It’s been a while now (exactly two years and one month), since I bought my last Synology NAS, both for homelab and personal/private usage. Why did I buy a new NAS? There are some requirements that my new NAS had to fulfill:
- Capable of 10 Gigabit Ethernet (integrated or with an addon card)
- Enough slots for disks (at least five)
- Two NVMe slots for using NVMe SSDs as read/write cache (integrated or with an addon card)
- Can be used for homelab storage, as well as backup storage for home computers, laptops, etc.
When looking for that one NAS that could handle all of the above, I stumbled across the Synology DS1621xs+. Synology launched it in September 2020, and I ordered it about two months later.
Some of the technical specifications of the NAS:
- It has 2 x M.2 2280 NVMe slots
- It comes with 8 GB DDR4 ECC SODIMM (expandable up to 32 GB, and yes I upgraded to 32 GB)
- It is equipped with an Intel Xeon D-1527 4-core 2.2 GHz CPU that has a Turbo Boost up to 2.7 GHz
- In terms of connectivity, there are two 1 GbE and one 10 GbE RJ-45 ports
- If you fancy, you could install some PICe card (the NAS has one 8-lane x8 slot), but I don’t know why or what
- And you can install up to six 3.5″ or 2.5″ drives
So that’s the basics covered. Let’s get back to the topic.
What was the problem?
To be honest, I never saw it as a problem, I somehow either accepted it or took it as a given. The network performance of that NAS. The first thing I did after installing and configuring the NAS was to set up the backup of my gaming PC. This PC had a 10 GbE network adapter in it, and I could make use of this network card with Veeam Agent for Microsoft Windows free. The backup performance was very nice!
But I had also a homelab. This homelab was also in need of good-performing storage (at least per my definition). And that’s exactly what this NAS was missing. With all the networks, VLANs, subnets, etc. it was easy to just mount a shared folder of this NAS as an NFS datastore to my vSphere environment. It just worked. But the performance could have been better. It wasn’t bad actually, I was able to saturate the (Gigabit) connection it “somehow” used, and I somehow never cared about.

But during the last few days (maybe also influenced a bit by my new job, because we’re operating very nice hardware here!) I wanted to get the full 10 Gigabit out of this NAS. Well, at least getting very close to it. So I dug deeper into it.
Some basic troubleshooting
First things first, some basic troubleshooting was required to drill to the root cause of this “problem”:
- I replaced some cables (not because they were broken or bad, but just for the sake of using known good cables)
- I adjusted parts of the cabling to make sure there is a 10 Gigabit connection between the NAS and the homelab (they are physically separated, and connected through various switches)
- That was for sure one part of the problem because one connection went over the “wrong” switch
- I made sure that I could reach one network from the other
But still, no luck… What could it be? After posting this problem on Twitter, some experts provided their insights and advice, and they put me on the right track.
There may be a bottleneck between my @Synology NAS and my @VMware #homelab. And maybe that bottleneck is called Gigabit. The Synology has a 10 Gig ethernet port, and the homelab switches have also 10 Gig ports. I'm unsure what I thought when I did the network cabling 🤦♂️ pic.twitter.com/NVwJM0j21G
— Karl Widmer (@widmerkarl) December 28, 2023
The advice that put me on the golden track was the one from Russel Hamker. He mentioned VLANs and paths.
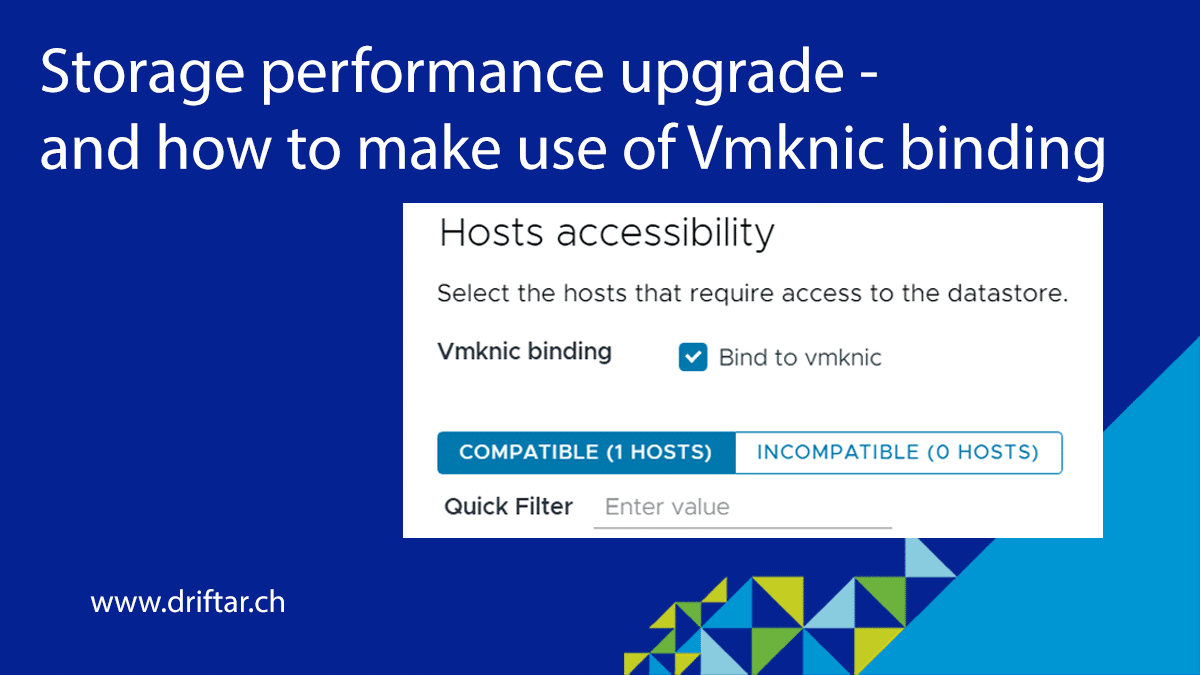
Now I have to go back a little to provide you with some context. I recently reinstalled my Supermicro hosts and was wondering if Synology now is supporting vSphere 8.x for VAAI or not. When I was searching for information, I found contradictory information. I also stumbled across a blog post by William Lam (click here for the article) where he was talking about the new NFS VMkernel binding feature that was introduced in vSphere 8.0 Update 1. More of this feature later in this blog post.
So back to the topic again!
We’re coming to the solution
Thanks to Russel’s advice to check the VLANs and paths, I was able to dig down to the root cause. Because my Synology NAS was in a different VLAN than my ESXi hosts, the traffic traveled through the firewall. That was one point. The second point was the physical network connection between the NAS and the homelab/ESXi hosts. I connected the home network infrastructure (where my NAS is connected) to the “wrong” homelab switch. Between the home network and the homelab was “only” a one Gigabit connection. That’s the second point.
Adjusting the network cabling was an easy task, it took me a few seconds to locate the port and cable and plug it into a different port. But still, no luck…
Let’s bring the NAS “closer” to the homelab
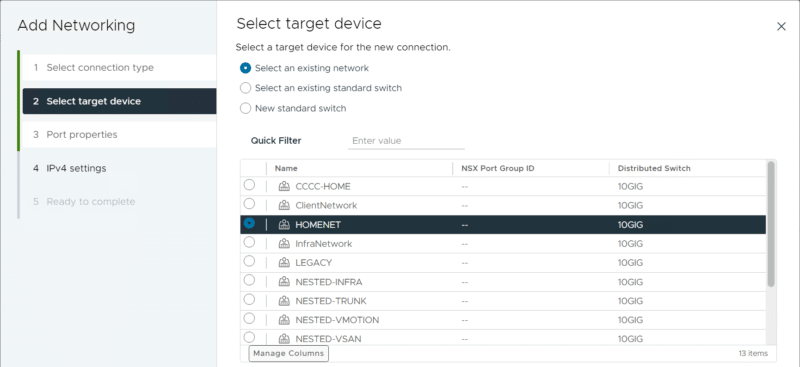
It all started with the creation of a new distributed port group in my homelab. The port group had to be configured with the correct VLAN:
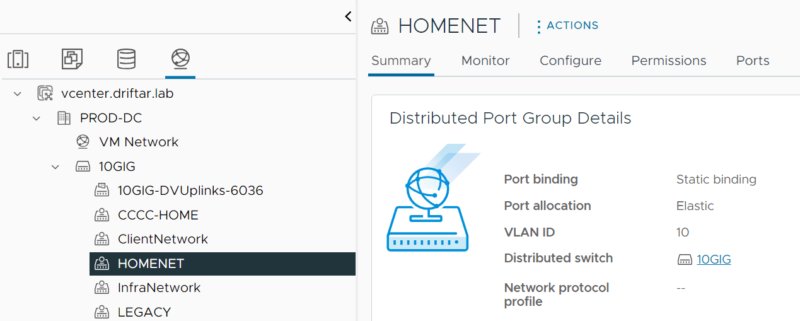
Ok, so that’s the “network cable” of my NAS virtually connected to my homelab already…
Next, I configured a new VMkernel adapter on every ESXi host. This VMK is then assigned to the above-created distributed port group:
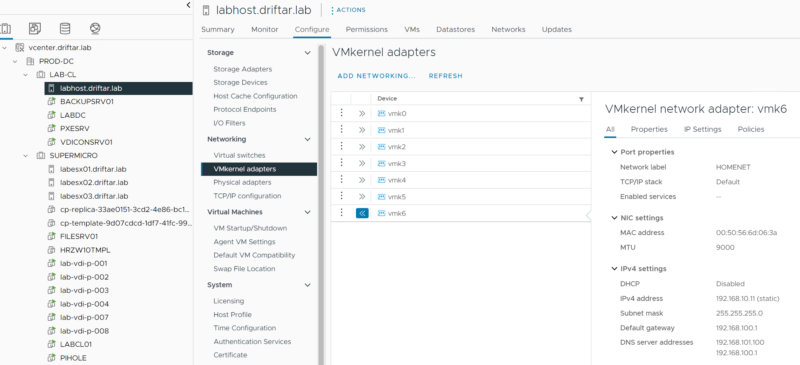
Ok, so that’s the “network cable” of my NAS virtually connected to my ESXi hosts then…
Let’s bring the NAS even closer…
At this point, I didn’t test if it was working or not. I didn’t mount the NFS datastore just yet, but I did some more configuration.
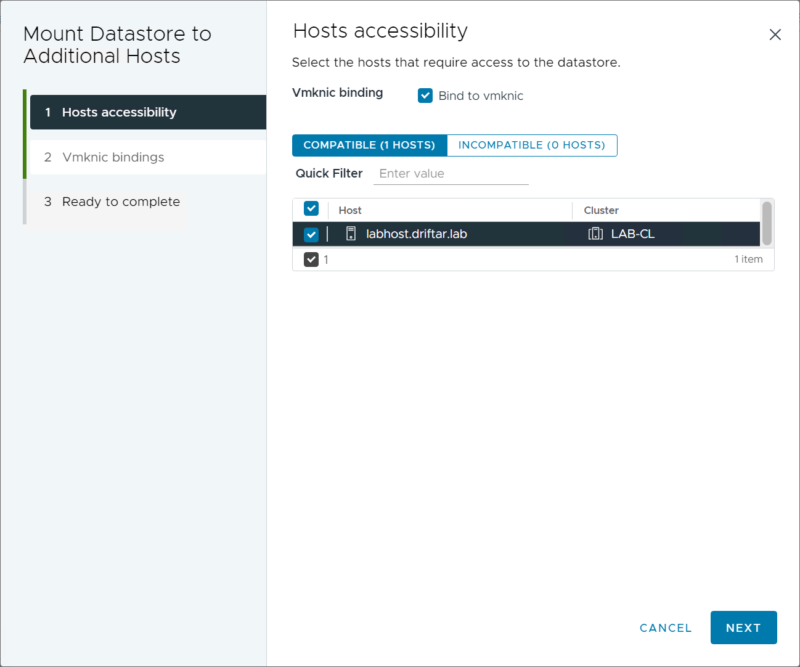
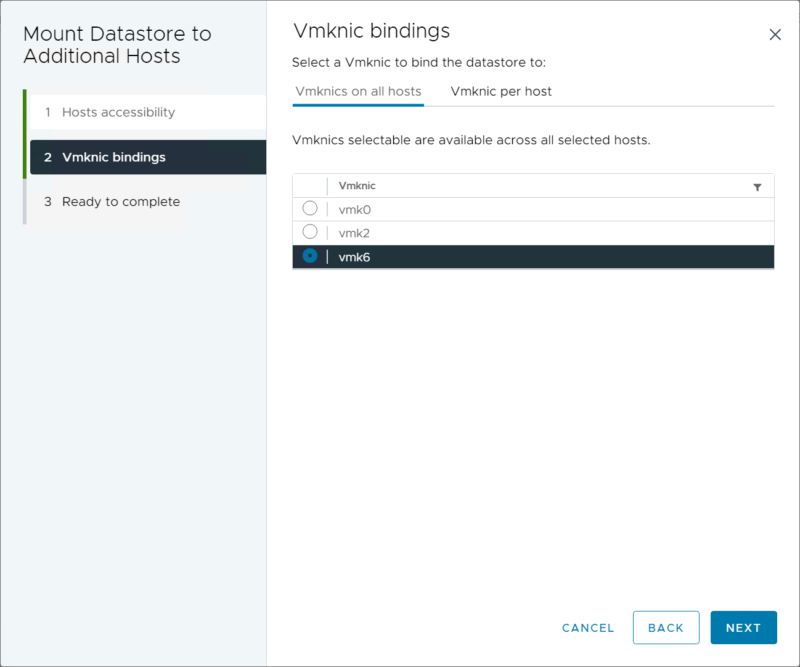
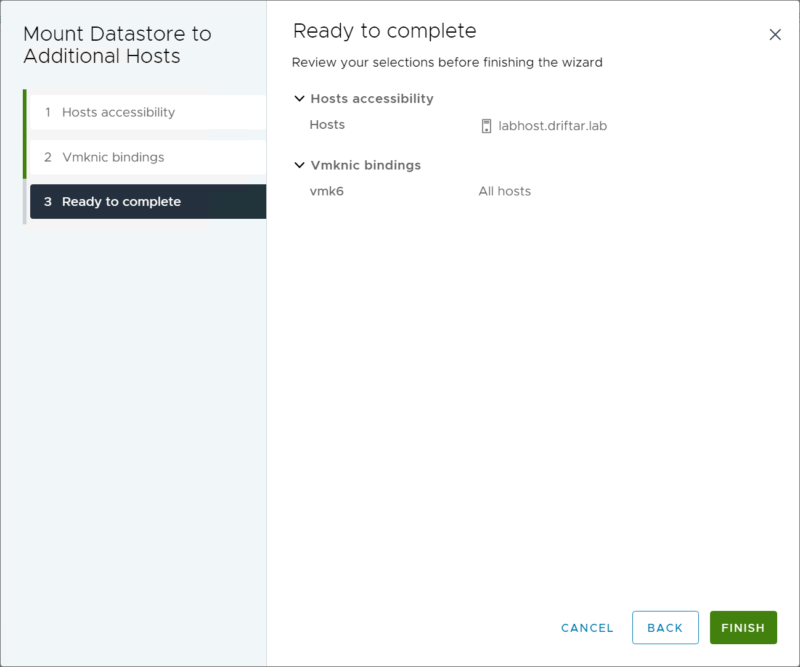
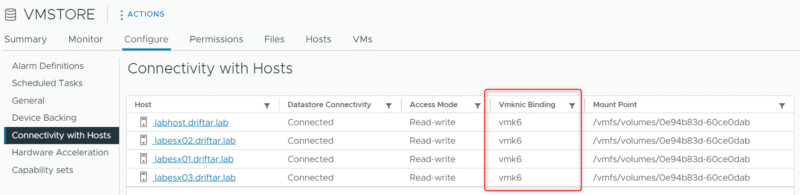
Remember the blog post by William Lam regarding the new NFS VMkernel binding feature? Well, I went this way. When I mounted the NFS datastore to my ESXi hosts, I enabled the Vmknic binding. I selected all of the hosts (the screenshot below has been created during documentation and not the actual troubleshooting). Then I selected the correct VMK (which was vmk6 on all my hosts) and connected the NFS datastore like this.
You can check if there is any Vmknic binding active/enabled when you check the actual datastore configuration:
Ok, close enough!
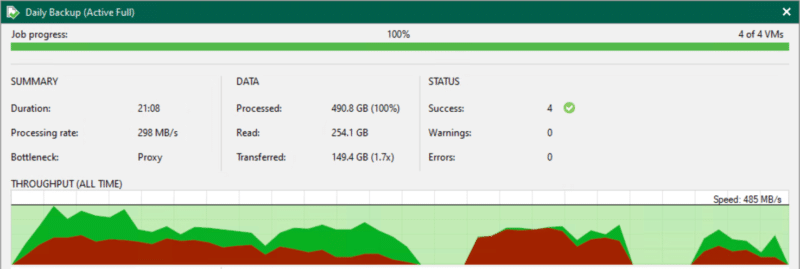
After going through the steps above (I think the Vmknic binding was totally optional, but to be honest, I didn’t test it), the numbers speak for themselves. The NAS can now deliver data to my homelab with 10 Gigabit (or at least close to it). This makes everything faster, like VM deployment, VM template update (I’m operating a content library), and even Veeam Backup and Replication received a nice boost with that new configuration!
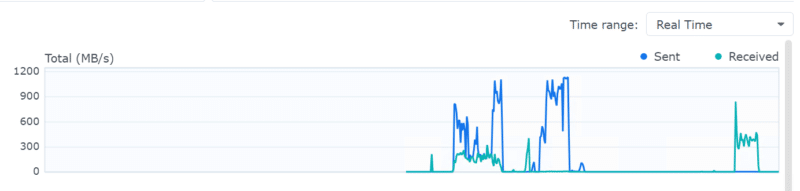
An active full backup of four VMs with a total of 254 GB of data, in about 21 minutes with an “all-time” throughput of 485 MB/s. Not too shabby!