NetApp – Change disk in a storage shelf (helpful tipps)

NetApp

This post is a special one. It’s my first post about a storage specific topic. But as many other post it is also the result of a solution for a specific problem i had recently at a customer.

I’m not very familiar with storage, especially with those from NetApp. I know what they have in their portfolio (at least some of it). But for example how to setup such storage devices correctly you’ll catch me on the wrong foot. But anyway. If it’s setup then there is mostly only the daily business which includes also troubleshooting from time to time. And i had recently a small troubleshooting issue. I received mails from a storage controller at a customer that there is something wrong with the filesystem because a disk is broken. Well, good to receive such mails in the middle of the night from Saturday to Sunday…

I had to call the NetApp support because i wasn’t sure if NetApp AutoSupport worked correctly. Before the phone call i tested it via the OnCommand System Manager, and AutoSupport worked fine. So then i called NetApp support to ask if there is already a support case for the affected system. But there wasn’t. About 5 minutes later i had a newly created support case, a support case number, and the confirmation that the replacement disk is processed to be shipped the same day.

The disk arrived the next and i had to replace it. But this time the NetApp FAS mocked me. It didn’t show which disk is defective and thus should be replaced. There should a LED light up in orange, but it didn’t.

Let me show you how i solved this LED specific problem, and how i did the whole replacement process. I know, the NetApp experts among us will probably cry. But i’m not the storage pro, i did it step by step with some help of my good old friend Google 😉

1) Check Auto-Assign

Auto-Assign is a good feature as i think. If you have unowned disks on a stack, loop, or shelf, you can configure Data ONTAP to automatically assign disk ownership at the stack or shelf level. So let’s check if it’s enabled or not.

  1. Open PuTTy (or an SSH client you like) and connect to the affected storage controller.
  2. Login as root.
  3. Enter “options disk” to check if Auto-Assign is ON or OFF.
  4. You should see something similar to this
  5. If Auto-Assign is OFF you can enable it with “options disk.auto_assign on“.
  6. If you like you can check if Auto-Assign now really is on if you enter “options disk” again.

2) Light up the LED of the broken disk

  1. I assume you’re still connected with your storage controller.
  2. In the next step we enable the diagnostics mode. We need that to activate the LED.
  3. Enter “priv set diag” to enable diagnostics mode.
  4. Now we need to find out which disk is defective. Enter “aggr status -f” to find out. You should see something similar to this:
  5. Now let’s light up the LED! Enter “led_on Disk_name” (=> “led_on 0a.00.23” in this example) to get the light on.
  6. Now you should see the orange LED light showing up. Now you know which disk is broken and want’s to be replaced.

3) Replace the broken disk and assign it as spare

  1. I assume you’re still connected with your storage controller. One last thing is to do.
  2. After you replaced your disk, check if the disk is recognized by the controller and probably owned on a stack, loop or shelf.
  3. Enter “disk show -n” to get the needed information.
  4. You should see something similar to this:
  5. DISK          OWNER           POOL    SERIAL NUMBER          HOME
    --------      -------------   -----   -------------          ------
    2c.01.13      Not Owned       NONE    3QQ2xxxxxxxxxxxxBQT4
  6. You now know that there is a disk waiting for duty.
  7. Enter “disk assign 2c.01.13” (where 2c.01.13 should be replaced with your current disk name) to assign it.
  8. In my specific case the disk was assigned as spare, because the spare was automatically set as an active disk to replace the broken one.

That’s it. Just some minutes and all was fine.

Veeam: NetApp Storage Snapshot

Always on, Zero Downtime, Availability, Backups, Snapshot… Heute muss alles zu jederzeit egal von wo aus immer verfügbar sein. Der Aussendienstmitarbeiter will seine Mails auf dem Laptop oder dem Smartphone jederzeit abrufen können. Zeigniederlassungen einer Firma müssen zu jederzeit auf den Terminalservern oder virtuellen Desktops arbeiten können. Der Webshop muss immer laufen damit die Kunden Waren bestellen können. Das sind hohe Anforderungen an die IT in der heutigen Zeit. Aber für alle von uns irgendwie selbstverständlich. Wir nutzen viele dieser Dienste ja selbst auch, und ärgern uns wenn etwas mal nicht funktioniert.

Das gleiche gilt für die Datensicherung. Früher ging es nicht anders, da hat die Datensicherung einfach mal eine Nacht lange, oder länger, gedauert bis alles aufs Band gesichert werden konnte. In der heutigen Zeit nahezu undenkbar. Daten ändern sich heute in kürzester Zeit wieder, vielfach bereits schon während der Sicherung, spätestens kurz darauf. Wie soll man da kurze RPO oder RTO einhalten?

In der heutigen Zeit, wo bereits ein sehr hoher Virtualisierungsgrad bei den meisten Firmen vorhanden ist, sollte das möglich sein. Zumindest wenn man mit einer Verfügbarkeitssoftware wie Veeam Backup & Replication resp. Veeam Availability Suite arbeitet. Ja ihr habt richtig gelesen. Verfügbarkeitssoftware steht da. Mit Veeam lässt sich viel mehr machen als bloss Daten zu sichern. Klar, das geht einfach, gut und schnell mit Veeam. Aber mit dieser Software lässt sich mehr machen. Kurze RPO oder RTO lassen sich realisieren, Veeam nennt das kombiniert RTPO. Einzelne Dateien, Ordner oder gar ganze virtuelle Maschinen lassen sich innerhalb von Minuten wiederherstellen. Innerhalb von kurzer Zeit einen kompletten Site Failover durchführen. Alles möglich mit Veeam.

Storage SnapShots

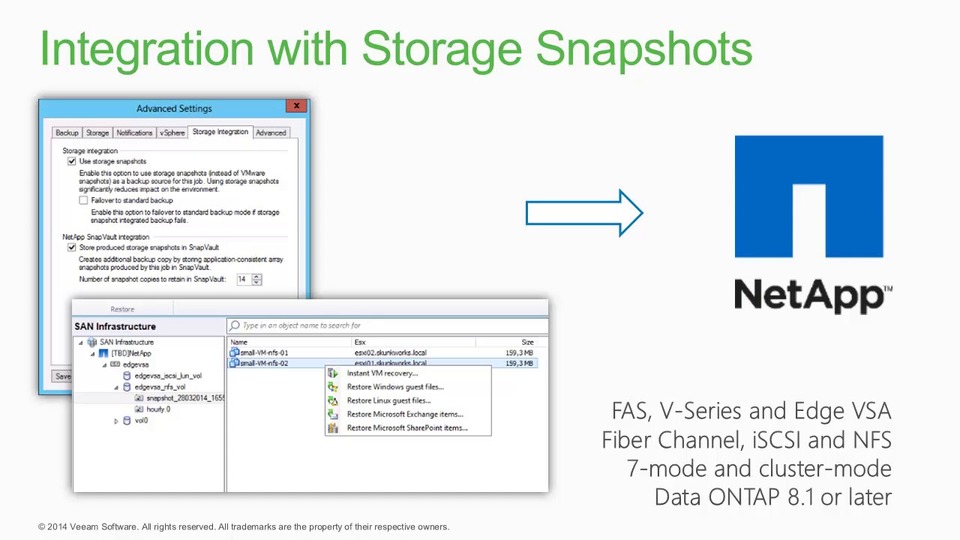
Heute möchte ich euch eine Funktion etwas näher bringen. Die Storage Spezialisten und NetApp Freunde kennen dies sicher schon länger. Storage Snapshots. Das ist etwas ähnliches wie ein Snapshot einer virtuellen Maschine zu erstellen. Jedoch nochmals eine Ebene tiefer direkt auf der Storage. Das ist einfach, schnell, und minimiert den Einfluss auf die laufenden virtuellen Maschinen um ein vielfaches. Der laufende Betrieb wird dadurch nicht gestört. Und wenn eine VM nicht mehr sauber läuft, oder Daten gelöscht wurden, kann dieser Storage Snapshot genutzt werden, um die Sache rasch und einfach zu beheben.

NetApp-logo-smallVeeam ist ein NetApp Alliance Partner und unterstützt eine breite Palette von Storage Systemen. Diese enge Zusammenarbeit zwischen Veeam und NetApp macht es möglich, das Maximum aus der bestehenden Virtualisierungsinfrastruktur herauszuholen. Ebenso kann ein Maximum an Verfügbarkeit, sowie schnelle Backups und schnelle Restores zu gewährleistet werden.

Wie nutze ich NetApp Storage SnapShot in Veeam

Wenn ihr schon mit Veeam arbeitet und einen Backup Job eingerichtet habt, geht ihr im Prinzip durch die gleichen Schritte durch. Nur das Repository, also das Ziel der Datensicherung, ändert sich. So einfach lässt sich das einrichten. Etwas mehr Details zeige ich euch anhand der nachfolgenden Screenshots.

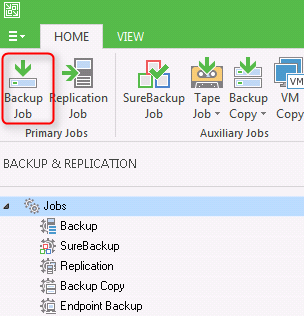
In der Veeam Console erstellt ihr einen neuen Backup Job:

Storage SnapShot

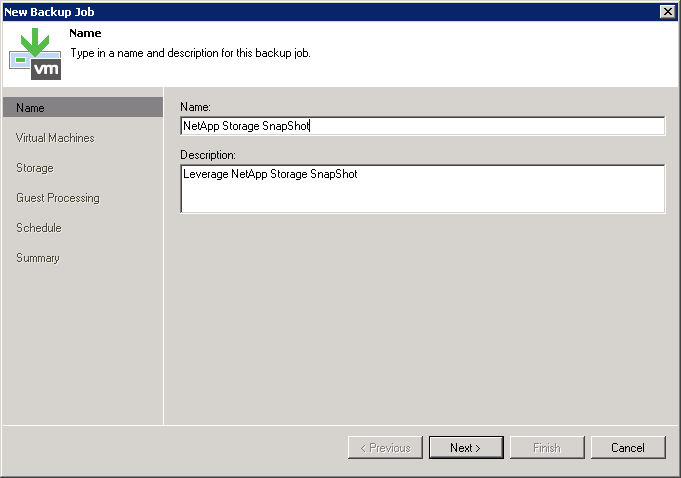
Ihr gebt dem Backup Job einen passenden Namen…

Storage SnapShot

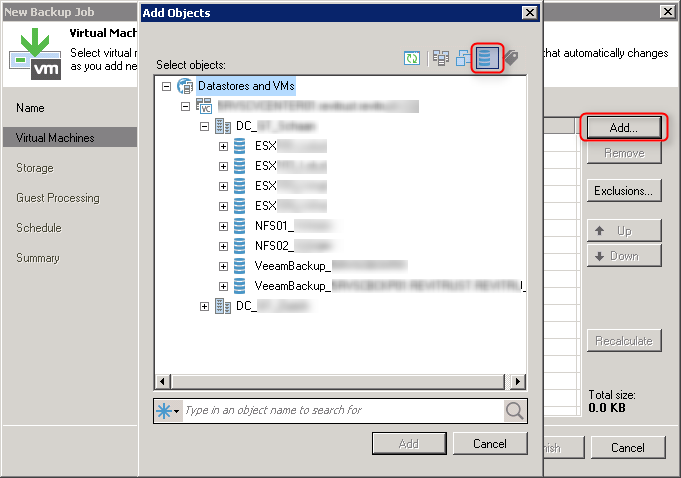
…und fügt die gewünschten VMs hinzu. Wählt hierbei aber die verfügbaren Speicher aus in der Anzeige, nicht die ESXi Hosts!

Storage SnapShot

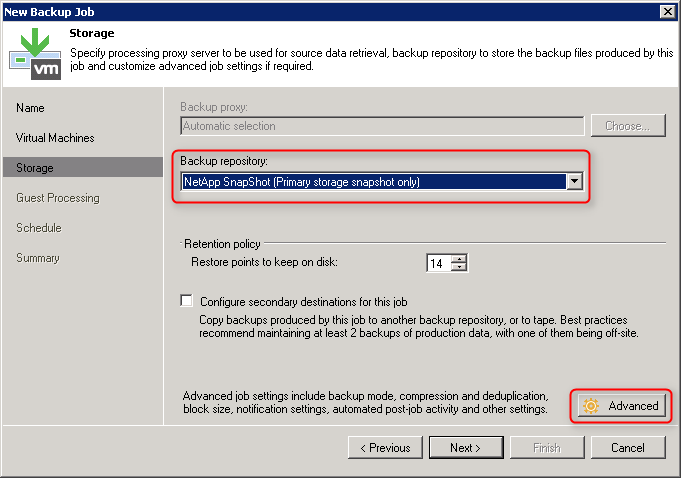
Als Backup Repository wählt ihr nun aus der Dropdownliste “NetApp SnapShot” aus.

Storage SnapShot

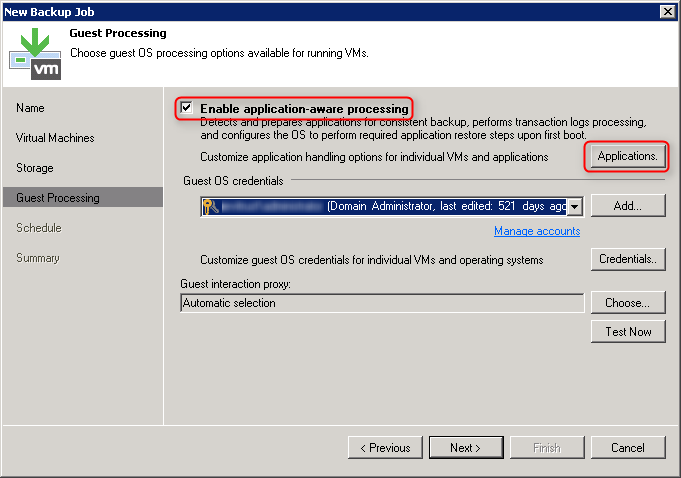
Die bekannten Funktionen zum “application-aware processing” können wie bei einem normalen Backup Job über “Advanced” gesetzt werden (VSS etc.). Vergesst die notwendigen Guest OS Credentials nicht.

Storage SnapShot

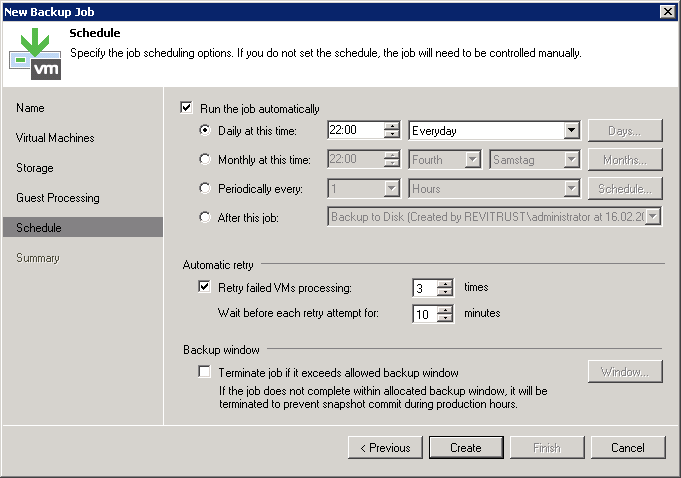
Erstellt einen Zeitplan für eure Storage Snapshots und schon seid ihr fertig.

Storage SnapShot

Weiterführende Informationen