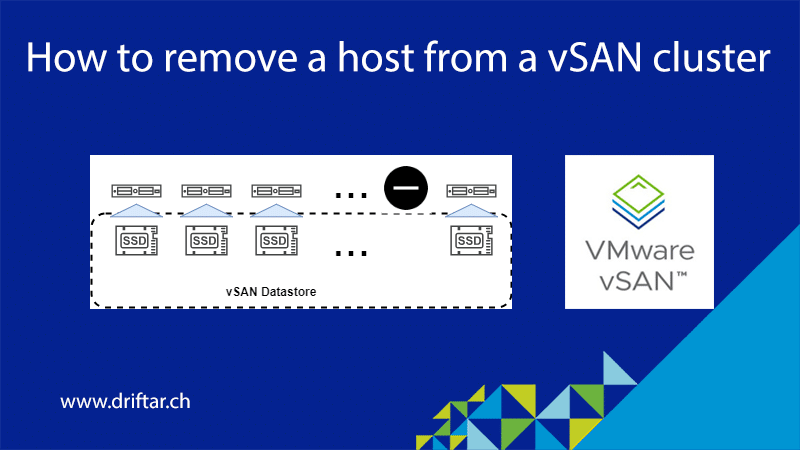
This blog post, I call blog posts like these “quick & dirty posts”, will show you today how to remove an ESXi host permanently from your vSAN cluster. Yes. Permanently. Forever.
Usually, you’re adding more capacity to a cluster, which means adding more hosts or disks to solve that problem. However, some legitimate reasons exist to remove an ESXi host from a vSAN cluster. Maybe you’re currently in the middle of a hardware renewal. The new hardware is already installed and running in production. And now, server by server, you’re removing the old hardware because you’re on track with the workload migration. The same counts for adding a cluster with nodes that have more “meat by the bone”, more compute power, and storage capacity. Nodes that are running more energy-efficient than the old ones. You see, only two reasons, but there might be many more.
But let’s dive into this topic now.
How to remove an ESXi host from a vSAN cluster?
We’re starting with making sure that the cluster and the disk groups have enough space to have one host removed. If the cluster is fine, let’s move on to remove the host.
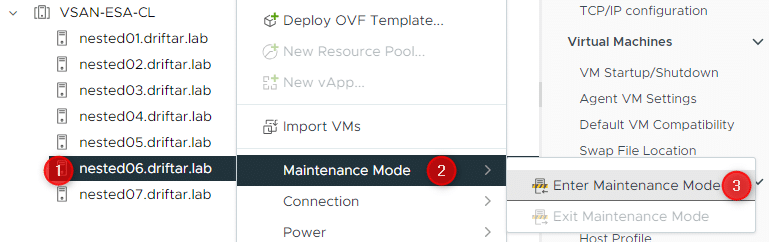
Place the host into maintenance mode
Right-click the host, choose “Maintenance Mode”, then “Enter Maintenance Mode”.
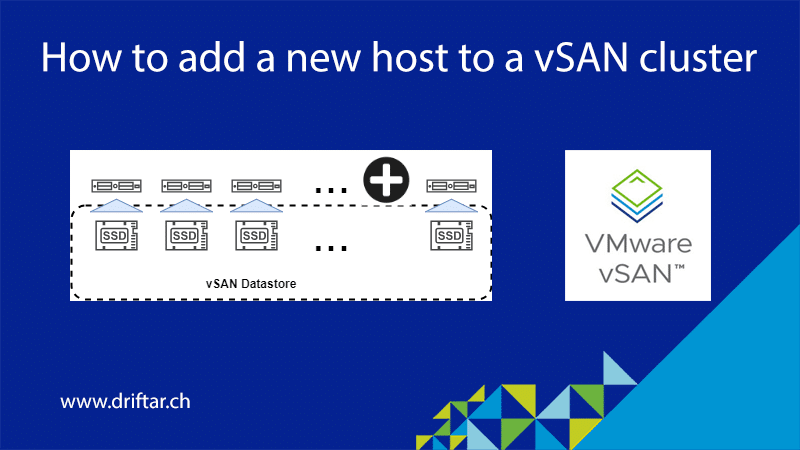
This blog post, I call blog posts like these “quick & dirty posts”, will show you today how to add an ESXi host to your vSAN cluster. You may need additional compute power, and/or storage capacity. Or you want to implement another storage policy to leverage storage efficiency and more failures to tolerate (RAID 5 / RAID 6 erasure coding). Maybe you want to create a stretched cluster, which needs an even number of vSAN nodes on each side plus a vSAN witness. So many reasons to add another vSAN node.
But let’s dive into this topic now.
How to add a new host to a vSAN cluster?
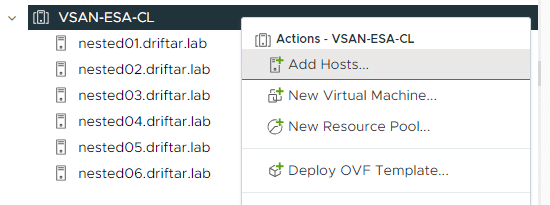
In my vSAN cluster, based on the Express Storage Architecture (ESA), I’ve got six hosts currently. I want to add another host to the cluster because of the computing and storage power. How to do this?
Right-click your cluster and choose “Add Hosts…”. So far, nothing special.
Just a few weeks ago, to my shame, I stumbled across an interesting feature in VMware vSphere when trying some things with vSAN. To be honest, and to make it clear before we dive into this topic in this blog post: I screwed up when I tested this feature the first time. Because I didn’t know about this feature and because I didn’t proceed as I should have, as per this feature. At the end I had to reinstall all my vSAN nodes and create a new clean environment after that I screwed up. It was somehow needed anyway because of the most recent homelab rebuild. So, somehow a win-win for me and the lab.
So don’t screw up! No, just kidding. you may know the feature better than me. And I can tell you, vSAN is stronger and more resilient than you may think.
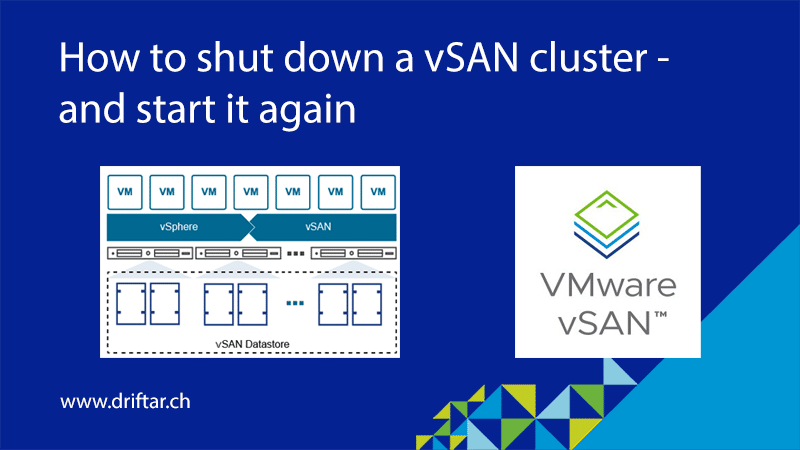
In this blog post, I’d like to show you how to shut down a vSAN cluster, and how to start it again. The feature is hidden in plain view, right-click the vSAN cluster and you’re good to go. Or not?
In this blog post, I’m assuming that the vCenter is NOT running on the vSAN cluster. I may update this blog post, or create another one, with vCenter running on the cluster. Without searching the internet and checking the VMware docs, I don’t know by heart if this is even possible. Anyway. So how do you shut down the vSAN cluster?
Some weeks and months ago the gathering started. I did some long research, read blog posts and found very much helpful stuff. As you can read on my homelab page here, my lab evolved. It all started with VMware Workstation, then I recycled my old gaming rig, I’ve added some real servers and storage, and now, today, I’m announcing the arrival of totally brand-new and shiny homelab hardware!
With this blog post, I’m starting a small series featuring my new homelab. In this very first post, you’ll get the BOM (Bill of Material), so you know exactly what happened. In the next posts, I’ll show you how I’ve set it all up and for what I’m using it.
Basic idea
Instead of having huge servers to heat the basement, I’ve planned to reduce my own data center footprint as much as possible. Ideally, everything related to my homelab should fit into a small 19-inch rack. A really small rack. This rack will be placed in my home office. Also, I want to run an all-flash VMware vSAN cluster with three nodes. I don’t want only two hosts and a witness appliance, even if it works and it is a fully supported concept for small- or branch offices. I want real beef. Each server should have one cache device and at least one SSD for the capacity tier. I went all-in and decided to go with two SSDs for capacity. All servers have to be connected with 10Gig SFP+ for vSAN and vMotion because I already own a 10Gig SFP+ switch (which wasn’t much used until yet). And all three servers should run as silent as possible. Sure, I’ve got headphones for gaming. But when the fans are constantly buzzing around and making noise, it’s not nice. And I’m
To conclude this:
Small data center footprint
Three node all-flash vSAN cluster
10Gig SFP+ connectivity
Small form factor 19-inch rack
Silent operations because of home office placement
That’s pretty much it.
For what I’m going to use it?
First, I love hardware! But I’m not buying hardware just for the sake of buying it. I learn new stuff because I didn’t have much to do with Supermicro except reading about it. I’ll install all the vSphere stuff I currently have running, and maybe something more. All that for learning how things work and for my exam preparations. Yes, I don’t have a VCP yet. I tried it several times but failed miserably. But not the next time, for sure! Maybe I’m gonna put also some “production” stuff onto it, like my Pi-Hole (reverse DNS add filter) or my Ubiquiti controller. We will see.
When I’m doing blog posts based on my home lab, like the following article about a failed vSAN cache disk, then I’m really talking about a home lab. Most of the hard- and software configuration in a home lab isn’t supported, neither from VMware nor from any hardware vendor. There might be parts in my lab, for example, the base servers (DELL PowerEdge) or the Smart Array controllers (HPE), which are listed on the VMware HCL. But for example not my SSD (Samsung and Crucial), or probably any combination of controller and SSDs and/or base server. There are so many people out there in the IT, having homelabs and trying out new hard- and software, testing things and learning. If we build such labs then with the only reason to learn and understand how a certain technology works. Not to do fingerpointing to any vendor. If we blow up our labs, then it’s mostly our own fault, like having cheap disks (my bad because I can’t afford shiny Optane nor datacenter disks) or we’ve screwed the configuration of something. I will never, and I repeat, I will never blame any vendor if my lab blows up because of my fault.
Foreword
Recently I rebuilt my VMware home lab from scratch and with the most recent vSphere version available at this point. I planned to rebuild my lab a long time ago but because of my job and other things I really hadn’t the time to do that. But recently I had to rebuild my lab because I screwed up my vCenter. Yes, I screwed it. So what did that mean? Reinstall all and everything completely from scratch. All my physical ESXi hosts, domain controller, vCenter, Jumphost, and backup server. All these services are running on a standalone ESXi server with some local disks. This server is called my home base. I’ve got some more servers which are running my VMware vSAN environment. I reinstalled these too and reconfigured everything that was needed, like networking and storage.
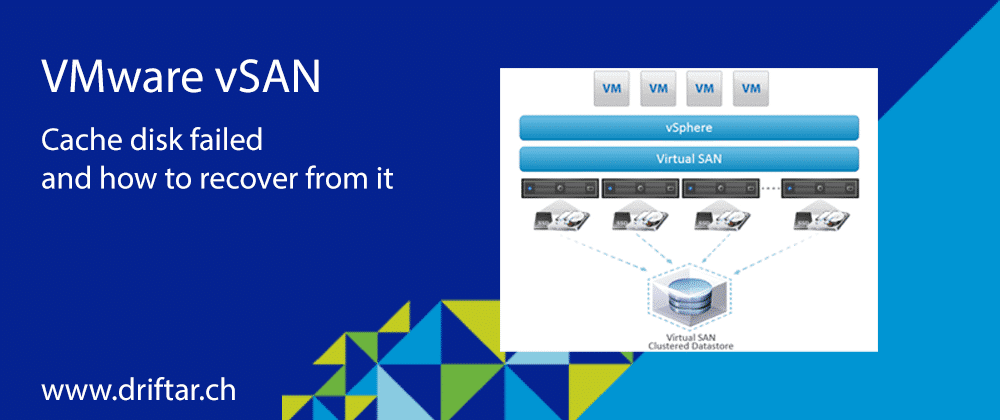
This week one of my vSAN cluster nodes went into degraded mode because of one of the cache disks failed. I thought, easy, just replacing the cache disk and that’s it. But no, the struggle became real…
What happened?
I’ve got three DELL servers for my vSAN cluster. All servers are equipped with one SSD as cache tier and three SSDs for the capacity tier. Now one cache disk failed because of reasons (I really don’t know why). That was causing vSAN to go into degraded mode as “failures to tolerate” was set to 1. So one failure (the failed cache disk) was compensated. Just for your information in case you didn’t know. If a cache disk of one disk group fails, the whole disk group will become unavailable. In my case, that meant that one-third of the whole vSAN capacity was gone.
What did I to resolve this?
My first idea was to replace the failed cache disk as I’ve got some identical disks as spare drives available. Well, not directly as spare drives, but installed and configured as RAID 5 in my home base ESXi host. So I did a Storage vMotion on all my home base VMs mentioned above to another local RAID 5 datastore, deleted the SSD RAID datastore and removed the disks. The physical replacement of this disks was easy. But telling my degraded vSAN node to accept this disk was a different topic.
Checking the disks
After I installed the “new” disk into the vSAN node I did a rescan on all storage adapters. And there was nothing. Only the already existing capacity disks but no cache disk. So I tried the second and the third identical disk with the same result. Only the capacity disks were visible in vCenter on the host but not the cache disk. What’s wrong here? I knew that the ESXi server only shows empty disks without any volumes, file systems or data on it. But how should I wipe this disk when not even with esxcli the disk is not visible?
As I’m using HPE Smart HBA H240 as my storage controller in the DELL server, I already installed the HPE smart storage administrator CLI tool on all the vSAN nodes. So I was able to look into the storage controller to see what’s happening there (or probably not).
The following command showed me that all disks are here and are fine:
./ssacli ctrl slot=2 pd all show status
But I was still struggling. Why is vCenter still showing only the capacity disks?
Clearing the disk(s)
An article by Cormac Hogan showed me how to reclaim disks for other uses. So i deleted all the partitions on the existing capacity disks, hoping that then the cache disk will also come back online. I read on another blog that wiping all vSAN disks can bring back non-detected disks. But that didn’t help.
First I removed the vSAN node from the vSAN cluster:
esxcli vsan cluster leave
Next I checked with partedUtil how many and what kind of partitions are on the disks:
partedUtil get /vmfs/devices/disks/mpx.vmhba1:C2:T2:L0
Each capacity disks showed two partitions, so I wiped them all:
A look into the HPE smart storage administrator CLI tool again showed me that still all physical disks are here. A rescan on all HBA in vCenter on this particular host didn’t help, only the capacity disks were shown.
I looked a little deeper into the storage controller with the command:
./ssacli ctrl slot=2 pd all show detail
That showed something not completely unexpected:
physicaldrive 2I:0:1

Masked from HBA: The drive contains controller configuration data and has been disabled
in order to protect the configuration data. Please run the "modify clearconfigdata"
command on the drive to re-enable it.
This physical drive above was the cache disk I was missing in vCenter. OK, so let’s clear the “configdata” and let’s see what happens then:
I checked again with “all show detail” and this “modify clearconfigdata” was gone.
Now I was able to rescan all storage adapters in vCenter on this host and that brought back my missed cache disk:
But that was to easy…
After having my cache disk back I went into vSAN configuration in vCenter and claimed the disks. The small one for the cache tier, the bigger ones for the capacity tier. And boom! This particular disk group went into another network partition group. Well done, thank you for nothing!
When you search around the internet for vSAN network partition you will find many forum and blog posts mentioning that this happens if something with the network configuration wasn’t as good as it should be. In my case I checked everything and I changed nothing on the network. So this partitioning issue had another reason. But to be honest I didn’t try to solve that. I wasn’t in the mood for that. I only wanted to bring back my vSAN into a good and healthy state.
I removed this vSAN node from the cluster by just draggin and dropping it out of the cluster. Then I tried to remove it from the inventory. And another boom!
The resource 'eagle.lan.driftar.ch' is in use.
That was the error message in vCenter when I tried to remove the host from inventory. But why? The host is in maintenance mode! Dang it! Let me remove it!
After doing some research on the interwebs I checked also the tasks in vCenter if there is a bit more of information. And I’ve found something:
Cannot remove the host eagle.lan.driftar.ch because it's part of VDS vMotion-DSwitch vSAN-DSwitch.
Well, that’s true. And that was also the obvious reason why I can’t remove the host from inventory. So I had to reconfigure the host networking, putting back the VMKernel ports for vMotion and vSAN to their origin local virtual switches. After that I was finally able to remove the host from the inventory.
Now rebuilding vSAN…
The next steps were easy. I added the host back to the vSAN cluster and configured the VDS for vMotion and vSAN as they were before. Then I went into vSAN configuration and checked the disk group. Lucky me the disk group configured before was still there and healthy, and vSAN claimed it automatically. And no network partitioning this time! All hosts and disk groups in the same network partition group!
After retesting the health onf the vSAN cluster it showed that there is one component in need of a resync. One of my templates was partially on this disk group before failing and is now waiting until the resync completed.
But at least vSAN is working fine again!
Closing words
In the most cases, or probably in all cases, replacing a disk in vSAN should be easy. Usually you will replace a used disk against a new and empty disk other than me. But that doesn’t mean you can’t unless you know what to do. I’m glad if this blog post helped you solving the issue.
If you follow the steps described in the VMware Knowledge Base then you should be fine: