Changing FRU information on Supermicro servers

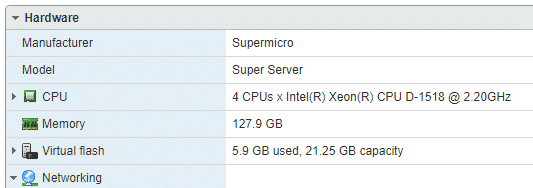
This blog post is not just for fun but because of a reason. I reinstalled my three Supermicro homelab servers with vSphere 7, and during setup, I noticed that ESXi shows incorrect values for the server model. What could cause this?

No, it shouldn’t be a “Super Server”, even if Supermicro servers are super for homelabs. But it should be an “SYS-300-8D” as this is the model I bought.

So how can I fix this? The short answer is: there is no fix until today, unfortunately. I tried it and asked also some fellow VMware friends, but still no success. It seems that this might a bug or something. I don’t know what values are read from ESXi to display that. And even after I changed the FRU values with the IPMICFG tool, reboot, and reinstalled the ESXi, the values were still displayed wrong. But at least I learned some new things during that troubleshooting. And I wanted to put the lessons learned into a blog post. Just in case you have similar issues, or you want to do the same things.

Read more

My homelab hardware gets its own rack

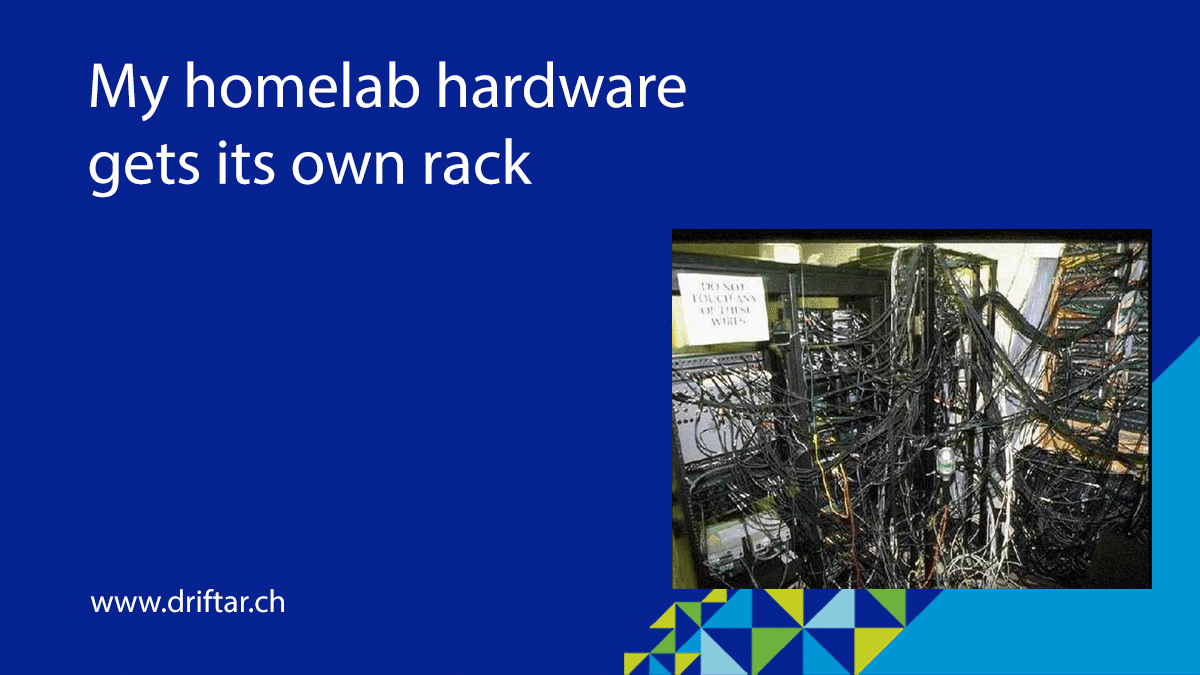
This project started a long time ago. When I planned the hardware needs for my homelab, I also thought of getting a rack. I had a real IT rack in mind, as you know it from your daily business, maybe back in the days when at least some stuff was on-premises and not everything in the cloud. I wanted to get a small rack with enough space to mount my whole homelab hardware into it, to have a proper cabling solution, and to have flexibility in case my homelab gets an extension.

But that wasn’t easy. There are various flavors of racks. The normal 42 unit IT rack, half-hight racks, and also various wall-mountable racks for patch panels, switches, and smaller devices. I was thinking and tinkering, looking for specs. But in the end, nothing satisfied me. Well, at least not from a price perspective, of being not able to transport it. And then, there was something going on on Twitter:

https://twitter.com/widmerkarl/status/1175392396974145542

Thanks to my colleague Michael Schroeder I’ve found something. He mentioned his IKEA rack, and that made me curious. Earlier in June, my colleague Fred Hofer announced that he moved his hardware into a bigger rack and that it was easier as when he moved from an IKEA Lack rack to the small rack:

https://twitter.com/Fred_vBrain/status/1267580223727550470

And that was the trigger! Why not building my own rack and tailor it to my needs? I don’t have to spend much money on a real IT rack, and I can do something handcrafted. The rack didn’t have to be anything special, there was not much in my personal specification book.

That’s the specifications planned:

  • Small (not full 42 rack units)
  • It should be lightweight
  • Enough space for at least three servers, some switches, and a NAS (or two)
  • Enough space for future homelab upgrades
  • Extensible, if needed
  • Should withstand some weight
  • Wheels!

The idea of building my own IKEA Lack Rack was born.

This whole homelab IKEA Lack Rack story will be covered in a small blog series. This blog post will start the series with some planning stuff, the first pictures, and the BOM, as far as I can provide it already. At least the BOM will be updated if there is a reason for it.

Read more

New homelab hardware arrived!

Some weeks and months ago the gathering started. I did some long research, read blog posts and found very much helpful stuff. As you can read on my homelab page here, my lab evolved. It all started with VMware Workstation, then I recycled my old gaming rig, I’ve added some real servers and storage, and now, today, I’m announcing the arrival of totally brand-new and shiny homelab hardware!

With this blog post, I’m starting a small series featuring my new homelab. In this very first post, you’ll get the BOM (Bill of Material), so you know exactly what happened. In the next posts, I’ll show you how I’ve set it all up and for what I’m using it.

Basic idea

Instead of having huge servers to heat the basement, I’ve planned to reduce my own data center footprint as much as possible. Ideally, everything related to my homelab should fit into a small 19-inch rack. A really small rack. This rack will be placed in my home office. Also, I want to run an all-flash VMware vSAN cluster with three nodes. I don’t want only two hosts and a witness appliance, even if it works and it is a fully supported concept for small- or branch offices. I want real beef. Each server should have one cache device and at least one SSD for the capacity tier. I went all-in and decided to go with two SSDs for capacity. All servers have to be connected with 10Gig SFP+ for vSAN and vMotion because I already own a 10Gig SFP+ switch (which wasn’t much used until yet). And all three servers should run as silent as possible. Sure, I’ve got headphones for gaming. But when the fans are constantly buzzing around and making noise, it’s not nice. And I’m

To conclude this:

  • Small data center footprint
  • Three node all-flash vSAN cluster
  • 10Gig SFP+ connectivity
  • Small form factor 19-inch rack
  • Silent operations because of home office placement

That’s pretty much it.

For what I’m going to use it?

First, I love hardware! But I’m not buying hardware just for the sake of buying it. I learn new stuff because I didn’t have much to do with Supermicro except reading about it. I’ll install all the vSphere stuff I currently have running, and maybe something more. All that for learning how things work and for my exam preparations. Yes, I don’t have a VCP yet. I tried it several times but failed miserably. But not the next time, for sure! Maybe I’m gonna put also some “production” stuff onto it, like my Pi-Hole (reverse DNS add filter) or my Ubiquiti controller. We will see.

Read more

VMware – Homelab storage extension installed

storage

Recently i ordered the last piece of hardware for 2016 for use in my VMware vSphere homelab. I failled in the fourth VCP exam in December 2016 and that gave me the kick to extend my homelab a little, and look into storage stuff in detail.

Thoughts and requirements

I had some ideas in mind and received good inputs from my fellow homelab colleagues, but there are so much possibilities for extending storage. There are various NAS manufacturers and storage vendors. You can “extend” your storage even virtually with some virtual storage appliances. But i have to keep my budget small, well as small as possible for my needs. I don’t have a sponsor (would be nice indeed). So for the extension of my homelab any storage device other than a NAS costs way too much money. And i want to use real physical existent storage, so also a no-go for virtual storage appliances (which also requires some physical storage in the back end). This made the field of choice at least a little smaller, not much, and i’m still kicking out some devices to find the one which suits my needs the best.

Another point is network connectivity. My decision was to have four network ports on this specific NAS device. It should support link aggregation, load balancing and failover. The NAS device should also support NFS and iSCSI protocols so i can reach it from my ESXi hosts and use it. It would be the best for the integration into my homelab when i’m already familiar with a specific kind of device / operating system / manufacturer. Yes, i know, that’s not a real decision maker, at least not the best. But why struggle if there exist easy to setup systems? And last but not least it should be supported within VMware, for example with VAAI.

With all this points from above i decided to go for a Synology NAS device.

The hardware

The base system is a Synology DS1515+ NAS device. The technical specifications:

CPU Model Intel Atom C2538
CPU Architecture 64-bit
CPU Frequency Quad Core 2.4 GHz
System Memory 2 GB DDR3
Memory Expandable up to 6 GB (2 GB + 4 GB)
Drive Bay(s) 5
Hot Swappable Drive YES
RJ-45 1GbE LAN Port 4
VMware vSphere 5 with VAAI YES
VMware vSphere 6 with VAAI YES

Details specifications are available here: Synology DS1515+

Disks (capazity / cache)

I ordered also three WD Red SATA disk with 4TB each and two Sandisk X400 SSDs with 512GB each. In this configuration i’ll get enough raw storage space (roughly 8TB usable capazity). With two SSD in a Synology multi-bay NAS i can also configure read-write cache (you’ll get read cache only with one SSD).

So let’s get our hands on the hardware…

Read more

VMware Homelab – Hardware für den Homeserver

Die letzten Wochen über habe ich immer wieder häppchenweise Hardware für mein Homelab resp. den Homeserver bestellt. Ich konnte und wollte nicht alles auf einmal bestellen da ich zum einen, wie in einem vorherigen Post bereits angemerkt, kein unbegrenztes Budget habe, und im Moment auch nicht viel Zeit um die Hardware zusammenzubauen. Zudem will ich alles miteinander verbauen, und nicht jetzt mal etwas und in drei Wochen wieder etwas. Das macht mehr Spass 🙂

Nun ist die Hardware endlich komplett und der Zusammenbau kann beginnen. Als Homeserver habe ich meine ehemalige Game-Workstation wieder in Betrieb genommen. Diese bildet eine recht gute und solide Basis, wie ich finde, vor allem aber bietet sie ausreichend Platz für Hardware und Erweiterungen. Ein Intel Prozessor und ein ASUS Rampage Mainboard bilden das Fundament. Dazu gesellen sich insgesamt 64 GB Ram, ein LSI SAS-Controller, einige SSDs sowie ICY-Docks mit Hotplug-Einschüben.

Das ist die Hardwareliste für den Homeserver

CPU: Intel Core i7-3930K 3,2 GHz (Sandy Bridge E)
Mainboard: ASUS Rampage IV Extreme, Intel X79, Sockel 2011
Ram: Kingston Value RAM (2x, 8GB, DDR3-1600, DIMM 240)
SAS-Controller: LSI SAS 9211-8i HBAi (single)
SAS-Kabel: 3ware CBL-SFF8087OCF-10M, SFF-8087 zu 4 x SATA, 1m
VSAN Cache SSD: Crucial BX200 (240GB, 2.5″)
VSAN Capazity SSD: Samsung 850 EVO Basic (500GB, 2.5″)
Hotplug-Bay für die Disks: ICY DOCK MB996SP-6SB 6-Bay 2.5″ Backplane
Case:

Phanteks Enthoo Primo, schwarz (Big Tower, Schwarz)

Und so sieht das ganze aus

Geplanter Ausbau des Homelab

Auf dem Homeserver wird auf einer eigenen SSD ein ESXi installiert. Auf diesem ESXi wiederum werden drei weitere ESXi als virtuelle Maschinen laufen (nested ESXi). Jeder dieser VM sollen eigene physische Disks zur Verfügung stehen. Das Ziel dieses Homelabs ist eine nested ESXi Umgebung für den Betrieb mit VMware Virtual SAN. Auf den virtuellen ESXi werden schlussendlich einige weitere VMs laufen, um Dinge wie HA, DRS, FT etc. zu testen. Auch werde ich meine liebste Backup Software für die Datensicherung einsetzen. Alles in allem ein kleiner feiner Server. Leider lässt das Board nicht mehr als 64 GB Ram zu. Aber für den Anfang ist das für mich absolut ausreichend.

Vielleicht werde ich auch mal in Intel NUCs investieren und das Homelab weiter ausbauen. Drei Stück, mit all-Flash Konfiguration und 32 GB Ram sind die Basis für ein Homelab mit VSAN. Die bekommt man schon für wenig Geld. Müssen ja keine Hochleistungsrechner sein…