Windows Activation on AWS fails

Sometimes it may happen that a Windows Server fails with the Windows activation when this virtual machine runs on AWS. I’ve stumbled across this issue from time to time, and with some research and trial & error, I was able to fix it. I haven’t been able to figure out what is causing this problem yet. But at least there is a solution that works. The solution is to activate Windows manually, and maybe “force it to its luck”. The following steps should help you to solve such a Windows activation issue.

Activate Windows manually

NOTICE: This guide is for Windows Server 2016 and later.

Reset Windows Activation

  1. Start the Windows Registry Editor as administrator (right-click → run as administrator)
  2. Navigate to the following location:
    Computer\HKEY_LOCAL_MACHINE\SOFTWARE\Microsoft\Windows NT\CurrentVersion\SoftwareProtectionPlatform
  3. Go to the right panel and right-click on SkipRearm
  4. Select the Modify option and a dialogue box Edit DWORD 32-bit folder should appear
  5. Here set the Value Data to 1 and click the Ok option
  6. Restart the server now
    It is important to restart the server at this step. Otherwise, the next steps will not work.

Reset Windows Activation timers

  1. Now go to the Start menu, and search for Powershell
  2. Select the run as an Administrator option
  3. Type the following command and press Enter:
    slmgr.vbs /rearm
  4. Restart the server now
    It is important to restart the server at this step. Otherwise, the next steps will not work.

Finally activate Windows

  1. Now go to the Start menu, and search for Powershell
  2. Select the run as an Administrator option
  3. Run the following commands:
    1. Press enter after each command
      Import-Module "C:\ProgramData\Amazon\EC2-Windows\Launch\Module\Ec2Launch.psd1"
      
      Add-Routes
      
      Set-ActivationSettings
      
      slmgr /ato
  4. It might be needed to add a Generic Volume License Keys (GVLK) here. To get the key for the correct operating system, you may visit this Microsoft article.
  5. Enter the following command and press Enter
    slmgr.vbs /ipk N69G4-B89J2-4G8F4-WWYCC-J464C
  6. Set the KMS server to the AWS KMS server with the following command:
    slmgr.vbs /skms 169.254.169.250:1688
  7. Run the next command to activate Windows:
    slmgr /ato

Information sources

The following guides and articles have been used to write this troubleshooting guide.

How to reset the ESXi root password?

When I check my blog, I can see the last post from February 2022. That’s a long time ago already! Time to write something, isn’t it?

Back in the days when I was working as a Systems Engineer for an IT service provider, it was much easier to write blog posts. Now as a “customer” I don’t find the time or the ideas, or maybe I’m forgetting blog post ideas, not sure why. At least that’s my thought. I’m always struggling if I should blog about this or that, is it worth writing about it, or are there gazillions of blog posts writing about the exact same thing?

Today’s blog post is exactly such a topic, I assume, that has been written about already some times, at least. But it was a problem we had during an ongoing vSphere upgrade project just recently. And I was able to help our operations team to move on with their work. So why not write a blog post about it?

What happened?

As mentioned, we’re currently working on a global vSphere upgrade project. We’ve got many ESXi hosts and clusters all around the world. So far nothing special. And even when there are easy-to-understand guides available internally (I wrote these myself and triple verified), maybe one or the other point on a checklist is forgotten, or you just didn’t think of it in the heat of the moment. One point is “Check the current credentials if they are working”. Thanks to the following troubleshooting guidance, there was no show stopper and only a few minutes of delay for the upgrade of one ESXi host.

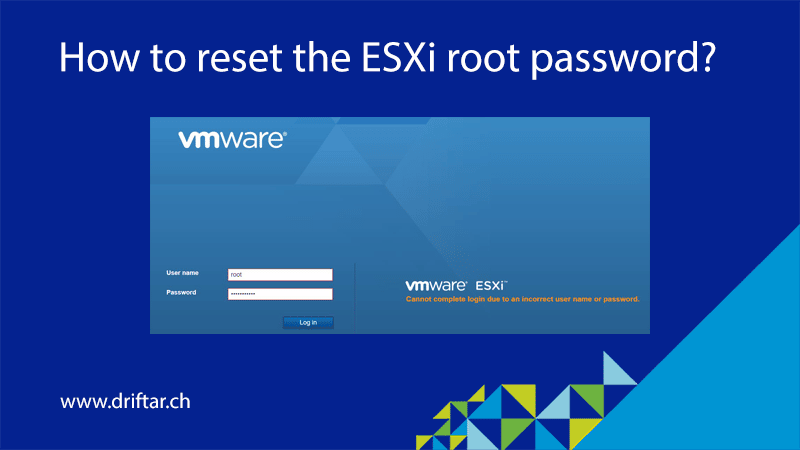
The root password for one of the ESXi hosts didn’t work. No chance to log in through the Web UI nor SSH. So what to do then?

There are only two officially supported ways to reset the root password of an ESXi host. You can reinstall the host from scratch or use host profiles. Well, reinstallation would be an option as we’re upgrading vSphere anyways. But this would require some additional time because of the ESXi configuration. Using a host profile can be done, but needs an Enterprise Plus license.

Because we have some spare licenses left for Enterprise Plus (not yet needed for hosts, but already planned to use), we decided to go the way with the host profile. And it wasn’t rocket science!

How can you do it?

The actual troubleshooting chapter is divided into two parts. The first part is changing the current license of an ESXi host, the second part is all about the host profile.

If you don’t have an Enterprise Plus license, then you have to plan reinstalling the ESXi server from scratch.

Change the host license

  1. Log in to the vCenter WebClient (https://yourvcenter.domain.com/ui)
  2. In vCenter, go to Home and then choose Administration and then Licenses
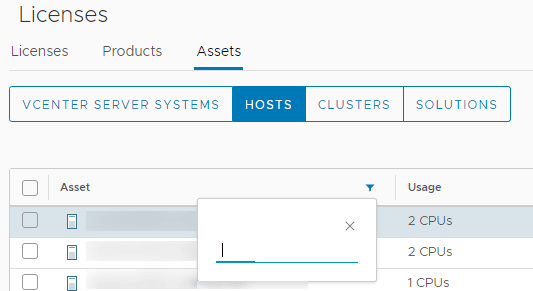
  3. Click the Assets tab and then the HOSTS button
  4. In the Asset column, you can click the filter icon and search for the ESXi host where you want to assign a different license
  5. Select the host, then click Assign License just above the list
  6. Choose the Enterprise Plus license, and click OK
  7. The host will now have an Enterprise Plus license, and you can continue with the steps below.

Remember to switch back the license to the one that was assigned to the ESXi host before.

Extract, change, and apply the host profile

  1. Log in to the vCenter WebClient (https://yourvcenter.domain.com/ui)
  2. In vCenter, go to Home and then choose Policies and Profiles, and click Host Profiles
  3. Click → Extract Host Profile
  4. In the Extract Host Profile menu wizard → Select the host you want to update the password for, then click Next
  5. Name the Host Profile and click Next and then Finish to complete the capture of the host profile template
    • The new host profile should appear on the Host Profile Objects Field
  6. Right Click the new Host Profile and choose → Edit Host Profile
  7. In the Edit Host Profile wizard, uncheck all boxes
  8. Then using the search filter search for → root
  9. Highlight and then select the check box for → User Configuration / root
    • Make sure to only select this item when searching for root
  10. A configurable window will display the root user configuration
  11. At the Password subsection, choose → Fixed password configuration
  12. Here you have to fill in the new password and confirm it before proceeding
  13. Double-check that all other non-applicable boxes have no check marks and proceed to Finish
  14. Once the task completes, right-click the new host profile and choose → Attach/Detach Hosts and Clusters → then select the host in the wizard
  15. Right-click the host profile again, and select Remediate
  16. Remove/detach the host profile from the host
    • At this time the host password should be successfully upgraded

Please be careful. It is recommended that you do this when the host is in maintenance mode. If it is part of a cluster, great. You can move all VMs away from that host with DRS (automatically or manually). If it is a standalone host, make sure to shut down the VMs first, just in case the host reboots. During the writeup, the affected host did not reboot, but there was a checkbox in the remediation settings that could cause the host to reboot.

How to connect your 3rd party router to a Swisscom Fiber connection?

Recently, we moved our household. Yes, we did. We built a house and we just moved in recently. At the time of writing, it looks like a bomb went off. Cardboard boxes and bags everywhere, furniture not yet at the perfect place, office room not yet ready. But the new cat tree arrived and was installed quickly. Our felines already love it!

Get the internet working!

On the day of moving into the new house, one of my primary tasks was to set up the internet connection and make sure the basic networking and also the TV is working fine. It looked all good when I connected the router. It seemed to have a signal. But when I tried to browse the internet, only a Swisscom landing page was showing up, notifying me that the internet connection has to be activated. What? So that was phone call number one.

I called Swisscom, explained to them what the problem is and if they could help me. They just told me, well, it is not a Swisscom router you have there. And they were right. I’m paying for 10 Gigabit fiber internet. But until the time of moving, Swisscom did not have a router that was capable of bringing that 10 Gig speed also into the home network. So I had to buy another router. It was the Zyxel XGS-PON Fiber-Router AX7501. It is certified by Swisscom, which means that you can use this device for Swisscom fiber internet as well as for Swisscom TV.

Need to pay for support? Not with me!

The guy on the hotline really tried to help, and I appreciate it. But when we reached the root of the cause of “no internet but a Swisscom landing page”, he mentioned that he should connect me with the next level tech support, but that would cost some money. Wait, what? That would be the first time ever since I’m a Swisscom customer, that tech support will cost me money! Well, thanks to the internet, I was able to find a solution. And it was easier than expected.

The solution

Depending on the specific network expansion situation, the Swisscom network supports the following fiber-optic technologies:

  • 10 Gbit/s technology XGS-PON to ITU standard G.9807.1
  • 1 Gbit/s technology point-to-point to IEEE standard 802.3-2008, clause 58, 59

Swisscom explicitly mentions that only routers and modules certified by Swisscom can be connected to the new 10 Gbit/s technology (XGS-PON). And the Zyxel AX7501 is one of the supported routers, probably the only one available currently. But that doesn’t mean that it is just plug-and-play. You can connect everything and the router also gets a signal, but there is no internet except the Swisscom landing page.

So what should I do?

There are two settings that have to be set in the WAN connection settings of the router. Probably settings that the original Swisscom router already has set.

First, you have to set the DHCP option 60 to the value “100008,0001”. Next, you have to set the VLAN ID to VLAN ID 10. That’s it. Save the configuration, and that should already do the trick. Try to browse a website now, it should show up.

A bit of googling saves you the money for paid support, since the information is obviously publicly available. But you first have to realize that such settings are necessary.

Source of information: Connecting external routers to the network – Help | Swisscom

Happy New Year 2022

The last two years were special, but I’m not going in too deep. It gave us all some new challenges, like Zoom/WebEx/Teams meeting marathons, no face-to-face contact with customers, and some challenging home office experiences. For me personally, some things changed. My better 51% (aka my girlfriend) and I are building a house! It should be finished by the beginning of 2022. And I already declared to be the CIO of this house 🙂 We will move all of our stuff, rearrange everything, and then there’s always the address change notification that you have to do with the postal service, all your online shops, car insurance, personal insurance, etc. Sending out letters soon because still not all can be done online. I did also some learning this year, like AWS courses and some VCP preparations. Certification exams are still pending… Dang it.

I hope that your wishes come true and that you find the courage to take new steps. For 2022, I wish you and your loved ones all the best. And I hope to see you soon!

Happy New Year!

My Top 10 Posts in 2021

Another year is over, it’s 2021 and the beginning of another year. With this blog article, I’d like to present to you my Top 10 posts of 2021. Surprisingly, the Top 10 blog posts are not all from 2020. Obviously, people are still searching for solutions for problems they have with some “old” stuff like Windows Server 2012 R2, or they are looking for solutions to problems they have in their current infrastructure. I hope that my blog posts will help the people out there in the tech community solve their problems. I’ll do my best to keep on doing my work and sharing my knowledge.

10. SHARP printers – Remote administration with VNC viewer

Back in 2016 when I was working as an IT administrator in customer support, I found out that you can control a printer with the VNC viewer. I was astonished!

https://www.driftar.ch/2016/09/06/remote-administration-sharp-printers-vnc-viewer/

9. VMware vSAN cache disk failed and how to recover from it

When you break things in your homelab, then it’s most likely your fault. I will never, and I repeat, I will never blame any vendor if my lab blows up because of my fault.

https://www.driftar.ch/2018/08/18/vmware-vsan-cache-disk-failed-and-how-to-recover-from-it/

8. Veeam – Backup Copy “Block is not initialized. Failed to download disk.”

When I was working at a Veeam Platinum Partner in Switzerland, I had many customers running Veeam Backup & Replication. This is another troubleshooting blog post. I had to use some tools the first time and I was able to fix some backup copy issues.

https://www.driftar.ch/index.php/2017/06/05/veeam-backup-copy-block-not-initialized-failed-download-disk/

7. Expand your logical drive to extend a VMFS datastore

It was like open-heart surgery. There was no possibility of a backup, no safety rope. But I had to do this task because a quick solution was needed.

https://www.driftar.ch/2019/07/24/expand-your-logical-drive-to-extend-a-vmfs-datastore/

6. VMware – Clone a VM with snapshots (and consolidate it)

Who doesn’t know snapshots and their sometimes weird behavior? This was a pretty strange candidate!

https://www.driftar.ch/2018/09/03/vmware-clone-a-vm-with-snapshots-and-consolidate-it/

5. “Starting drivers, please wait” – An HPE adventure story

This was one strange issue! Back in the day when I was working at a solution provider, a customer reported an issue. His ESXi hosts have lost connectivity to a storage system. It took some time to solve, and it was a good experience.

https://www.driftar.ch/2017/07/18/starting-drivers-please-wait-an-hpe-adventure-story/

4. Setting up Visual Studio Code for WSL 2

I’ve started learning some automation stuff, like doing things with Ansible. And I had to set up a suitable solution for me to write things, play around and test stuff.

https://www.driftar.ch/2021/01/27/setting-up-visual-studio-code-for-wsl-2/

3. An easy way to quickly migrate a VMware VM to Synology VMM

In the third place of 2021, there is this post about migrating a VMware VM to Synology Virtual Machine Manager.

https://www.driftar.ch/2020/09/01/an-easy-way-to-quickly-migrate-a-vmware-vm-to-synology-vmm/

2. Backup and Restore vCenter Server Appliance

In the second place of 2021, there is this post about how to backup and restore your vCenter Server Appliance.

https://www.driftar.ch/2020/04/21/backup-and-restore-vcenter-server-appliance/

1. Microsoft Active Directory – Desktop Shortcuts with Group Policy

And the first place winner for my Top 10 blog posts in 2021 is an old one back from 2016. But obviously, people still search for solutions like this. With Active Directory Group Policies you can do so many things. One of them is also creating desktop shortcuts.

https://www.driftar.ch/index.php/2016/11/12/microsoft-active-directory-desktop-shortcuts-with-group-policy/