When I check my blog, I can see the last post from February 2022. That’s a long time ago already! Time to write something, isn’t it?
Back in the days when I was working as a Systems Engineer for an IT service provider, it was much easier to write blog posts. Now as a “customer” I don’t find the time or the ideas, or maybe I’m forgetting blog post ideas, not sure why. At least that’s my thought. I’m always struggling if I should blog about this or that, is it worth writing about it, or are there gazillions of blog posts writing about the exact same thing?
Today’s blog post is exactly such a topic, I assume, that has been written about already some times, at least. But it was a problem we had during an ongoing vSphere upgrade project just recently. And I was able to help our operations team to move on with their work. So why not write a blog post about it?
What happened?
As mentioned, we’re currently working on a global vSphere upgrade project. We’ve got many ESXi hosts and clusters all around the world. So far nothing special. And even when there are easy-to-understand guides available internally (I wrote these myself and triple verified), maybe one or the other point on a checklist is forgotten, or you just didn’t think of it in the heat of the moment. One point is “Check the current credentials if they are working”. Thanks to the following troubleshooting guidance, there was no show stopper and only a few minutes of delay for the upgrade of one ESXi host.
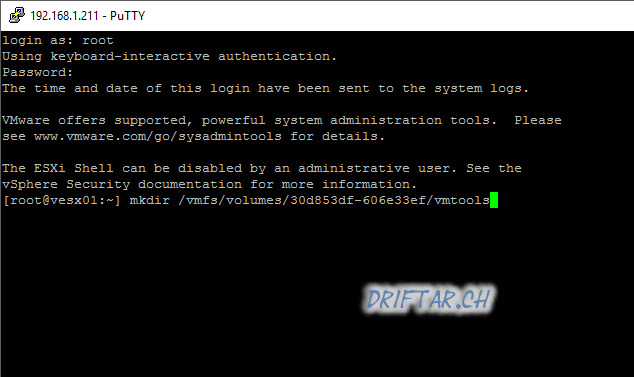
The root password for one of the ESXi hosts didn’t work. No chance to log in through the Web UI nor SSH. So what to do then?
There are only two officially supported ways to reset the root password of an ESXi host. You can reinstall the host from scratch or use host profiles. Well, reinstallation would be an option as we’re upgrading vSphere anyways. But this would require some additional time because of the ESXi configuration. Using a host profile can be done, but needs an Enterprise Plus license.
Because we have some spare licenses left for Enterprise Plus (not yet needed for hosts, but already planned to use), we decided to go the way with the host profile. And it wasn’t rocket science!
How can you do it?
The actual troubleshooting chapter is divided into two parts. The first part is changing the current license of an ESXi host, the second part is all about the host profile.
If you don’t have an Enterprise Plus license, then you have to plan reinstalling the ESXi server from scratch.
Change the host license
- Log in to the vCenter WebClient (https://yourvcenter.domain.com/ui)
- In vCenter, go to Home and then choose Administration and then Licenses
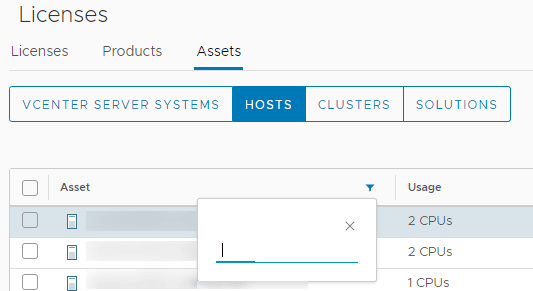
- Click the Assets tab and then the HOSTS button

- In the Asset column, you can click the filter icon and search for the ESXi host where you want to assign a different license
- Select the host, then click Assign License just above the list
- Choose the Enterprise Plus license, and click OK

- The host will now have an Enterprise Plus license, and you can continue with the steps below.
Remember to switch back the license to the one that was assigned to the ESXi host before.
Extract, change, and apply the host profile
- Log in to the vCenter WebClient (https://yourvcenter.domain.com/ui)
- In vCenter, go to Home and then choose Policies and Profiles, and click Host Profiles
- Click → Extract Host Profile
- In the Extract Host Profile menu wizard → Select the host you want to update the password for, then click Next
- Name the Host Profile and click Next and then Finish to complete the capture of the host profile template
- The new host profile should appear on the Host Profile Objects Field
- Right Click the new Host Profile and choose → Edit Host Profile
- In the Edit Host Profile wizard, uncheck all boxes
- Then using the search filter search for → root
- Highlight and then select the check box for → User Configuration / root
- Make sure to only select this item when searching for root
- A configurable window will display the root user configuration
- At the Password subsection, choose → Fixed password configuration

- Here you have to fill in the new password and confirm it before proceeding
- Double-check that all other non-applicable boxes have no check marks and proceed to Finish
- Once the task completes, right-click the new host profile and choose → Attach/Detach Hosts and Clusters → then select the host in the wizard
- Right-click the host profile again, and select Remediate
- Remove/detach the host profile from the host
- At this time the host password should be successfully upgraded

Please be careful. It is recommended that you do this when the host is in maintenance mode. If it is part of a cluster, great. You can move all VMs away from that host with DRS (automatically or manually). If it is a standalone host, make sure to shut down the VMs first, just in case the host reboots. During the writeup, the affected host did not reboot, but there was a checkbox in the remediation settings that could cause the host to reboot.