It’s been a while now (exactly two years and one month), since I bought my last Synology NAS, both for homelab and personal/private usage. Why did I buy a new NAS? There are some requirements that my new NAS had to fulfill:
Capable of 10 Gigabit Ethernet (integrated or with an addon card)
Enough slots for disks (at least five)
Two NVMe slots for using NVMe SSDs as read/write cache (integrated or with an addon card)
Can be used for homelab storage, as well as backup storage for home computers, laptops, etc.
When looking for that one NAS that could handle all of the above, I stumbled across the Synology DS1621xs+. Synology launched it in September 2020, and I ordered it about two months later.
Some of the technical specifications of the NAS:
It has 2 x M.2 2280 NVMe slots
It comes with 8 GB DDR4 ECC SODIMM (expandable up to 32 GB, and yes I upgraded to 32 GB)
It is equipped with an Intel Xeon D-1527 4-core 2.2 GHz CPU that has a Turbo Boost up to 2.7 GHz
In terms of connectivity, there are two 1 GbE and one 10 GbE RJ-45 ports
If you fancy, you could install some PICe card (the NAS has one 8-lane x8 slot), but I don’t know why or what
And you can install up to six 3.5″ or 2.5″ drives
So that’s the basics covered. Let’s get back to the topic.
The vExperts had the chance to attend an exclusive online session recently together with Synology. The topic was “Flexible VM backup and recovery solutions with Synology”. Josue Guzman, Technical Account Manager at Synology, showed us how to set up and use the VM backup solution. He demoed also the whole backup and restore process. And especially the instant restore option, where the Synology NAS mounts itself as an NFS datastore into your ESXi host was awesome.
Many thanks to Corey Romero and the vExpert team for organizing all these cool sessions!
But I’m not going to recap the session here. I just want to pick up the thread because there is a not-inconsiderable amount of space required with backup. And if you also have specific RTO and RPO that have to hold data for a certain period of time, then the storage requirement can be quite large.
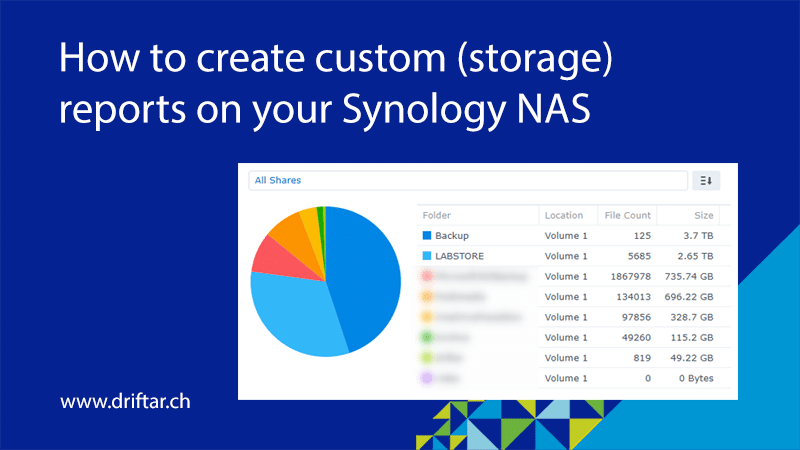
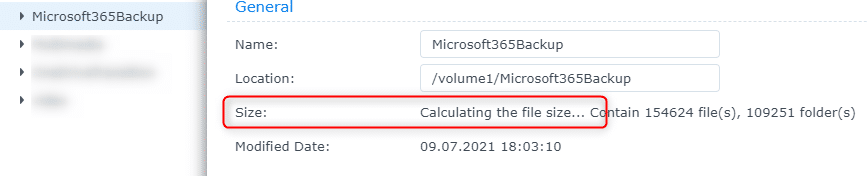
And that’s exactly the thread I want to pick up. When you’re working with Synology NAS systems, you may know how cumbersome it sometimes is to get the size of the various (shared) folders you have on your NAS. Sure, you can do “right-click => select Properties” on every folder, note it down somewhere, and then you can add all the values together. But who wants that?
But there is a much nicer and more elegant way to get the folder size. And at the end, you even see colored pie charts. Well, are you curious now?
Long time no hear, and I’m really sorry for that. It was a busy time, with a new job, huge project and also military duty in between. But now things are calming down, and so do I. And I’ve got some time for a new blog post.
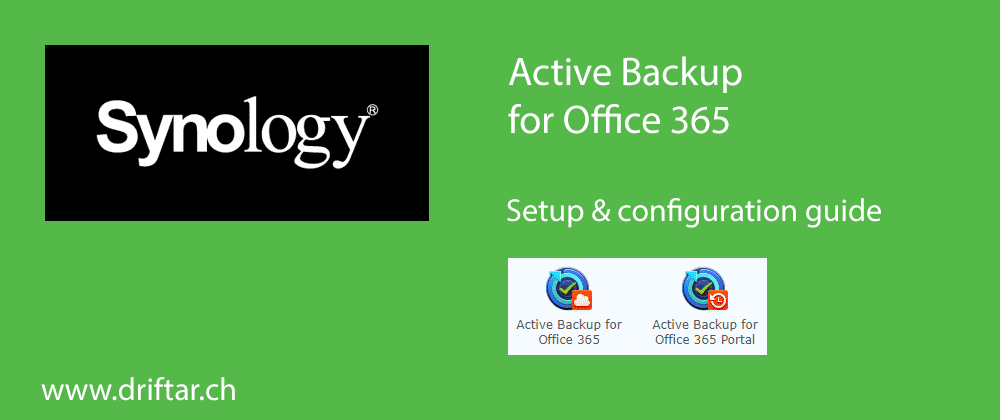
Recently i stumbled across a newsletter from Synology. They now have a backup tool for Office 365 available which is free of costs for 10 users. Extra license packs can be purchased for adding and renewing additional licenses. That doesn’t sound so bad. But wait. Office 365 is in the cloud, doesn’t Microsoft back it up so that I don’t have to worry about? Well, long story short, NO. There is some retention like deleted items and stuff, and you can modify specific settings. But backing up Office 365 data is all in your own responsibility. There are various backup solutions like Veeam Backup for Office 365 which work absolutely great, and also the recently announced solution from Synology which I’m writing about today. Let’s look at it a little closer.
Unfortunately not every Synolgy NAS system is supported, so please have a look at the list here if your devices is on it or not. Lucky me, i bought a new NAS for my vSphere homelab some months ago which fits perfectly for this test setup.
More information about Active Backup for Office 365
Synology has plenty of information about Active Backup for Office 365 on their website.
Some of the features:
Protection of mail, calendar, contacts, OneDrive
With Active Backup for Office 365 Portal enabled, both employees and admins can easily locate items for restoration and restore/export them with simple clicks
Mail/calendar attachments (if stored in Btrfs volumes) and OneDrive files that contain identical content will only be stored to Synology NAS once, which saves storage space
Files stored in Btrfs volumes on Synology NAS can be deduplicated with previous versions, minimizing the storage space required
But now let’s talk tech and let’s dive into the setup and configuration of Active Backup for Office 365.
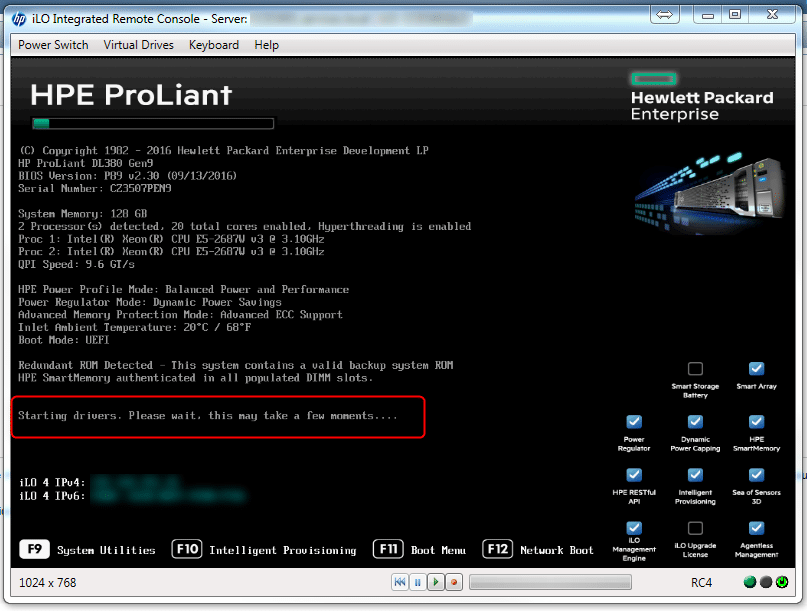
Yes i know that, the title of this blog post doesn’t sound very well. But if you read this blog post you can see that it fits very well. Recently, just some days before the writing of this post, one of my customers called me because of a vCenter issue. He’s got two HPE ProLiant DL380 Gen9 and an MSA 2040 SAS Dual Controller storage system.
The customer told me that some VM’s aren’t running anymore and that both hosts aren’t available in vCenter management. I made a quick look through remote support and saw that. Both hosts were gone, most of the VM’s still running but some not. We first tried to access the hosts through SSH but no success. We tried to access the DCUI with moderate success. At least we were able to logon, but the DCUI didn’t respond after successful login. That’s kind of strange, didn’t see that until yet. The hosts did respond to ping, so that’s at least a little light at the end of the tunnel.
We then decided to restart one host. We don’t have SSH (PuTTY) access to the hosts, we can’t manage them from vCenter, we can’t use the DCUI. What else could happen?
So we restarted a host. And this is the beginning of this story…
This post is a special one. It’s my first post about a storage specific topic. But as many other post it is also the result of a solution for a specific problem i had recently at a customer.
I’m not very familiar with storage, especially with those from NetApp. I know what they have in their portfolio (at least some of it). But for example how to setup such storage devices correctly you’ll catch me on the wrong foot. But anyway. If it’s setup then there is mostly only the daily business which includes also troubleshooting from time to time. And i had recently a small troubleshooting issue. I received mails from a storage controller at a customer that there is something wrong with the filesystem because a disk is broken. Well, good to receive such mails in the middle of the night from Saturday to Sunday…
I had to call the NetApp support because i wasn’t sure if NetApp AutoSupport worked correctly. Before the phone call i tested it via the OnCommand System Manager, and AutoSupport worked fine. So then i called NetApp support to ask if there is already a support case for the affected system. But there wasn’t. About 5 minutes later i had a newly created support case, a support case number, and the confirmation that the replacement disk is processed to be shipped the same day.
The disk arrived the next and i had to replace it. But this time the NetApp FAS mocked me. It didn’t show which disk is defective and thus should be replaced. There should a LED light up in orange, but it didn’t.
Let me show you how i solved this LED specific problem, and how i did the whole replacement process. I know, the NetApp experts among us will probably cry. But i’m not the storage pro, i did it step by step with some help of my good old friend Google 😉
1) Check Auto-Assign
Auto-Assign is a good feature as i think. If you have unowned disks on a stack, loop, or shelf, you can configure Data ONTAP to automatically assign disk ownership at the stack or shelf level. So let’s check if it’s enabled or not.
Open PuTTy (or an SSH client you like) and connect to the affected storage controller.
Login as root.
Enter “options disk” to check if Auto-Assign is ON or OFF.
You should see something similar to this
If Auto-Assign is OFF you can enable it with “options disk.auto_assign on“.
If you like you can check if Auto-Assign now really is on if you enter “options disk” again.
2) Light up the LED of the broken disk
I assume you’re still connected with your storage controller.
In the next step we enable the diagnostics mode. We need that to activate the LED.
Enter “priv set diag” to enable diagnostics mode.
Now we need to find out which disk is defective. Enter “aggr status -f” to find out. You should see something similar to this:
Now let’s light up the LED! Enter “led_on Disk_name” (=> “led_on 0a.00.23” in this example) to get the light on.
Now you should see the orange LED light showing up. Now you know which disk is broken and want’s to be replaced.
3) Replace the broken disk and assign it as spare
I assume you’re still connected with your storage controller. One last thing is to do.
After you replaced your disk, check if the disk is recognized by the controller and probably owned on a stack, loop or shelf.
Enter “disk show -n” to get the needed information.
You should see something similar to this:
DISK          OWNER           POOL    SERIAL NUMBER          HOME
--------      -------------   -----   -------------          ------
2c.01.13      Not Owned       NONE    3QQ2xxxxxxxxxxxxBQT4
You now know that there is a disk waiting for duty.
Enter “disk assign 2c.01.13” (where 2c.01.13 should be replaced with your current disk name) to assign it.
In my specific case the disk was assigned as spare, because the spare was automatically set as an active disk to replace the broken one.