Windows Activation on AWS fails

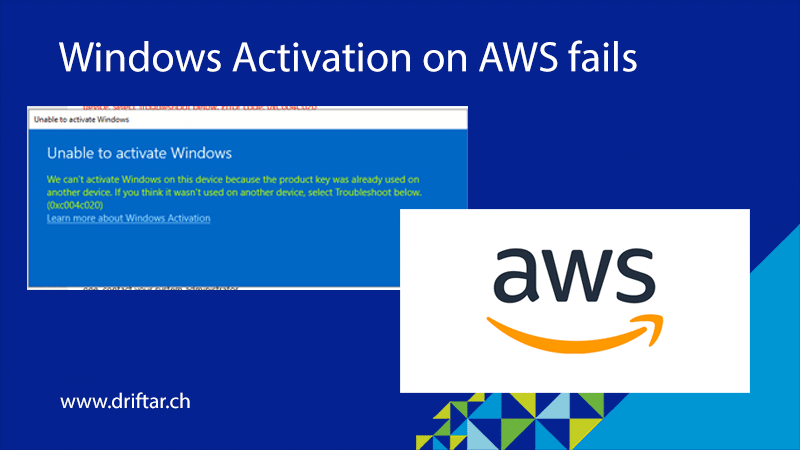
Sometimes it may happen that a Windows Server fails with the Windows activation when this virtual machine runs on AWS. I’ve stumbled across this issue from time to time, and with some research and trial & error, I was able to fix it. I haven’t been able to figure out what is causing this problem yet. But at least there is a solution that works. The solution is to activate Windows manually, and maybe “force it to its luck”. The following steps should help you to solve such a Windows activation issue.

Activate Windows manually

NOTICE: This guide is for Windows Server 2016 and later.

Reset Windows Activation

  1. Start the Windows Registry Editor as administrator (right-click → run as administrator)
  2. Navigate to the following location:
    Computer\HKEY_LOCAL_MACHINE\SOFTWARE\Microsoft\Windows NT\CurrentVersion\SoftwareProtectionPlatform
  3. Go to the right panel and right-click on SkipRearm
  4. Select the Modify option and a dialogue box Edit DWORD 32-bit folder should appear
  5. Here set the Value Data to 1 and click the Ok option
  6. Restart the server now
    It is important to restart the server at this step. Otherwise, the next steps will not work.

Reset Windows Activation timers

  1. Now go to the Start menu, and search for Powershell
  2. Select the run as an Administrator option
  3. Type the following command and press Enter:
    slmgr.vbs /rearm
  4. Restart the server now
    It is important to restart the server at this step. Otherwise, the next steps will not work.

Finally activate Windows

  1. Now go to the Start menu, and search for Powershell
  2. Select the run as an Administrator option
  3. Run the following commands:
    1. Press enter after each command
      Import-Module "C:\ProgramData\Amazon\EC2-Windows\Launch\Module\Ec2Launch.psd1"
      
      Add-Routes
      
      Set-ActivationSettings
      
      slmgr /ato
  4. It might be needed to add a Generic Volume License Keys (GVLK) here. To get the key for the correct operating system, you may visit this Microsoft article.
  5. Enter the following command and press Enter
    slmgr.vbs /ipk N69G4-B89J2-4G8F4-WWYCC-J464C
  6. Set the KMS server to the AWS KMS server with the following command:
    slmgr.vbs /skms 169.254.169.250:1688
  7. Run the next command to activate Windows:
    slmgr /ato

Information sources

The following guides and articles have been used to write this troubleshooting guide.

Active Directory – Replication issues after promoting new 2012 R2 DC

This week i’ve set up the first Windows 2012 R2 domain controller at a customer. All worked good and looked fine. But when i had to create two new user accounts i found out that these two accounts weren’t replicated to the new domain controller, i’ve just set up a day erlier, nor to another domain controller in another site. I discovered also that the NTDS settings and replication topology wasn’t complete. The new domain controller had not a single connection to active directory domain services. The customer has two sites which are connected over a leased line. Both sites have their domain controllers. Those new user accounts i’ve created on an existing Windows 2008 R2 domain controller.

After nearly two days of testing and troubleshooting the problem seems to be solved. All domain controllers are replicating and talking with each other domain controllers. When i create a user account it will show up instantly on all other domain controllers. Also the replication topology is now looking good. KCC generated the missing topology now automatically, which wasn’t the case directly after the new domain controller was on duty.

I want to provide you some information about this issue and how i solved it. Probably it will help you solving your Active Directory replication issues. And if not i hope it will be at least something you can check if this patricular thing is ok and help you with troubleshooting.

Read more

Microsoft Active Directory – Desktop Shortcuts with Group Policy

A really cool feature in Microsoft Active Directory is the  Group Policy (or Group Policies in general). With Group Policies you can install (small) software packages, set the Internet Explorer start page, set wallpapers, execute scripts on user or computer security context and many things more. You can also deploy specific desktop icons for a user or a user group. Hence this blog post will show you how you deploy simple desktop shortcuts to a users desktop.

The group policy

If you have some specific applications in your company (for example a simple timesheet application) which your users should use, then you can create a group policy or a group policy preference respectively to deploy this desktop shortcut.

  1. In Group Policy Management, create a new group policy object (GPO) in the “Group Policy Objects” folder.
  2. Right click this newly created GPO and select “Edit…”.
  3. Navigate to “User Configuration => Preferences => Windows Settings => Desktop”
  4. Right click the “Desktop” object and select “New => Shortcut”
    Group Policy - Shortcuts

  5. Now set all the configuration details of your application shortcut in the next dialog box.
    Group Policy - Shortcut Target Type

    Note: Please be aware of the “Target type” setting. If the shortcut has to be an application shortcut, you have to choose “File System Object”. As default it’s set to “URL” and thus creates only a shortcut for a website. Therefore if your user wants to open this shortcut, Internet Explorer (or the default browser) opens with a “cannot display this website” message instead of the application.

  6. On the “Common” tab check if this group policy preference should run in logged-on user’s security context or not.
    Group Policy - Shortcuts Security Context

    Note: If you set the „Location“ to „Desktop“ then you should make sure on the „Common“ tab the check box „run in logged-on user’s security context“ is set, because the shortcut will be published on the users own desktop. If you whish to deploy a shortcut to the „All Users“ profile then you have to set the target to „All Users Desktop“ and also uncheck the box to run this group policy preference in logged-on user’s security context. Usually a normal user doesn’t have access to all users profile, but the system account, which runs this group policy preference, has access to it.

  7. Now click Apply / OK and close this dialog box.

As the last step, back in GPO Management, link the created GPO with the Organizational Unit in which your users reside.

Now your users have only to restart the computer or do a single log-off log-on. So they will receive the newly created desktop shortcut.

Microsoft Active Directory – Change UPN for all users

Powershell

change UPN
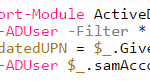
Today i had to change the UPN (User Principal Name) for a whole company. Well, go through each user account in Active Directory, change the UPN the way it has to be, and you’re done. That would be the way if you want to do it manually. And this is a slow way. For sure, if there are only five users or so you’re good to go. But what when there are dozens of user accounts? Perhaps in different organizational units? At the present time, where everything in IT has to be quick and fast and with the least amount of effort, you can do it more clever.

Well, that was some challange to find it out. But as often, Powershell is your friend. With few lines of code, fully customizable, you can change the UPN for all users within an organizational unit. So you will save time, because you just have to change the OU in the script.

The change UPN script

[code language=”powershell”]
Import-Module ActiveDirectory
Get-ADUser -Filter * -SearchBase "OU=lan.driftar.com Users,OU=LAB-Users,DC=lan,DC=driftar,DC=com" | ForEach {
$UpdatedUPN = $_.GivenName + "." + $_.SurName + "@driftar.com"
Set-ADUser $_.samAccountName -UserPrincipalName $UpdatedUPN
}
[/code]

What does the script?

The script searches within the organizational unit specified for the user accounts, combines givenname and surename with the domain prefix, and changes then the UPN for all the user accounts withing this organizational unit. In this example the new User Principal Name for a user will be “givenname.surename@driftar.com” (for example john.doe@driftar.com).

Conclusion

To be honest it was some time needed to search for the right script parameters and test it out, to make sure everything works. But you don’t do that every time. You can save this script and customize it every time for the customer you work for. It’s a quick way to change the UPN, and it’s an easy way to save time.