This blog post, I call blog posts like these “quick & dirty posts”, will show you today how to add an ESXi host to your vSAN cluster. You may need additional compute power, and/or storage capacity. Or you want to implement another storage policy to leverage storage efficiency and more failures to tolerate (RAID 5 / RAID 6 erasure coding). Maybe you want to create a stretched cluster, which needs an even number of vSAN nodes on each side plus a vSAN witness. So many reasons to add another vSAN node.
But let’s dive into this topic now.
How to add a new host to a vSAN cluster?
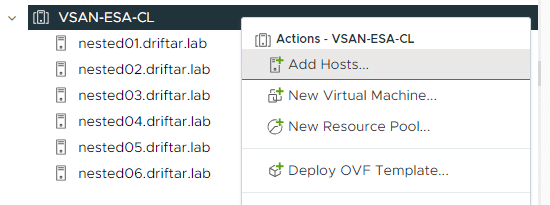
In my vSAN cluster, based on the Express Storage Architecture (ESA), I’ve got six hosts currently. I want to add another host to the cluster because of the computing and storage power. How to do this?
Right-click your cluster and choose “Add Hosts…”. So far, nothing special.
Just a few weeks ago, to my shame, I stumbled across an interesting feature in VMware vSphere when trying some things with vSAN. To be honest, and to make it clear before we dive into this topic in this blog post: I screwed up when I tested this feature the first time. Because I didn’t know about this feature and because I didn’t proceed as I should have, as per this feature. At the end I had to reinstall all my vSAN nodes and create a new clean environment after that I screwed up. It was somehow needed anyway because of the most recent homelab rebuild. So, somehow a win-win for me and the lab.
So don’t screw up! No, just kidding. you may know the feature better than me. And I can tell you, vSAN is stronger and more resilient than you may think.
In this blog post, I’d like to show you how to shut down a vSAN cluster, and how to start it again. The feature is hidden in plain view, right-click the vSAN cluster and you’re good to go. Or not?
In this blog post, I’m assuming that the vCenter is NOT running on the vSAN cluster. I may update this blog post, or create another one, with vCenter running on the cluster. Without searching the internet and checking the VMware docs, I don’t know by heart if this is even possible. Anyway. So how do you shut down the vSAN cluster?
I may have skipped some homelab generation upgrades in my documentation here. However I have updated the page as far as I could, and I would like to provide you with a brief update on my current homelab setup with this blog post as well.
Last year, my wife and I moved into our own house. Yes, I married my love and we built a house. I didn’t shout about it because it’s something personal and I don’t have to rub it in everyone’s face. But yes, I’m a married house owner now and a loving father. Oh, I forgot to mention that my wife gave birth to a beautiful son this year. So many things happened! But anyway, back to topic.
You may have seen some images I posted on Twitter last year, about the huge IT rack I got my hands on, and the first “production” deployment in my new homelab rack. This “production” deployment was an actual beer fridge that was small enough to fit into that rack. If you don’t believe me, please go ahead and check the pictures here. The beer fridge is still there, but the huge and heavy IT rack has gone. The huge rack has been replaced by a desktop-size rack from StarTech.com. This rack is enough to provide a nice mount for my SuperMicro servers and networking equipment.
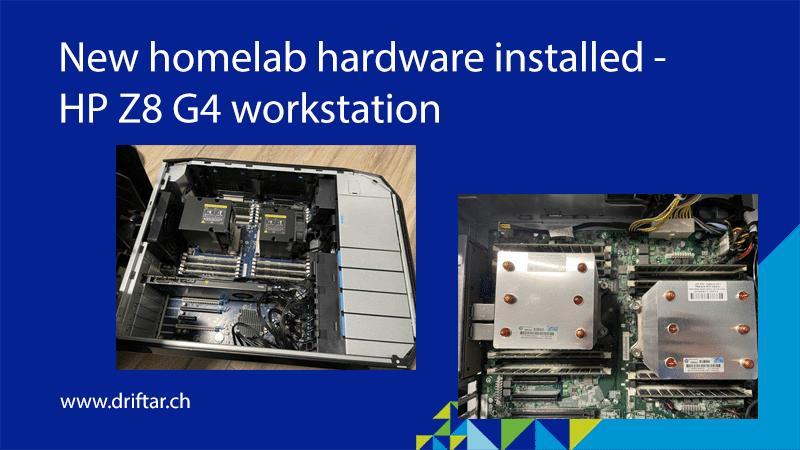
But the main topic in this blog post is the recently acquired hardware. I bought a refurbished HP Z8 G4 workstation!
This blog post is the first with Veeam as a topic for years! I can only hope that it helps at least some people struggling with the same problem I had.
I’m a PC gamer. Still. When I find some time for fun and games, you may find me on the grounds of Battlefield 2042, or maybe I’m driving a tractor in Farming Simulator 2022. My gaming computer is still capable of playing the most recent games. Maybe not with the best graphics and most recent graphic technologies, but they run and make fun.
Anyways.
On this gaming PC, I’ve installed the Veeam Agent for Microsoft Windows (the free one). Since ages. It works well, but sometimes, the backup fails. Even if you have your games available on demand to be downloaded at any time (Steam, EA, Ubisoft, etc.) and don’t need to install the games from DVDs anymore, it is still annoying if your disk goes bad or something screws up your Windows. I’m using a Synology NAS as my backup target, connected over a 10 Gbit/s ethernet link. The computer itself is equipped with some Samsung NVMe SSDs, so even a full backup is done pretty quickly.
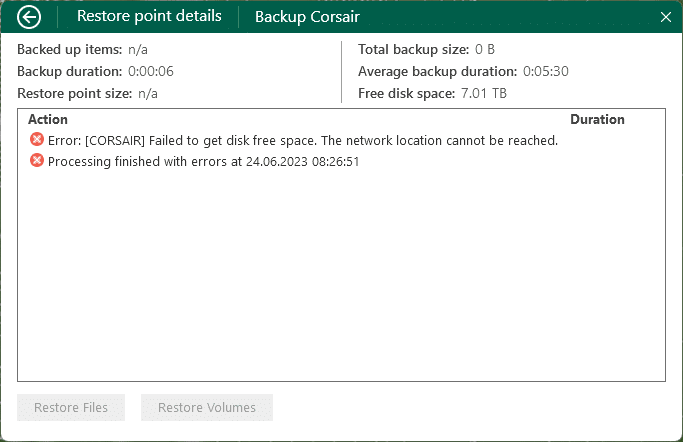
The point is that the computer always takes some time until the network connection is ready and working fine. That’s by design. You log in with Windows Hello, for example, the Desktop is loading, and somewhen the LAN connection is also ready. But Veeam Agent for Microsoft Windows already started its job (in case it’s scheduled and if it has missed that time slot) before the network is ready. And this job will fail because the network is not yet ready.
Error: [PCNAME] Failed to get disk free space. The network location cannot be reached.
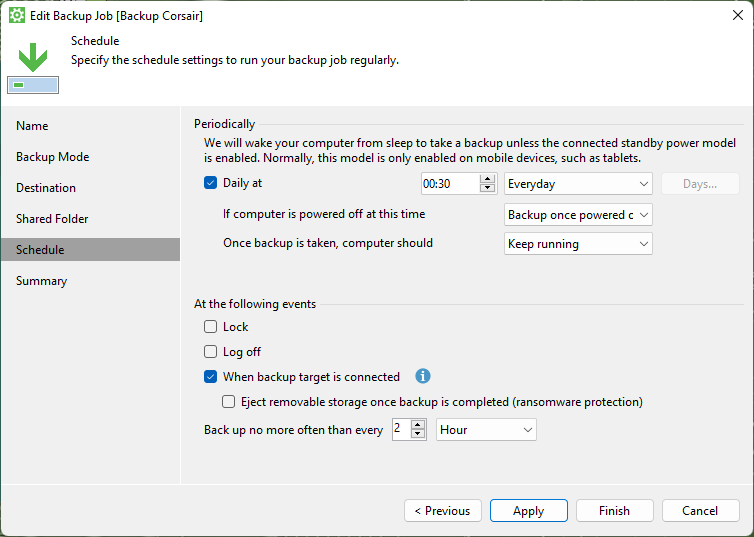
I searched for a while on the internet and stumbled across a Veeam forum post. There they mentioned enabling the “When backup target is connected” function.
I enabled this feature and tried it out. It worked.
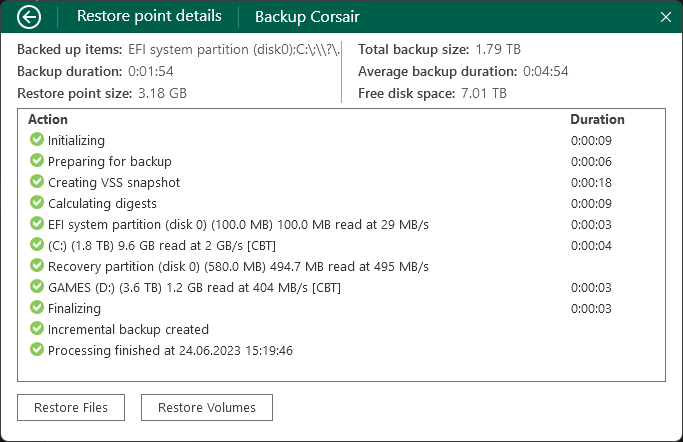
The backup job will now usually succeed.
Yes, usually. Veeam Agent still starts the job before the network is ready (directly after logging in to Windows). And this job may fail. But the job will start again as soon as there is connectivity to your NAS (SMB share). And this time, the job runs just fine and successful.
I didn’t blog about it until yet because I didn’t have the time to install, test and troubleshoot. Also, I didn’t have much time for writing because I was busy with private and business things. But just recently I found time to do some homelabbing and test some things.
May I introduce you: Intel Optane SSDs!
A while ago, the vExpert community got the opportunity to apply for Intel Optane SSDs. I thought why not? They can always say no. So I applied for three Intel Optane SSDs. And I was one of the chosen ones. Sure, this sounds cheesy, but I don’t know how many vExperts finally got some disks.
Through the vExpert program, we had the possibility to choose between the 2.5″ U.2 P4800X 375 GB SSD or its PCIe counterpart. I applied for the U.2 disk. If only I had known what I was getting myself into…