This blog post is not just for fun but because of a reason. I reinstalled my three Supermicro homelab servers with vSphere 7, and during setup, I noticed that ESXi shows incorrect values for the server model. What could cause this?
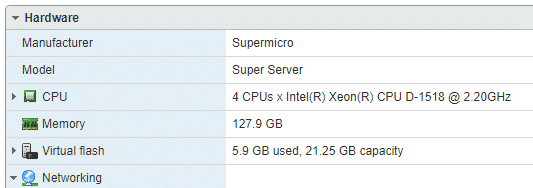
No, it shouldn’t be a “Super Server”, even if Supermicro servers are super for homelabs. But it should be an “SYS-300-8D” as this is the model I bought.
So how can I fix this? The short answer is: there is no fix until today, unfortunately. I tried it and asked also some fellow VMware friends, but still no success. It seems that this might a bug or something. I don’t know what values are read from ESXi to display that. And even after I changed the FRU values with the IPMICFG tool, reboot, and reinstalled the ESXi, the values were still displayed wrong. But at least I learned some new things during that troubleshooting. And I wanted to put the lessons learned into a blog post. Just in case you have similar issues, or you want to do the same things.
BIOS and IPMI upgrade first
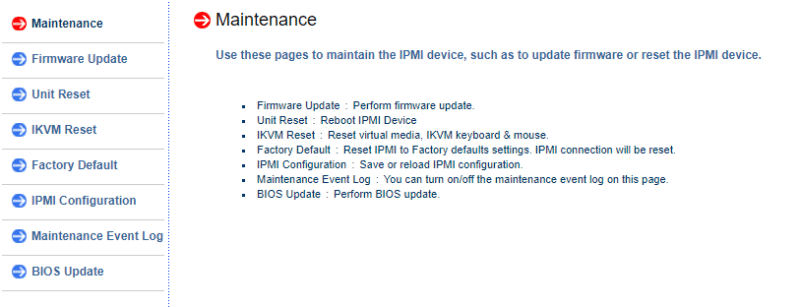
First I did a BIOS and IPMI firmware update. You can download the update files here from Supermicro. In the top right corner, you can filter for your mainboard. First check which mainboard is installed in your server. Then you click the “Download Zip” file link (after filtering for your mainboard), accept the EULA, and proceed to the download. The upgrade is pretty simple. Log in to the IPMI web interface, click the Maintenance tab, and on the left-hand side you can spot the places where to upgrade the IPMI (firmware), and the BIOS.
If you have your ESXi host up and running, place it into maintenance mode first, because a reboot is needed, at least with the BIOS update.
The IPMI firmware can be updated without any problems, but with the BIOS you need to activate a license. Not bad, isn’t it? If there is a security issue (like it was with Meltdown and Spectre) you have to pay to upgrade. But when you do a bit of googling, you should be able to find a way to work around that license requirement.
Spoiler
However, after updating the BIOS and IPMI firmware, ESXi still didn’t show the correct value for the server model. So what to do next?
Needed tools
Some of you may know the tools to configure the IPMI. Most vendors have their own tools to configure their IPMI through CLI (DELL iDRAC, HPE iLO, Supermicro, etc.). The tools are usually available for different operating systems. You can even configure the IPMI without needing to log in to it because you’re already working on the physical server and got access to the physical IPMI chip. That’s very helpful in case you screwed up something (like the wrong IPMI IP address, or a wrong password).
For Supermicro, you can download the IPMI tools here at their website. If you scroll down past the examples, you will find the download links. Or you click here for the download link. There is one catch: to download software, you have to fill a form. It’s not really a registration, as I didn’t receive any (spam) mails or had to confirm my registration. Just fill the form and you’re good to go.
For my use case here I downloaded the IPMICFG tool “For VMWare ESXi only”. You’ll get a Zip file that contains a VIB file, the release notes, the user guide, and the offline bundle. Extract the zip file, and upload the offline bundle to a datastore on your ESXi server (maybe the local /tmp folder).
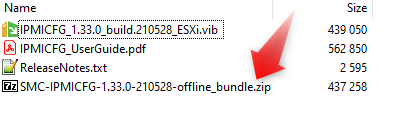
You can install the offline bundle with the esxcli software command:
esxcli software vib install -d /tmp/SMC-IPMICFG-1.33.0-210528-offline_bundle.zip --no-sig-check
NOTICE: as of the time of writing this article, the filename you’ve downloaded might be another.
How to do the change
The IPMICFG tool will be installed in the following folder (just navigate into it):
cd /opt/supermicro/ipmicfg
You can access the help information with the following command:
./IPMICFG.esxi -help
As we’re looking for a way to change the FRU information (FRU = Field Replaceable Unit), we’re going to work with the following command:
./IPMICFG.esxi -fru

Command: -fru
Command(s):
-fru info Shows information of the FRU inventory area.
-fru list Shows all FRU values.
-fru cthelp Shows chassis type code.
-fru help Shows help of FRU Write.
-fru <field> Shows FRU field value.
-fru <field> <value> Writes FRU.
-fru backup <file> Backs up FRU to a file <Binary format>.
-fru restore <file> Restores FRU from a file <Binary format>.
-fru tbackup <file> Backs up FRU to a file <Text format>.
-fru trestore <file> Restores FRU from a file <Text format>.
-fru ver <v1> <v2> Gets/Sets the FRU version. (<v1> and <v2> are
BCD-format)
With -fru list you can list all FRU values. That’s the best point to start, so you see what you already have, and what values you may have to change.
Let’s start with an example. I wan’t to change the product name:
With ./IPMICFG.esxi -fru list you've got already all values and you know how that value is called.
The name of the value is in brackets ( ).

./IPMICFG.esxi -fru PN

This gives you the actual value, empty or a real value. With -fru [name] you can read the value. Let's change it now.

./IPMICFG.esxi -fru PN New-Value

This will change the product name to New-Value.
You don’t need to save the configuration as you may know it from network switches. Just fire the command and that’s it. It’s directly written in the FRU area.
Conclusion
As mentioned above, the reason for this blog was that ESXi is not displaying the correct value for the server model. And as also mentioned, all the FRU changes didn’t solve the problem. One of three ESXi servers in my homelab shows the correct value, the others don’t.
But I’ll keep on trying. Stay tuned!
It took me a while to research, but you can indeed change the server name by using the sum tool (Supermicro Update Manager) downloadable here: https://www.supermicro.com/en/support/resources/downloadcenter/smsdownload
The functions you need to check out are EditDmiInfo and ChangeDmiInfo. Using those, you can extract the DMI information to a text file:
./sum -i [IPMI ip address] -u ADMIN -p [password] -c EditDmiInfo –file DMI.txt
After you made the necessary changes to DMI.txt you can upload it to the board:
./sum -i [IPMI ip address] -u ADMIN -p [password] -c ChangeDmiInfo –file DMI.txt
After a reboot, you can see the changed information on the IPMI system screen as well as on the esxi host hardware model field.
Hi Peter,
Many thanks for mentioning this SuperMicro tool! I will try this for sure as soon as my homelab is back online!
Have a great day!
Best regards,
Karl
Hi Peter,
I know it’s a long time now, but I finally managed to get my homelab back online and do the DMI reflash.
I did this on a Windows machine, so slightly different commands or parameters, but it worked at the end.
Read the DMI information and save them into a file:
sum.exe -i [IPMI IP] -u root -p [password] -c GetDmiInfo –-file C:\path\to\DMI.txt
Program the DMI information from a file
sum.exe -i [IPMI IP] -u root -p [password] -c ChangeDmiInfo –-file C:\path\to\DMI.txt
Only a reboot is needed, and the information show up now correctly!
Thank you very much!
Best regards,
Karl
Karl and Peter thank you so much, you intellectual powerhouses. I bought a couple SM servers right around the time of your original post and they all came branded iXsystems. Since I wasnt going to run TrueNAS on them, I tried to change the names with the FRU method but it wouldnt work for me. None of those values were actually populated. I looked for what seemed like forever with no luck, and gave up. Now that I’m sending these off to a new home, I came across this post and of course the DMI data pulled is exactly what I want to change. This utility is exactly what I needed. You guys rock!
BTW, I needed the X9 version and SM’s downloadcenter page didnt want me to download it for some reason, but the backend site still has it:
Windows: https://www.supermicro.com/wdl/Bios/sw_download/636/
Linux: https://www.supermicro.com/wdl/Bios/sw_download/639/
Thank you for this information.
Unfortunately it seems that a SFT-OOB-LIC license is needed to use the SUM tool.
Or is there a way to do this without?
It’s some time ago and I can’t remember everything, I’m sorry. If you check the blog post again, there is a spoiler that leads you to some reverse engineering stuff.
For this particular change of BIOS settings I’m using the “IPMICFG” tool, not the SUM (Supermicro Update Manager).