When it comes to virtualization, I’m working with VMware products in my homelab, alongside (hardware) products from other manufacturers. But some special circumstances made a special solution to a problem necessary. Due to a month of military duty, when I was at home only for the weekend, I shut down my homelab. Not also due to this fact, but also because I’m currently building my own customized rack, where I will install my homelab hardware. Be sure to check my blog frequently to get more information about the rack, as I will blog about it soon!
What’s the reason for this migration?
I’m using Ubiquiti hardware for my networking (lab switches, home networking, including wireless), and also a Pi-Hole as my ad-blocker. These are the only “business-critical” services in my home network. And they were running on my homelab. But what should I do when I shut down everything? Well, VMware Workstation to the rescue! I’m (actually, I was) running an ESXi on VMware Workstation on my gaming computer. This ESXi server was managed with vCenter as a replication target for Veeam Backup and Replication. Quickly migrate the VMs to that virtual ESXi host, and that’s it. But what when I accidentally shut down this PC? Or I want to shut it down? I need another solution which is more like 24/7!
What’s the solution?
That made me think about Synology. I knew that at least some Synology NAS systems can run virtual workloads directly, either as a virtual machine or within Docker. I didn’t want to go with Docker because of the lack of knowledge, and I have only limited system resources on that NAS box. So it will be two VMs running on my Synology box! But how?
You can’t just vmotion your VMware VM to Synology VMM (Virtual Machine Manager). You can export the VMDK files or create an OVF, which you then import into Synology VMM. But that took to long, somehow (in certain circumstances I can be impatient …).
This blog post will show you how you can easily backup your VMware VMs to a Synology box, with their own toolset, and restore it directly into Synology VMM. It might come in handy, in case you’re searching also for a nifty solution to run a Pi-Hole or a Ubiquiti controller. Or some other small VMs.
To be honest, the Synology box isn’t a Ferrari, or a Fright Liner in terms of performance and / or capacity. Such a NAS is always somehow limited in CPU resources and memory. In my case, I was happy that I maxed-out the memory when I initially bought the NAS box. My current NAS looks like this:
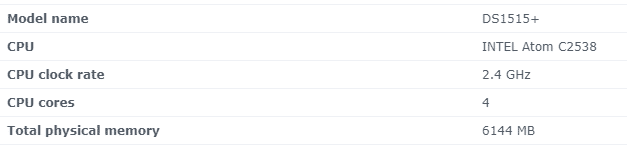
You can see, there are not many resources, but it should be fine for some tiny Linux VM. A domain controller can even run on it if the resources are used sparingly. But don’t expect too much… And let’s dive into the topic now.
First, the backup
tl;dr – We have to back up the VMs first from our ESXi host to the Synology box, and then we do a restore of the VM directly to Synology VMM before we can run them on the box. The next steps will describe how you use Synology Active Backup for Business and create a backup of your VMs. Hint: it’s free! You only have to enable the feature with your Synology account.
Preparation
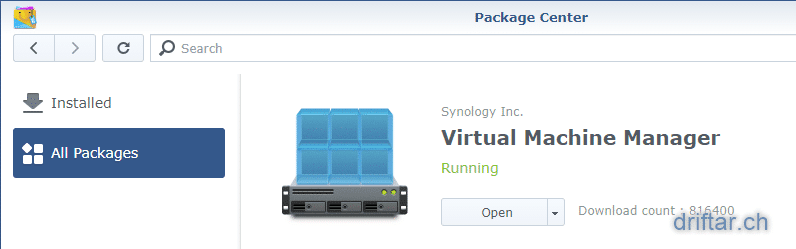
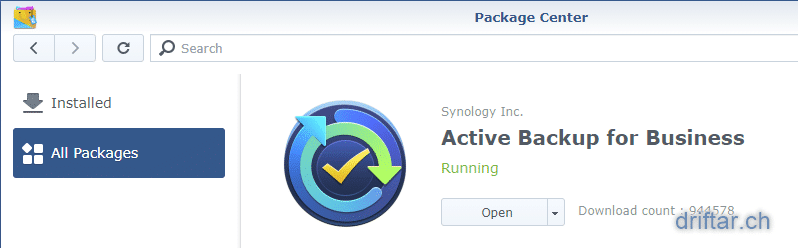
To have everything ready, you have to download two software packages on your Synology NAS. You can directly install these packages through the Synology Package Center. We need the “Virtual Machine Manager” and also “Active Backup for Business”:
Create a backup of your VMs
As mentioned, we will now first create a backup of our virtual machines. To do so, open the Active Backup for Business. You have to “activate” it in the first step with your Synology account. No worries, it’s free.
Click the “VMware vSphere” tab and click “Manage Hypervisor” to add your ESXi host. Simply add the FQDN / IP address, username and password to connect to the ESXi host. If all is fine, you’ll get a green notification bar. To mention, this notification bar is always there and refreshes automatically. So you will see immediately if there’s something wrong with your ESXi host.
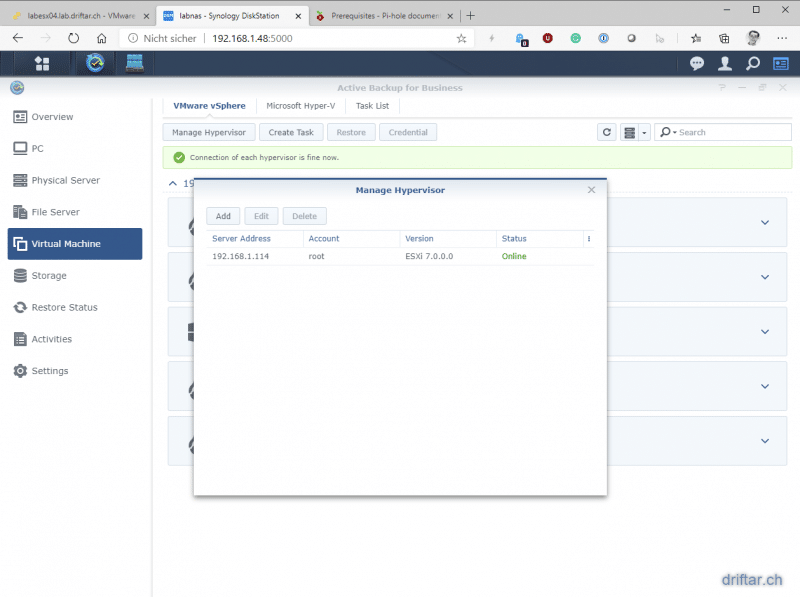
NOTICE: this post will be updated as soon as I’ve got my homelab back up and running. I’ll check if I can add vCenter as well and how this works.
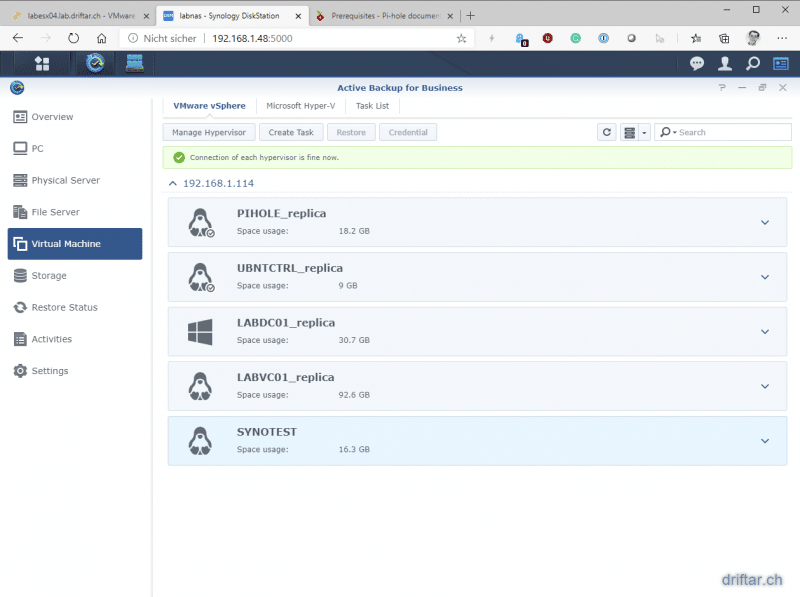
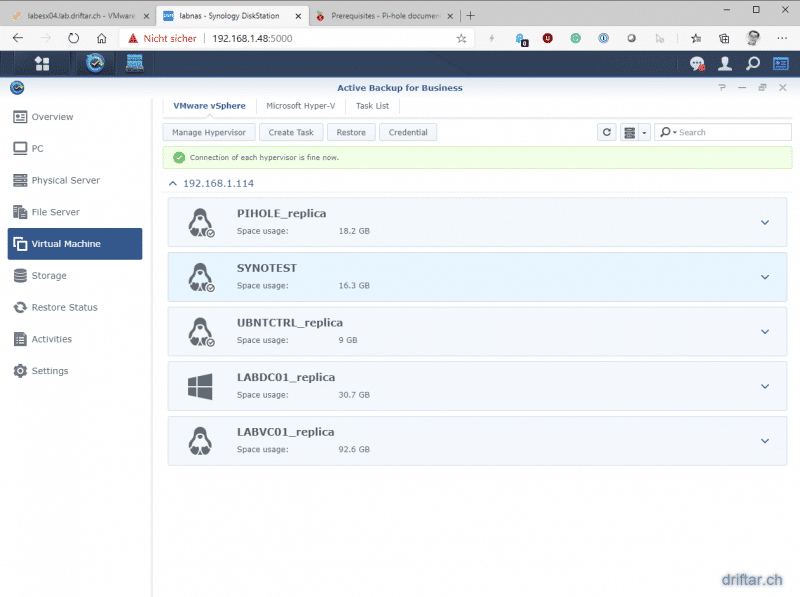
After adding your ESXi host, you will see a list of VMs running on your host. To create a backup task, click the “Create Task” button above the VM list and follow the assistant.
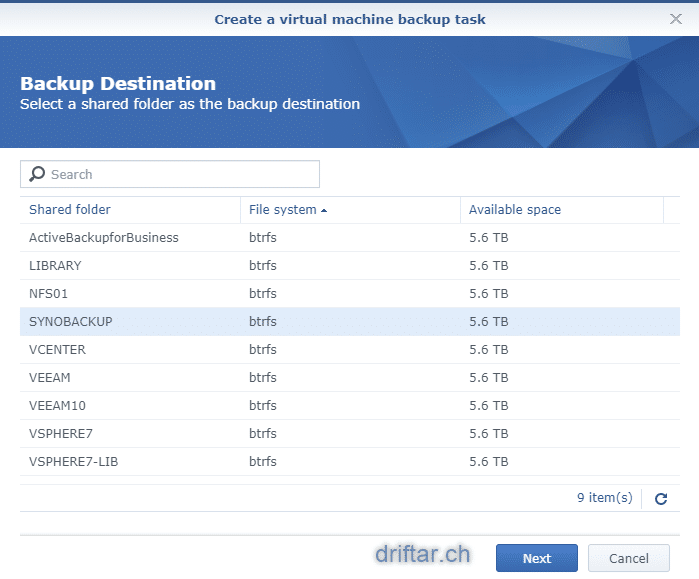
First, we select the backup destination. This is a folder on your Synology box. I’ve created one, called “SYNOBACKUP”.
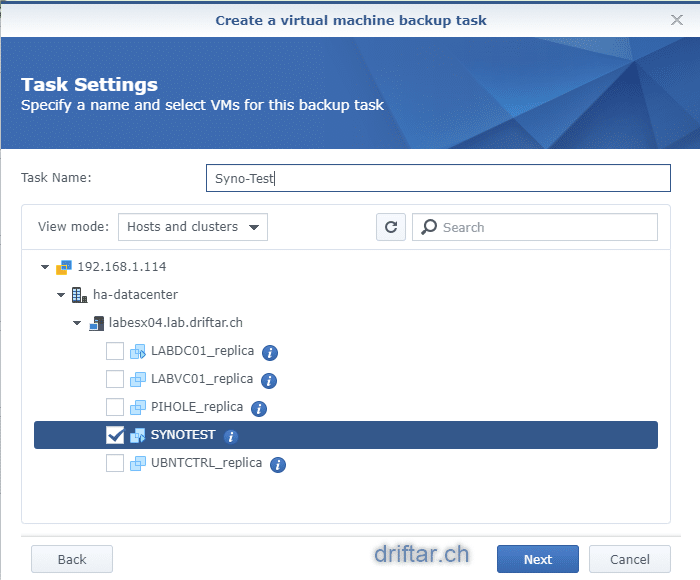
Select the virtual machine(s) you’d like to back up.
Set the task settings according to your needs. More information about the settings here, and the Active Backup for Business in general, are available at the Synology knowledge base.
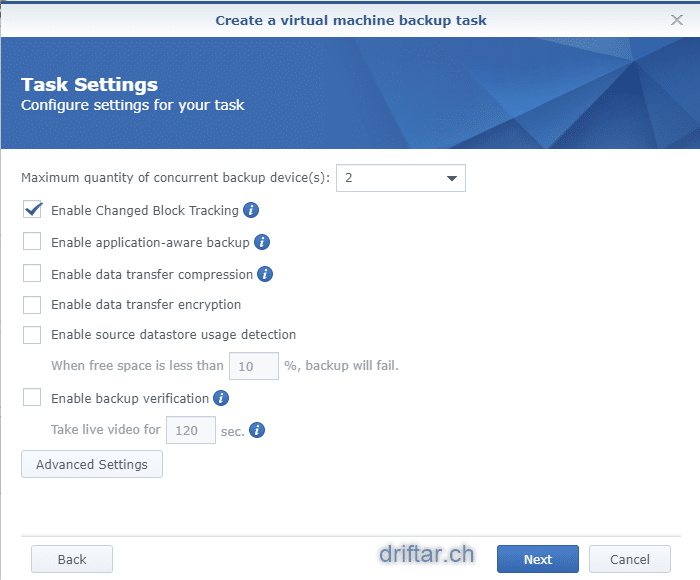
In our case, we only want to migrate a VM from a VMware ESXi host to a Synology NAS, we’re not going to create a scheduled backup. But please, feel free to do so if you fancy!

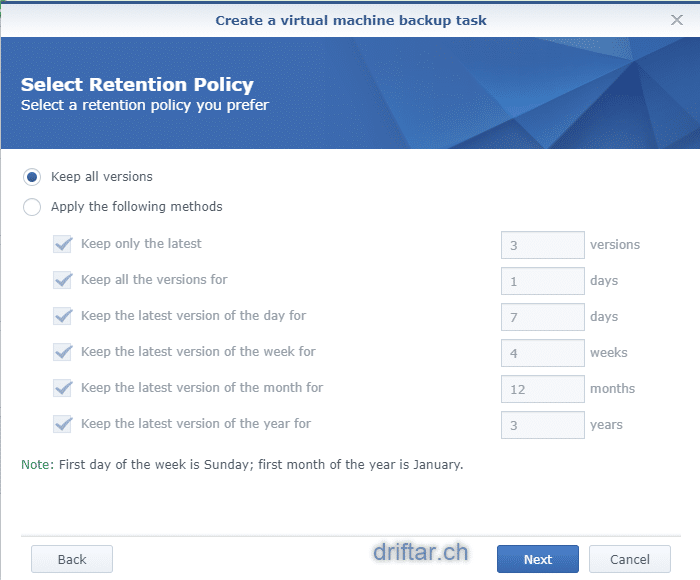
I’m just clicking through the assistant, I’m going to keep all versions. In my case, I have only one because I’ve set up a manual backup task.
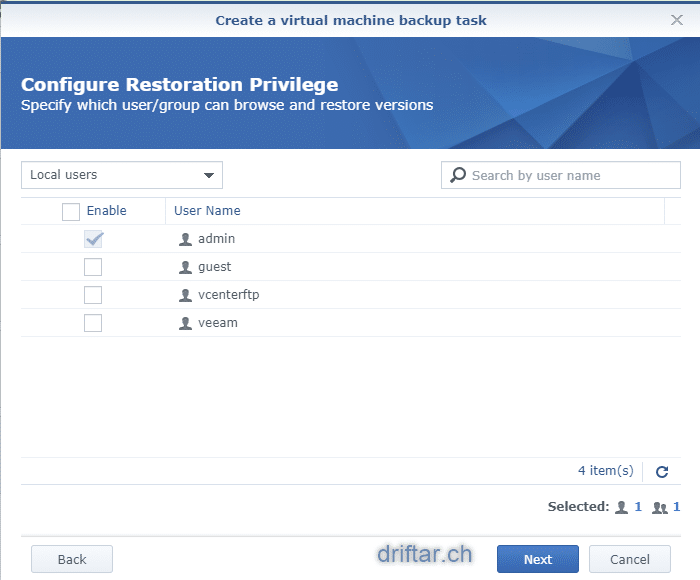
Next, enable a user with restoration privilege. This user will be able to do a restore.
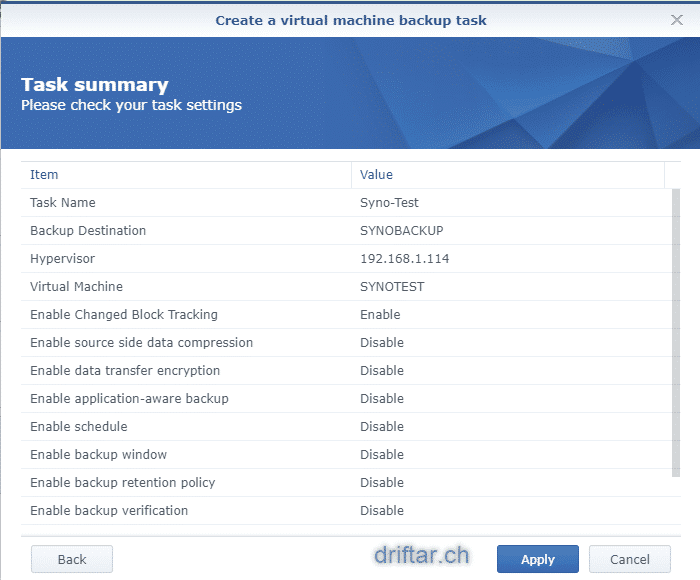
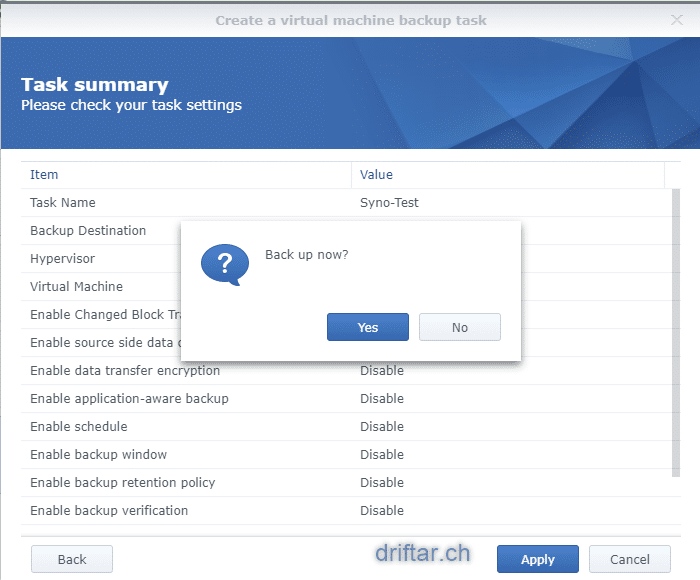
Check the task summary to review if everything is as you like to configure it. If all is fine, click “Apply”.
You will be asked if you’d like to back up now. Why not? It’s a manual task in my example here, and I would start it anyway after the configuration.
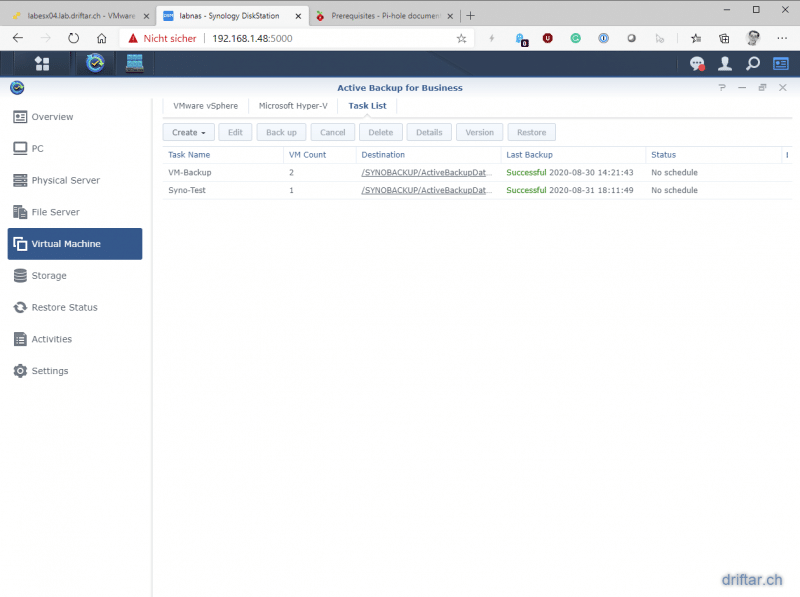
On the “Task List” tab you can see the progress of the backup. We will wait until the backup has been completed successfully.
Restore the VM now to Synology VMM
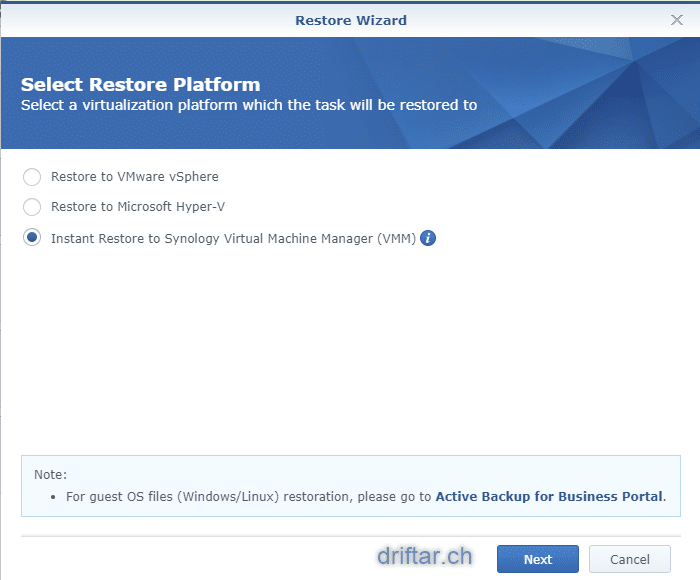
Now we’ve got a fine backup of our VM(s). To be able to run them in Synology VMM, we have to restore it. And we can restore it directly into VMM. How cool is that?
Click the VM you just clicked to create a backup task. Click the “Restore” button above the VM list. The restore wizard will start and guide your through this task.
Mark the radio button to instant restore the VM to Synology VMM.
Select the appropriate restore point. In my case there’s just one because I only have one due to the migration project.

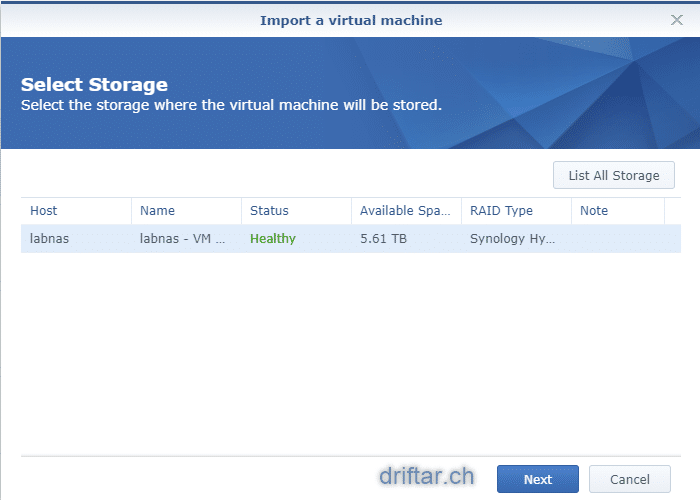
Select the storage where the VM should be restored. I only have one volume on my test NAS.
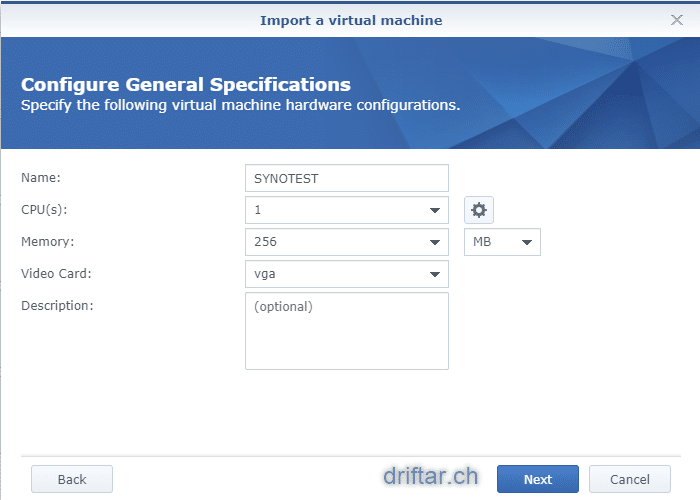
Enter a name for the VM and adjust CPU and memory settings. The restore wizard will show the same values the VM had initially. But that might be too much for a Synology NAS…
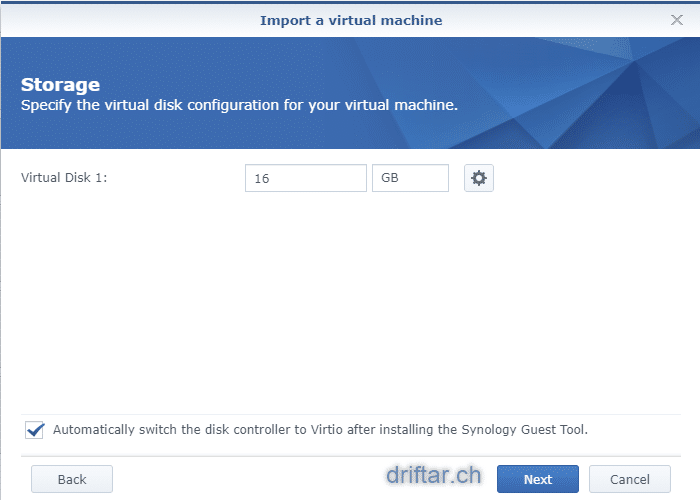
Set the disk size of that VM. Also this value is the original value the VM had on ESXi.
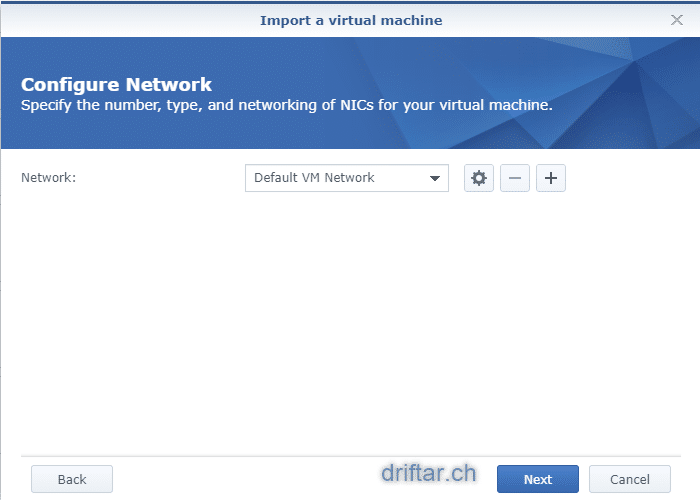
Next, select the appropriate network for your VM. I’ve excluded the part of creating a network when installing and configuring Synology VMM. More information regarding Synology VMM is available on their knowledge base.
Some other settings can be adjusted, but in our example here it’s not necessary. You could, for example, attach an ISO file to boot a VM from it, or change the start-up behavior.

Assign now user permissions which will enable a user to power on/off or restart a virtual machine through VMM.
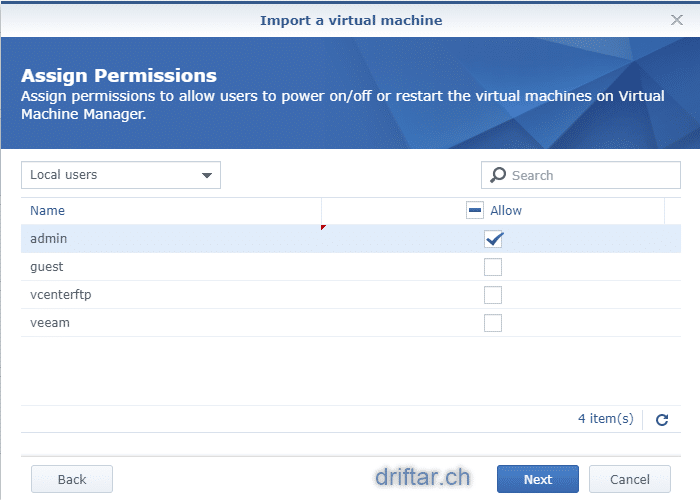
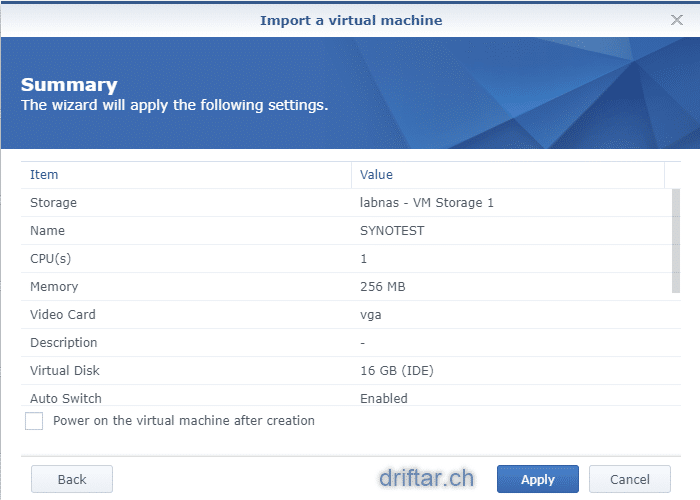
Check the summary to review all settings, and click “Apply”. The restore will start now.
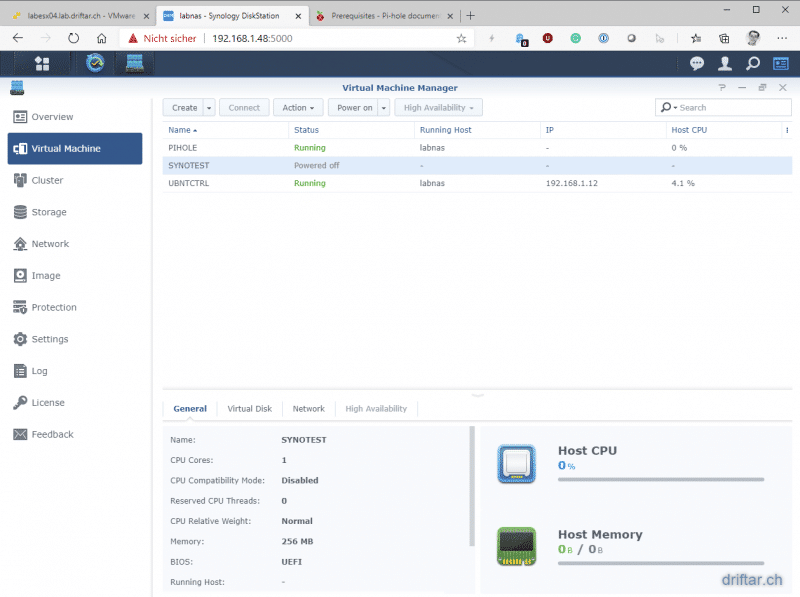
In my example, it was only a small VM, and the restore was done like immediately. When I wen’t back to the VMM, I already saw that the VM is waiting there for me to be powered on.
Finishing tasks
Networking issues
When you’re in the Synology Virtual Machine Manager, you can now power on the VM. Just a second later, you can click the “Connect” button to open the VM web console and see what’s going on. It will look similar to this:
In my case, I had networking issues, with both virtual machines after doing the restore. The VM was offline and didn’t get a DHCP IP address. The reason was the network interface. When the VM was running on my ESXi host, the interface was named “ens192”. That was the reason the VM didn’t come online and didn’t get an IP address. I had to rename the interface to bring it back online.
In my example, a CentOS 8.2 VM, I was able to do this with the GUI tool “nmtui”. I had to edit


Installing Synology Guest Agent
VMware provides the VMware Tools, and Microsoft provides their Guest Integration Components. Synology also provides their own guest tools, at least for Windows, through an ISO file. For Linux, as in my example, you can just download it through the Linux package manager.
Installing Synology Guest Tool on your virtual machines in Virtual Machine Manager (VMM) can help enhance their performance and make managing easier. After the installation, you will be able to do the following:
- Shut down/restart virtual machines in VMM
- Detect IP addresses of guest operating systems
- Take file system consistent snapshots (Refer to this article for more information)
You can find more information about the Synology Guest Tools in their knowledge base article.
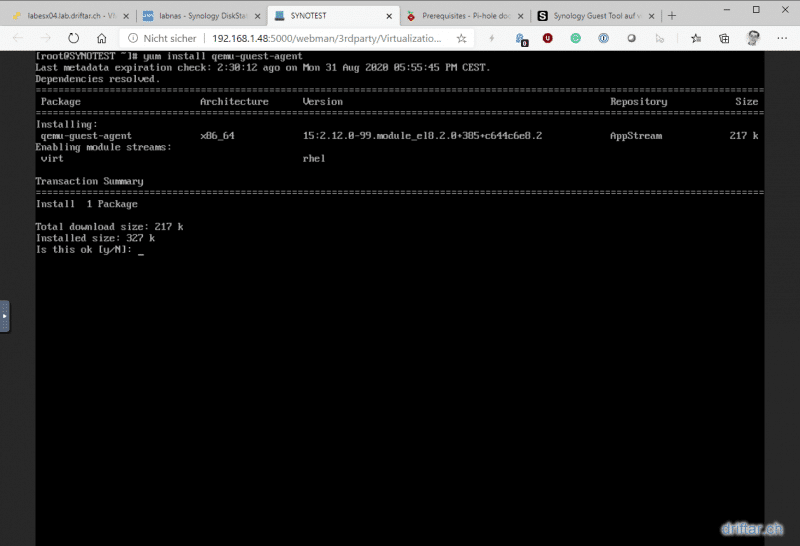
I’m using a CentOS 8.2 Linux, in my case I had to execute this command:
yum install qemu-guest-agent
For Ubuntu, this command will help (as my “production” VMs are based on Ubuntu):
apt-get install qemu-guest-agent
A restart is usually not needed, you should get the visible feedback in Synology VMM closely after installing the guest tools. There you should see that the guest tools are now installed (Guest Agent: Running) and when you see the IP address.

And that’s basically it. This guide should help you creating a backup of your VM, running on an ESXi host, to a Synology NAS, and restore it directly into Synology Virtual Machine Manager.
too bad this is not possible from a bare metal backup.
Hi Vince,
It looks as it is possible, as it is mentioned in the Synology KB here:
https://kb.synology.com/en-us/DSM/help/ActiveBackup/activebackup_business_physicalserver?version=6
You have to scroll down until the end where you should see the information:
Quote:
“Instant Restore to Synology Virtual Machine Manager (VMM): During urgent cases when tolerance for downtime is limited, mounting the backed-up image of your physical server on Synology Virtual Machine Manager (VMM) and power it on to continue your business could be your choice. To mount the backed-up image of your physical server on Synology Virtual Machine Manager, Synology Virtual Machine Manager requires to be installed on the same DSM.”
Thanks!
Seems we were both writing the reply at the same time 🙂
** EDIT, you can restore from ABB to VMM…. but NOT with a bare metal PC, you must first change machine type to server.
Then from ABB -> Pyhsical server -> restore.
I did this exactly the same way, works without problems.
But do you have an idea how to get the backup task deleted from Active Backup afterwards?
It says when I want to delete:
Cannot delete task xxx. The Device is instantly restored to and then managed by Synology Virtual Machine Manager.
OK, that’s true, but this task is finished and I really wonder where are dependencies between them?
Any idea?
I can also not delete the Hypervisor because the task must be deleted before.
To be honest, I don’t know. It seems weird that you can’t delete the task. But it might be obvious that you can’t delete the hypervisor because there is a task relating to it.
I have to check this in my lab. I wasn’t aware of any problems during the tests and the writing of this blog post.
It would be great if you can test this and give me some feedback.
Thanks!
We’re not alone with this problem 🙂
I just tried it again today in my lab and was able to A) reproduce the issue, but also B) solve it.
I stumbled across a Synology forum post here:
https://community.synology.com/enu/forum/6/post/142054
1) Open Synology Active Backup for Business
2) Click “Restore Status”
3) If there is a task doing something (but in fact it’s doing nothing), delete this task
4) Now click “Virtual Machine” and click the “Task List” tab
5) Now you should be able to delete the backup task, and finally remove the hypervisor.
“Cannot delete task xxx. The Device is instantly restored to and then managed by Synology Virtual Machine Manager”
Anyone found a solution to this? It seems you cannot remove the ESXi from Active Backup due to the above issue so you cannot used this method to migrate your VMs from ESXi to VMM without dependencies on source. A migration is not complete if the migrated data relies on source data (source hypervisor being present in Active Backup) for it to function.
What are people supposed to do if want to move away from ESXi completely
Hey Zed,
Check out my recent answer to toastis question:
https://www.driftar.ch/2020/09/01/an-easy-way-to-quickly-migrate-a-vmware-vm-to-synology-vmm/#comment-2738
There might be a restore task still idling around and doing nothing, but preventing you from deleting the backup task and removing the hypervisor.
Cheers mate!
How do you backup a VMM VM?
It seems to create the files “hidden”…
Hi Tak,
Within the Synology Virtual Machine Manager you will find the “Protection” menu item, where you can set up actual backups of virtual machines that are running on your NAS.
But yes, you’re right, you don’t “see” these backups in the Synology File Station because these are hidden (maybe for a good reason). You may connect through SSH to manually get some more information about the file location and file size of your current backed up VMM VMs.
Best regards,
Karl
Hey Karl,
Sorry to resurrect an old post; this is just the best post I’ve found on the subject of using Synology ABB restoration for migration. Thanks for the tip about network interfaces needing to be renamed. It saved me a lot of time!
After the Instant Restore, I found that the virtual disk is in an incompatible format for backups or replication (why they’re hidden re: above comment). So, I dug through the backup location and found the VMDK. I imported that as a disk image and created a VM from it. I can now fully manage it in VMM – protection and all.
-Keegan