Since few months i’m working with VMware vSAN in my own vSphere homelab. And i tell you, i really like vSAN! If you’re looking for an easy, affordable, very well performing and scalable storage solution, there you go. VMware vSAN is ready to take all your workloads. It doesn’t matter if it’s just your nested lab environment, or something more serious like a Virtual Desktop Infrastructure (VDI), big data or business critical applications like SQL databases and Microsoft Exchange servers.
How does vSAN work?
VMware vSAN takes the local disks of an ESXi hosts and puts them in a storage pool, a so called disk group. Put all disk groups of your ESXi hosts together in a cluster and you’ve got a vSAN datastore. It’s that easy. And it’s also easy to make changes to those disk pools. Add disks, remove disks, or change the complete layout of a disk pool.
vSAN max component size
When i recently rebuilt my vSphere homelab i figured out that there was an issue with the disk configuration:
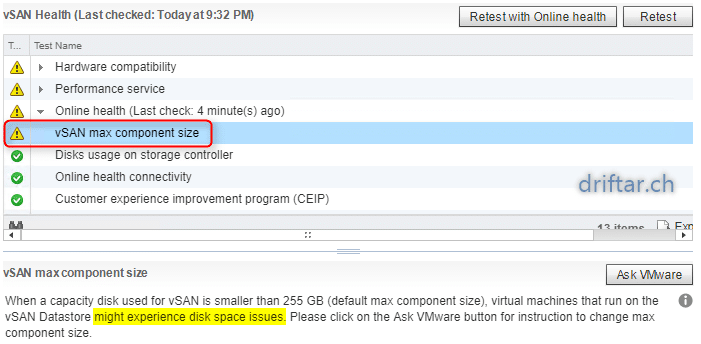
When a capacity disk used for vSAN is smaller than 255 GB (default max component size), virtual machines that run on the vSAN Datastore might experience disk space issues. Please click on the Ask VMware button for instruction to change max component size.
I don’t like disk space issues. So i better fix that. You probably saw the small “Ask VMware” button on the right hand side. If you click this button you will be directed to a VMware knowledge base article which describes in detail what happens here. Long story short, when vSAN stores virtual machine objects, it creates components whose default size does not exceed 255 GB. However, when you use magnetic disks that are smaller than 255 GB, these storage components might end up to be larger than actual underlying magnetic disks.
You could change some parameters like ClomMaxComponentSizeGB or you could change the disk layout, so to speak add bigger disks. So did i. I deleted each disk group, changed the disk size and reclaimed the changed disks for vSAN. The following steps will guide you through this process.
How to delete a disk group
-
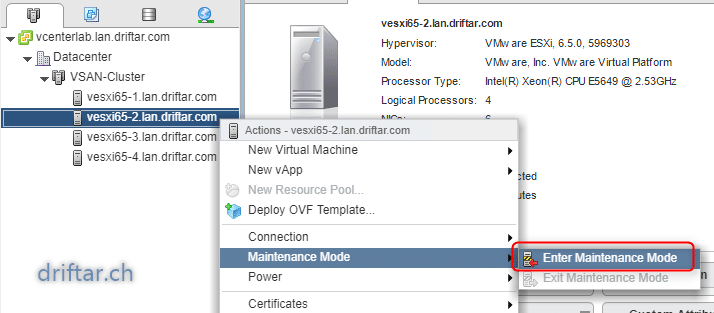
First, enter your ESXi hosts in maintenance mode.

-
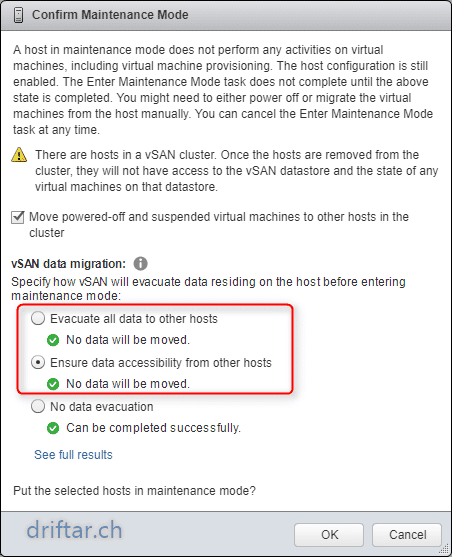
Specify how vSAN will evacuate data residing on the host before entering maintenance mode.

I didn’t have any VM running on the vSAN cluster because the lab was rebuilt from scratch.
If you’ve got VMs running, then please make sure you click “Evacuate all data” or “Ensure data accessibility” to make sure there is no data loss.
-
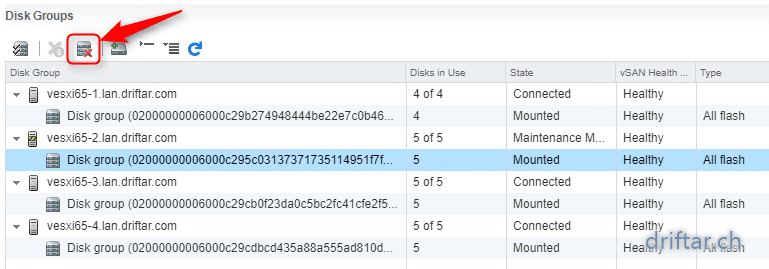
To delete the disk group of the host in maintenance mode, click your vSAN cluster => Configure => Disk Management.

-
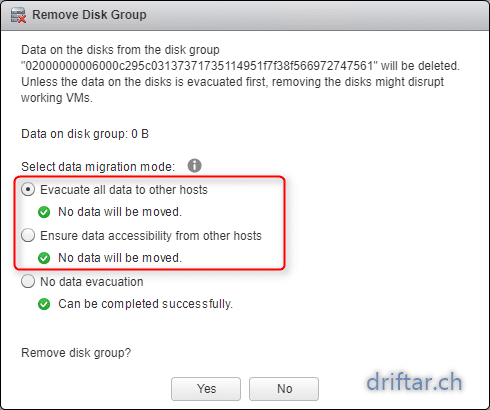
Again, confirm in which way the vSAN cluster should evacuate the data residing on the host.

Now go ahead and change the disks in your ESXi hosts. In my case i just increased the size of the caching disk and also the capacity disks, but also deleted one of the capacity disks.
How to claim the new / changed disks for vSAN
-
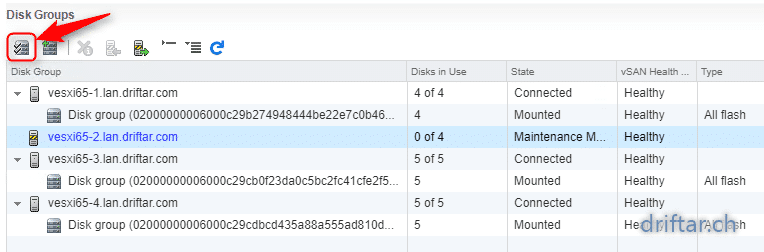
After you changed the disks size (or added / removed disks) you can claim these disks for vSAN.
To do that, click again on your cluster => Configure => Disk Management.

-
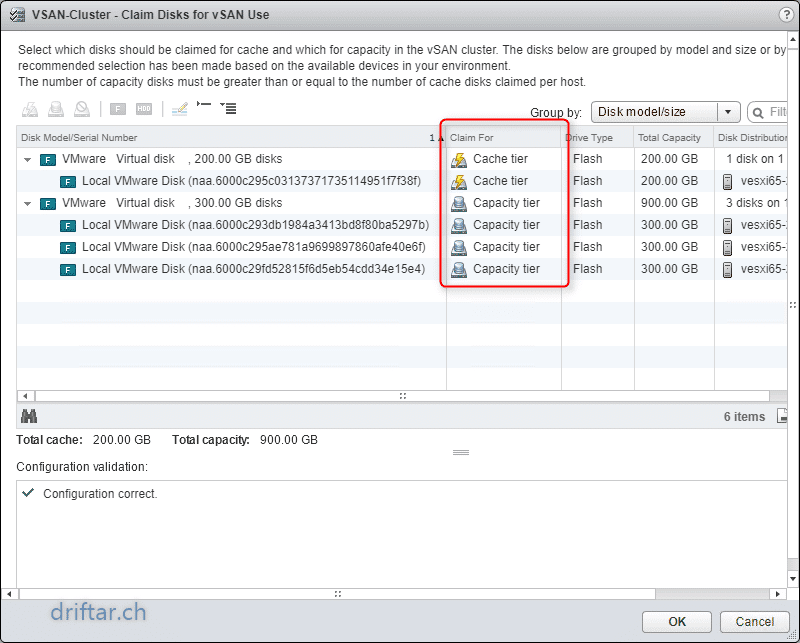
Please make sure that you choose the correct disk / tier. Usually the smaller (and only one) disk is the caching tier.
HINT: Only one flash disk as caching device is possible per disk group.

That’s it. No tricks nor magic. Just easy vSAN management.
Please keep in mind:
When you add disks to a vSAN cluster with enabled deduplication and compression, specific considerations apply.
-
You can add a capacity disk to a disk group with enabled deduplication and compression. However, for more efficient deduplication and compression, instead of adding capacity disks, create a new disk group to increase cluster storage capacity.
-
When you remove a disk form a cache tier, the entire disk group is removed. Removing a cache tier disk when deduplication and compression are enabled triggers data evacuation.
-
Deduplication and compression are implemented at a disk group level. You cannot remove a capacity disk from the cluster with enabled deduplication and compression. You must remove the entire disk group.
-
If a capacity disk fails, the entire disk group becomes unavailable. To resolve this issue, identify and replace the failing component immediately. When removing the failed disk group, use the No Data Migration option.
I hope this guide will help you to make changes to your disk groups. I’m happy if you let me know that with a comment 😉