Recently i ordered the last piece of hardware for 2016 for use in my VMware vSphere homelab. I failled in the fourth VCP exam in December 2016 and that gave me the kick to extend my homelab a little, and look into storage stuff in detail.
Thoughts and requirements
I had some ideas in mind and received good inputs from my fellow homelab colleagues, but there are so much possibilities for extending storage. There are various NAS manufacturers and storage vendors. You can “extend” your storage even virtually with some virtual storage appliances. But i have to keep my budget small, well as small as possible for my needs. I don’t have a sponsor (would be nice indeed). So for the extension of my homelab any storage device other than a NAS costs way too much money. And i want to use real physical existent storage, so also a no-go for virtual storage appliances (which also requires some physical storage in the back end). This made the field of choice at least a little smaller, not much, and i’m still kicking out some devices to find the one which suits my needs the best.
Another point is network connectivity. My decision was to have four network ports on this specific NAS device. It should support link aggregation, load balancing and failover. The NAS device should also support NFS and iSCSI protocols so i can reach it from my ESXi hosts and use it. It would be the best for the integration into my homelab when i’m already familiar with a specific kind of device / operating system / manufacturer. Yes, i know, that’s not a real decision maker, at least not the best. But why struggle if there exist easy to setup systems? And last but not least it should be supported within VMware, for example with VAAI.
With all this points from above i decided to go for a Synology NAS device.
The hardware
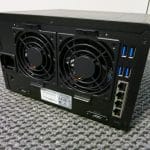
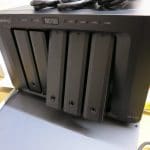
The base system is a Synology DS1515+ NAS device. The technical specifications:
| CPU Model | Intel Atom C2538 |
| CPU Architecture | 64-bit |
| CPU Frequency | Quad Core 2.4 GHz |
| System Memory | 2 GB DDR3 |
| Memory Expandable up to | 6 GB (2 GB + 4 GB) |
| Drive Bay(s) | 5 |
| Hot Swappable Drive | YES |
| RJ-45 1GbE LAN Port | 4 |
| VMware vSphere 5 with VAAI | YES |
| VMware vSphere 6 with VAAI | YES |
Details specifications are available here: Synology DS1515+
Disks (capazity / cache)
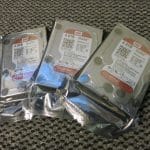
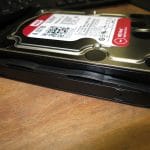
I ordered also three WD Red SATA disk with 4TB each and two Sandisk X400 SSDs with 512GB each. In this configuration i’ll get enough raw storage space (roughly 8TB usable capazity). With two SSD in a Synology multi-bay NAS i can also configure read-write cache (you’ll get read cache only with one SSD).
So let’s get our hands on the hardware…
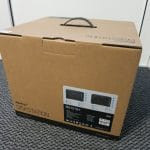
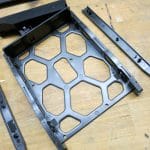
Unboxing, hardware installation
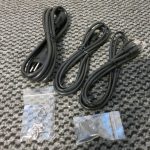
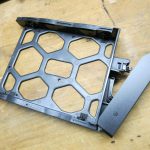
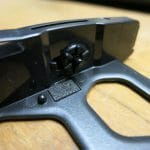
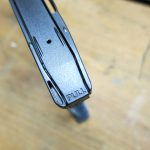
As you might know it from Synology, their setup is really easy. Unpack the NAS device, install the harddisks, plugin power and network. That’s basically it. You don’t need any tools to install the disks, if they are in 3.5 inch format. If you plan to use smaller disks, like SATA 2.5 inch or SSD like me, then a standard Philips screwdriver should suit your needs. The mounting brackets have extra holes to mount the 2.5 inch disks. Now let me show you some pictures of the unboxing and the hardware assembly.


Software setup
After powering on the NAS just wait few moments until it the NAS is online. Then open your browser and enter http://find.synology.com to start the software setup. You don’t even need to use the Synology Assistant software anymore. With this web based setup assistant you create an administrator account with a password and define the hostname of the NAS. After this it will setup the operating system (Synology Diskstation Manager, DSM). Some minutes later your NAS is ready for further configuration.
Not counting the time for taking the photos for unboxing and disk installation the whole process of basic setup took about 10 minutes. That’s nothing. You can really safe your time for more important things with a Synology NAS.
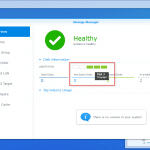
Disk setup
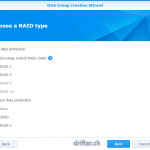
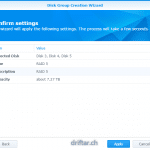
After the disk installation and the basic setup we now create a Raid array. I’ll keep it simple and create a Raid 5 array. I only have three capazity disks, so that will work for me. If you plan to use disk with different sizes (it’s not recommended to do so in a storage array because of wasted space and performance) you can use the Synology Hybrid Raid SHR. This will basically create different Raid stripes on your disks to assure that there is no wasted space. Actually not a bad thing at all.
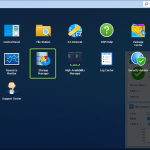
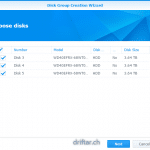
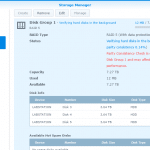
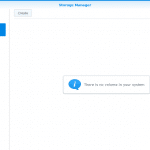
Login with your web browser and the IP of your Synology NAS, enter your admin credentials and open the “Storage Manager”. You will see that there are some unused disks. Let’s use them now.
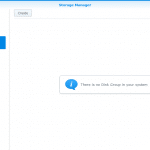
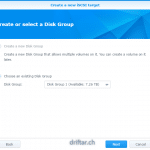
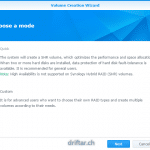
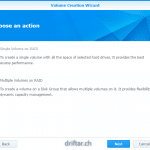
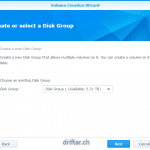
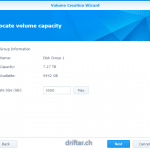
Create a Disk Group
I’m planning to use both NFS and iSCSI. So i don’t want to lose storage space when i create just one big volume. So let’s first create a disk group and configure the Raid level and let us then move on step by step.
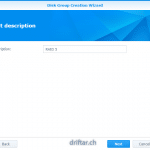
In the Storage Manager click on “Disk Group” and click “Create”. Follow the assistant to create a disk group with a Raid level. After finishing the assistant your NAS device will do a check of the parity consistency. Depending on the disk size and Raid level it will take some time. But you can move on with further configuration, no worries.

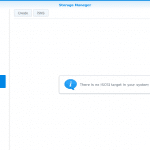
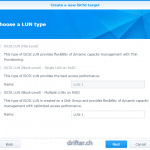
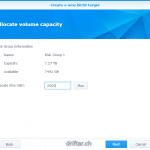
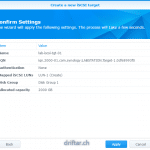
Create an iSCSI Target and LUN
In my case i’m planning to spend one half of the available space to an NFS volume and the other to an iSCSI LUN. Before we can start with that we need to create a volume. Let’s do that now.
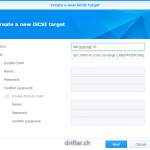
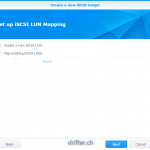
In your Storage Manager, click on “iSCSI Target” and then click “Create”. Follow the assistant to create your new iSCSI target and the first LUN on an existing Disk Group.
In my case i don’t push the allocated size to the maximum. I want to create other LUNs (probably when using the NAS in the lab) and probably playing around with extending some existing LUNs.
Hint: if you already created a volume and used the whole space for this volume, your only iSCSI LUN option is a “File-Level” LUN, there is no Block-Level option available.
I will configure the security options later when i’m ready to integrate my new NAS device into my vSphere homelab. At the moment we just basically set the things up so we can use it afterwards.
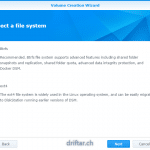
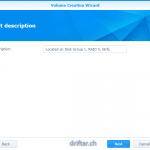
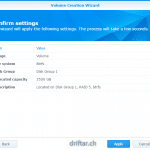
Create a storage Volume
Now we have our first iSCSI target and LUN ready. Let’s move on to NFS. NFS is not a block-level filesystem but a file-level system. For this we need to create a volume on our Raid disk group. Let’s do that now.
On the left hand side in the Storage Manager, click on “Volume” and then click “Create”. Follow the assistant to create a volume which suits your needs. After creating the colume, Storage Manager does also a consistency check. But no worries, there won’t run two checks parallel. It’s the same check as we triggered when we created the Disk Group.
Further configuration
Network
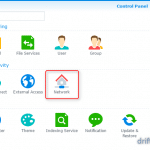
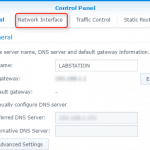
Now since we’ve created an ISCSI Target with a LUN and a volume for NFS too, we can go on with the further configuration of our NAS device, like IP address etc. You’ll find the required assistants in the Control Panel via the NAS website (http://[nas-ip-address]:5000). In the Control Panel you click on the Network icon. Depending on your NAS model you will find one or more network ports on the tab “Network Interface”.
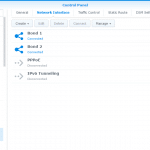
My DS1515+ has four network interfaces. I created two LACP bonds with two network ports each, one for NFS (and for the web access too) and another one for iSCSI. Be aware that, depending on the type of bond / trunk you want to create, you have to create a trunk on your network switch too. Otherwise your network goes nuts.

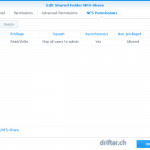
NFS Permissions
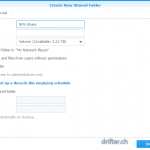
Looking forward to the NFS usage for my homelab, we have to create a shared folder on this NAS and set the proper permissions, so that our ESXi hosts can access these shares. Again in your Control Panel, look for the “Shared Folder” icon. Click on it. Click on the “Create” button and choose “create”. Follow the assistant to create a network shared folder. Add your admin user for read / write permission, so that you can access the folder if something gets stuck or so.
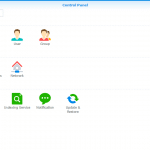
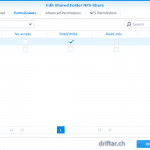
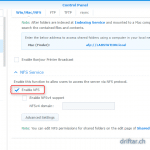
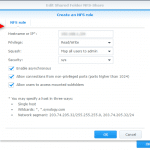
Before we can add the NFS Permissions we have to enable the NFS service. To do so, go back to your Control Panel, and search for “file services”. Click the result from the list. Scroll down to the bottom, click the checkbox for “Enable NFS” and click “Apply”. Easy as pie. Now go back to your newly created shared folder, click on it and click “Edit”. Click the tab for “NFS Permissions” and setup the permissions as you need it.
vSphere homelab integration
Today evening i tried the first steps to integrate my new Synology NAS into my homelab. I struggled to be honest. When you’re not working with such stuff each and every day, you have to read much guides, and sometimes there is also some trial and error, at least if you try to connect to the wrong IP address as i did, until your light bulb above your head goes on with the solution.
But lets close for today. I’ll update this post as soon as i’ve got a little more time. Then i’ll go a little more into detail how to add an NFS and iSCSI storage to your vSphere environment.
So stay tuned!
As someone who has started studying for VCP I would be curious to know what tripped you up on the exam.