Today i’d like to provide you another one of my straight-forward walk through guides. Everybody is talking about cloud. Is it either a private cloud or a public cloud, or probably something between (a hybrid cloud, you don’t say…). So many people and companies want to have their stuff migrated to the cloud or are already using cloud technologies.
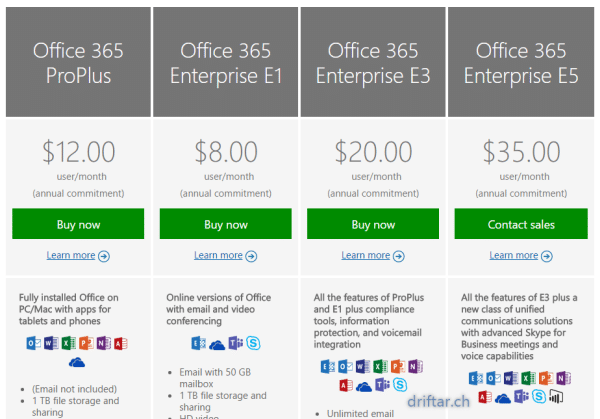
Microsoft Office 365 is also one of these cloud technologies. It’s your mail hosted in the cloud. It is available in different sizes and versions, combined with powerful office and collaboration applications (Word, Excel, Outlook, Skype for Business and Sharepoint Online and so on) or just the mail part of it. You can choose whatever you need, and at very attractive pricing conditions.
Compare the Microsoft Office 365 business plans here:
https://products.office.com/en-us/business/compare-more-office-365-for-business-plans
But today we don’t talk about how cool and great this Office 365 stuff is. We wanna talk about how you backup your mails. Your mails are stored somewhere in the cloud (actually a physical datacenter located somewhere). I don’t know if Microsoft does backups for YOUR mails. It’s always better to do that by yourself. Then you know it’s working and you can recover in case of a user deleted something, or whatever can happen with these mails.
So let’s talk about Veeam Backup for Office 365.
This nice piece of software from Veeam is now available since a few days. It’s working very fine, and it is simple to install as you know that from other Veeam software. As mentioned above, this post should guide you through the simple setup and configuration of Veeam Backup for Office 365. When i don’t count the time it took to take screenshots, then the installation is done in a few minutes. Promise. Let’s dig into that.
Step 1 – Setting up Veeam Backup for Office 365
Setting up Veeam Backup for Office 365 is done in a hurry.
-
Go to the Veeam website and click on “Downloads” (or click here).
Hint: Login / Registration required.
-
Unpack the Zip-File on your server.
Hint: Probably on your Veeam Backup server to keep things together.
-
Now double click the installer MSI package and follow the setup assistant.
-
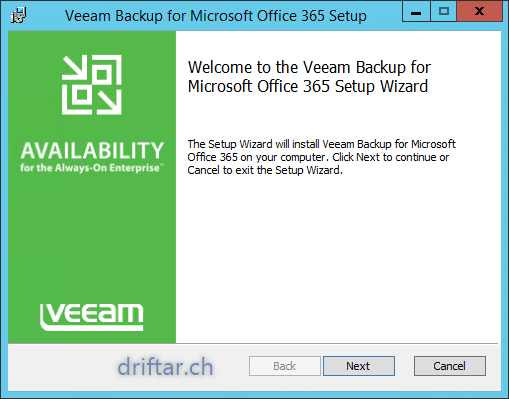
On the Welcome screen click “Next”.
-
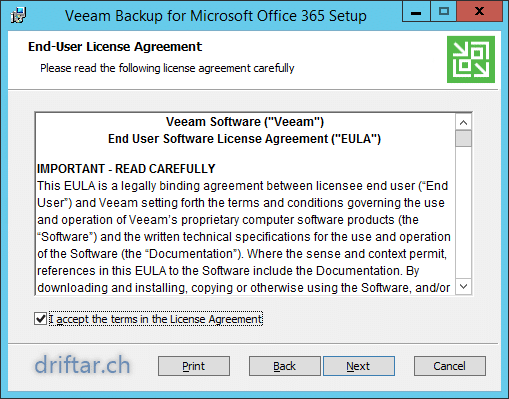
Read and accept the EULA (End-User License Agreement). Click “Next”.
-
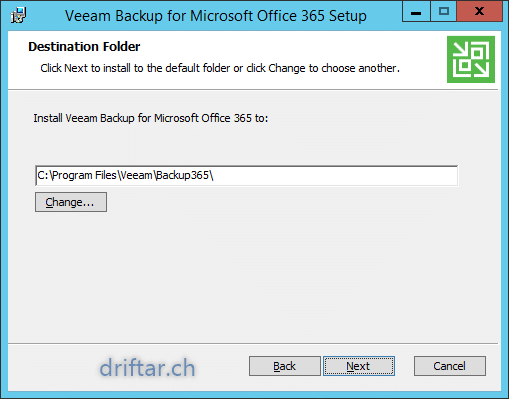
Choose the installation folder. Click “Next”.
-
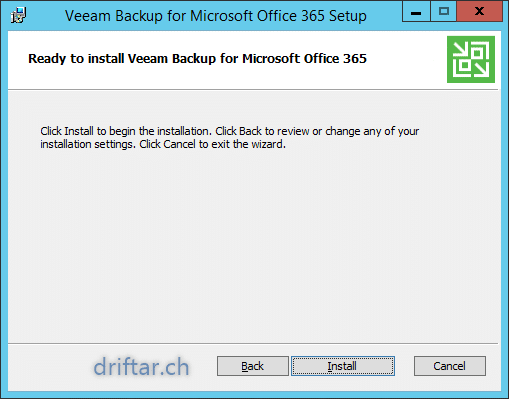
Now click “Install”. The software will now be installed.
-
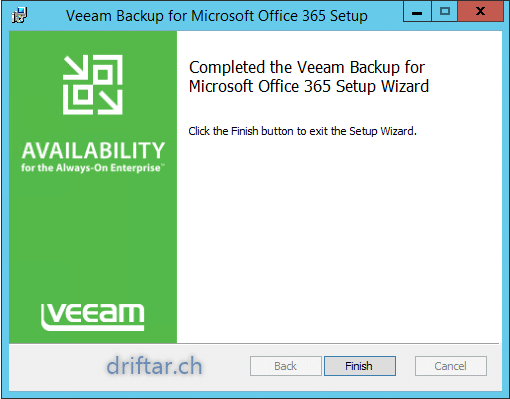
Click “Finish” to exit the setup assistant. That was quick, wasn’t it?.
-
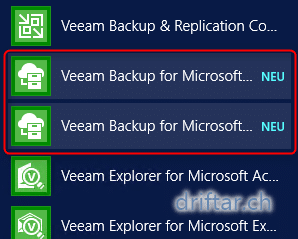
You will find the new application icons in the start menu on your server.
Aaaand your done.
Step 2 – Add your organization
Before we can backup anything Office 365 related, we have to add our organization to Veeam Backup for Office 365.
-
To start Veeam Backup for Office 365 just click the icon in the start menu.
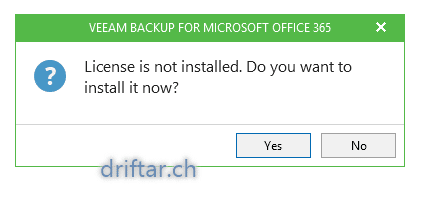
The application prompts you to install your license. Do that.
-
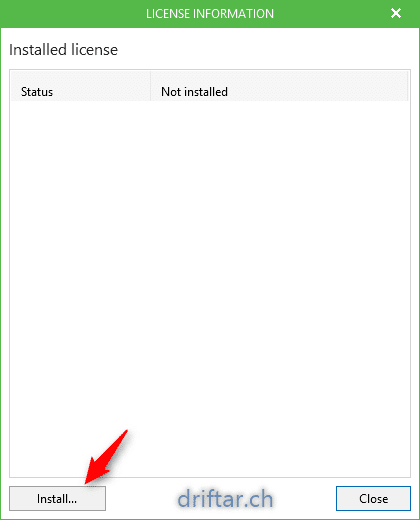
The license information screen appears. Click “Install…”.
-
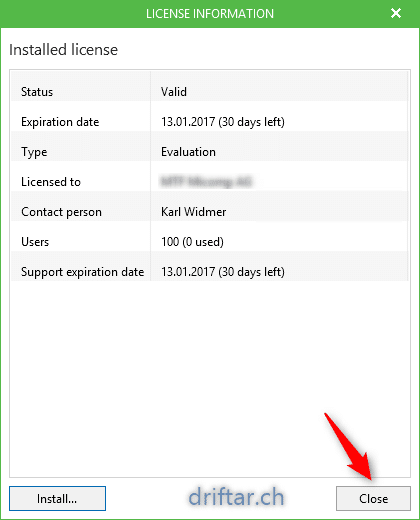
Search for your license file (*.lic) and add it here. Then click “Close”.
-
If you’re testing the software the you will receive the trial license warning.

-
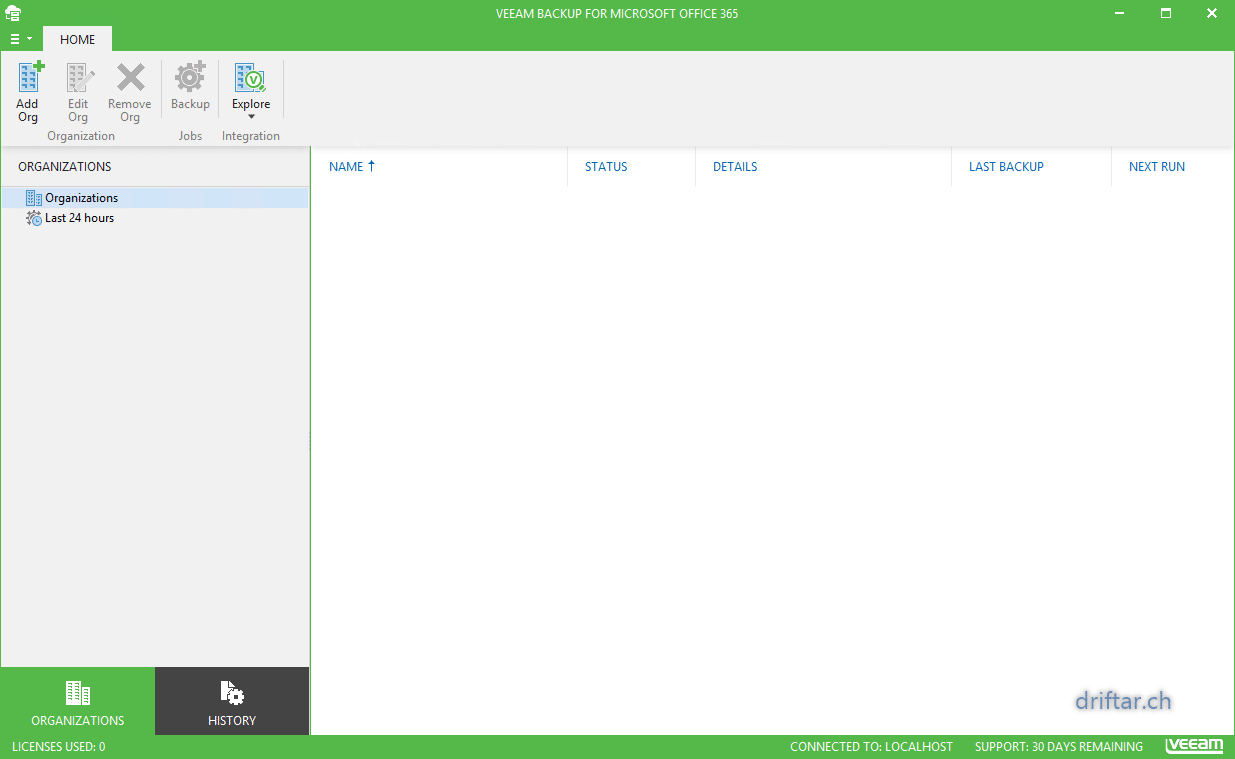
After adding a license we see the main screen of the software.
-
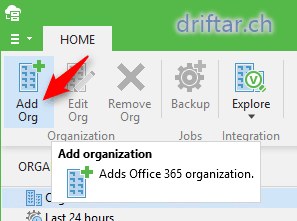
Let’s start with adding an organization.
Click the “Add Org” button in the ribbon bar.
-
Enter your Microsoft Office 365 credentials. Click “Next”.
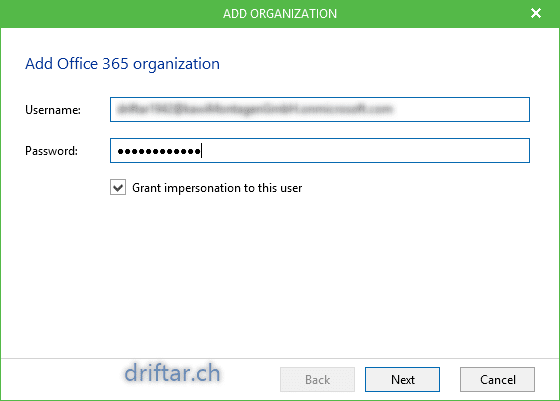
Hint: this credentials / user account should have access to all mailboxes.
-
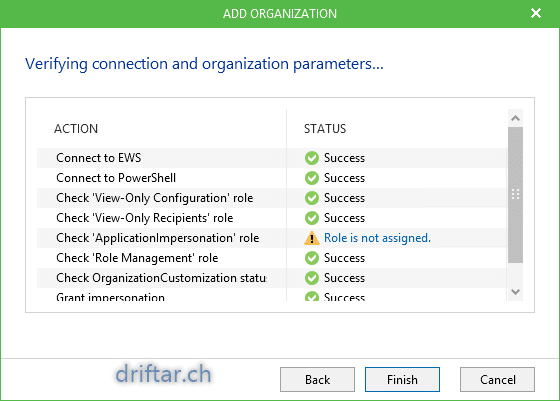
The configuration assistant does some checks. When all is fine click “Finish”.
-
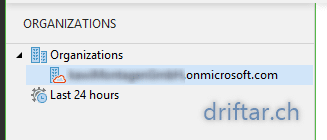
You will see your organization now on the left hand side.
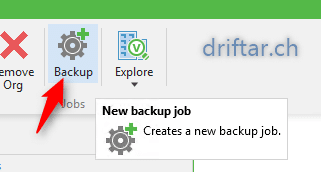
Step 3 – Create a backup job
-
In the ribbon bar click “Backup” to add a backup job. The assistant will start.
-
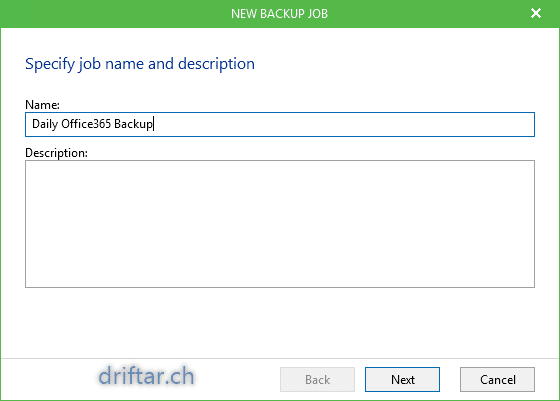
Enter a name and click “Next”.
-
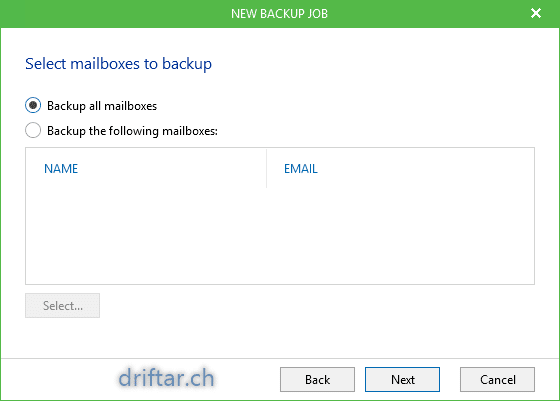
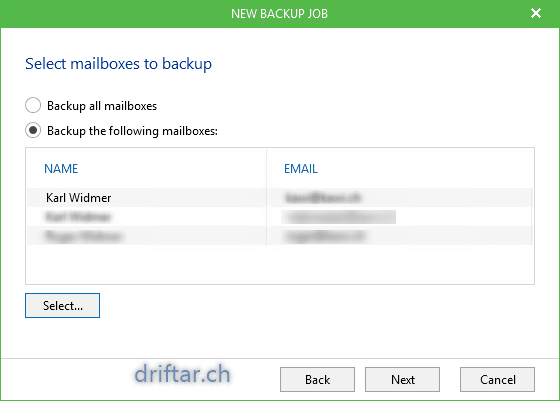
You can backup all mailboxes on your Office 365 account, or you can select the mailboxes which you want to backup.
-
I’ll show you the second option, how to select specific mailboxes.
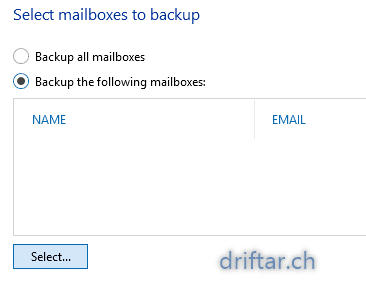
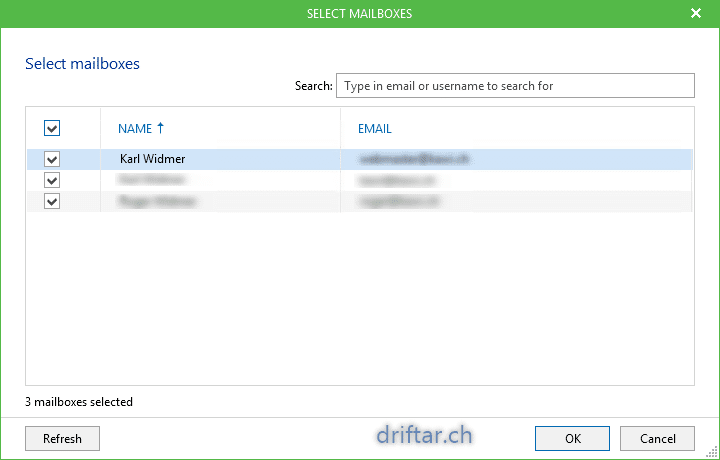
Let’s click the second radio button (“Backup the following mailboxes”) and click “Select…”
-
Click on the checkboxes in front of the mailboxes you whish to select. Now click “OK” to close the assistant.
-
Check if all the mailboxes you want to backup are selected and click “Next”.
-
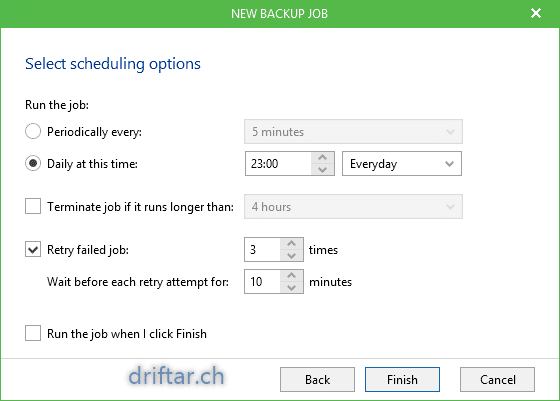
Schedule your backup. Click “Finish” to close the assistant.
But wait… Where did I configure the backup repository as i know it from Veeam Backup & Replication? Yes, you don’t do that when creating a backup job. Let me show you that in the next step.
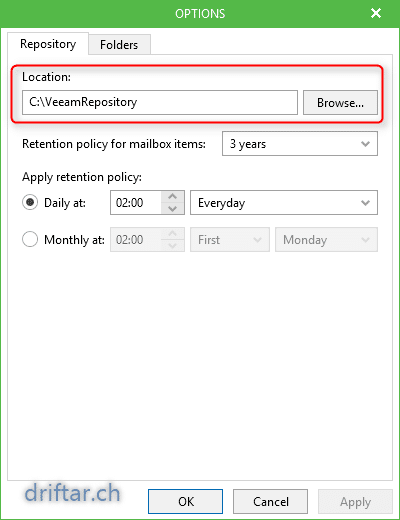
Step 4 – Change repository
As per default Veeam Backup for Office 365 creates a default repository on your local hard disk (default: C:\VeeamRepository). That’s nice when you like to keep it simple and all togehter on one place. You can use that if it’s for example on a virtual server with a lot of space. This server should be backed up separately.
But if you like to change the repository to another storage device, like a NAS or so, then you have to change the path and point it to a UNC path.
-
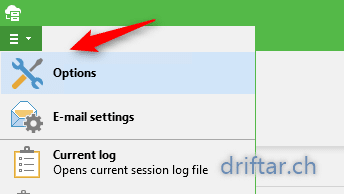
Click the Menu button in the top left corner and choose “Options”.
-
To change the repository path, if you like to, just browse for a directory or add a UNC path to your backup device.
-
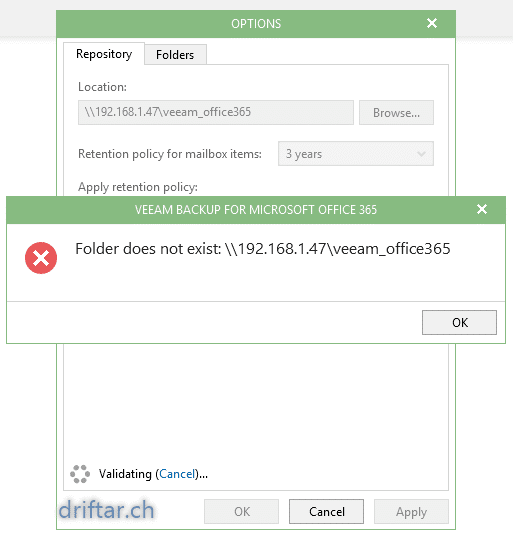
It looks as Veeam Backup for Office 365 doesn’t like my network attached storage device. Let’s troubleshoot that quickly.
-
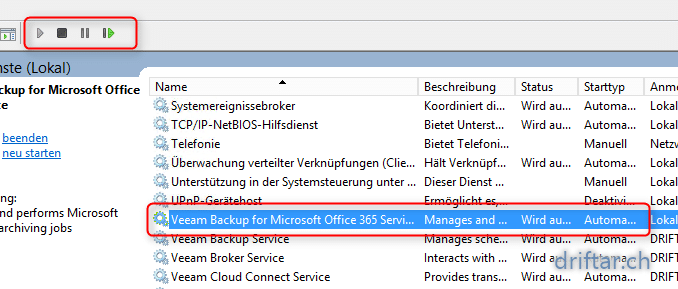
Open Windows services manager and stop the “Veeam Backup for Microsoft Office 365 Service”.
-
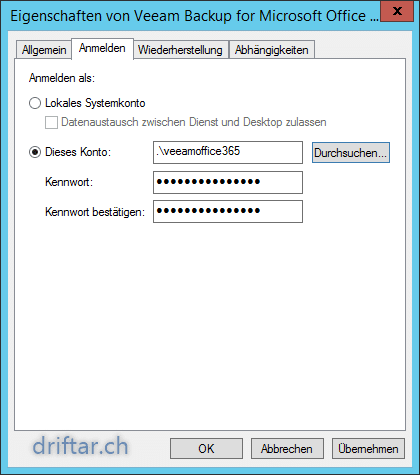
On your server, create a local user account with administrative permissions.
-
If you’re using a Synology NAS device, or probably a FreeNAS server, create there a user account too, with the same username and password!.
Hint: Make sure that this useraccount has read / write access to the shared folder on your storage device where you’d like to point the repository path to.
-
Back on your server, edit the “Login” credentials of the Veeam Office 365 service. Change it to the newly created local user account.
-
After changing the login credentials of this service, start the service and open the Veeam Backup for Office 365 console.
-
Open again the options dialog box.
-
Now enter the UNC path to your network attached storage device.
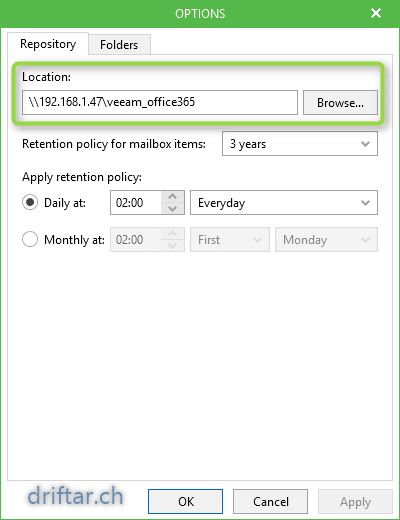
Now Veeam Backup for Office 365 should be all fine and accepting your UNC path.
Conclusion
Veeam released a very nice and handy piece of software to backup Microsoft Office 365 mailboxes. It’s easy to install and configure and ready to use in minutes. Microsoft enables you to work anywhere at anytime with Office 365 and takes much of the management responsibility. But that doesn’t mean that you shouldn’t have a local backup of your data.
More information and pricing
To get more information about Veeam Backup for Office 365 visit the Veeam website.
Get a look at the pricing to. At a limited time you will get an introductory price. And this price is hot!
If you are already using Veeam Backup & Replication Standard, Enterprise or Enterprise Plus, then there as a special offer for you too. You will get Veeam Backup for Office 365 for free! (Two years with Enterprise, one year free with Enterprise Plus and Standard.)