Since the direct restore to Azure was announced with Veeam version 9.5 i wanted to test that and to get some hands on. But there is always either lacking of time or Murphy, which both are against me. This week I’ve been digging into this topic. I wanted to create a working configuration for a direct restore to Azure. Let me tell you this fairy tale…
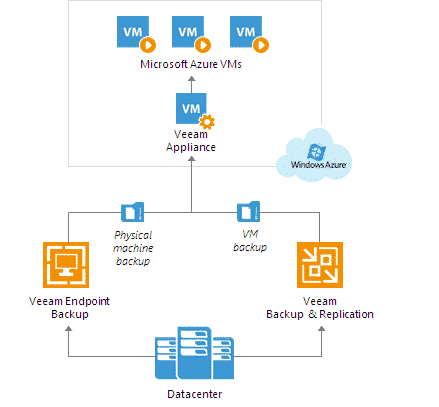
I’m not completely new to cloud computing at all. I did some first steps with Amazon AWS and my first website, i tried out Microsoft Azure when it was relatively new, and i had also some tryouts with VMware vCloud Air. But all was just for testing, looking how that stuff works. No big deal at all. Now with Veeam version 9.5 this new feature called “Direct Restore to Microsoft Azure” comes in handy.
Before you try to just configure the direct restore in Veeam Backup & Replication 9.5 there are some requirements you have to fulfill, otherwise you will do many of the setup assistants twice or more (like i had to do because i didn’t know what exactly are the requirements).
Requirements
- Veeam Backup & Replication 9.5
- Supported in Standard, Enterprise and Enterprise Plus
- Microsoft Azure Account
- Pay-as-you-go or any other subscription based account
- Azure Storage (blob or general storage)
- Azure Virtual Network
Hint: if you organize all of this stuff above in the same ressource group on Azure you will have a better overview (at least then if you are already a heavy Azure user and if you’ve got lots of things on your Azure dashboard).
With this basics above configured we are ready to set the things up in Veeam Backup & Replication.
Setup your Azure Proxy VM
Before we can do a direct restore to Azure we have to setup the proxy VM on Azure. I’ll just go straight forward because i’d like you to show how the things are done. This ist a proof of concept which should show how it works. It’s not a perfectly designed restore solution.
-
Open your Veeam Backup & Replication console.
-
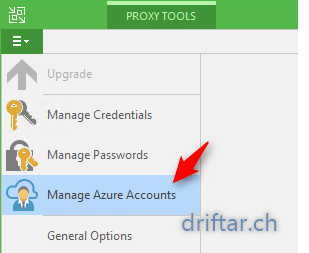
Click on the Options button top left, then click “Manage Azure Accounts”.

-
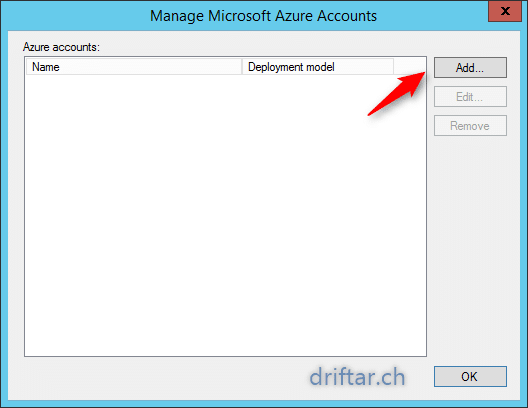
The accounts list will show up. Click “Add”.

-
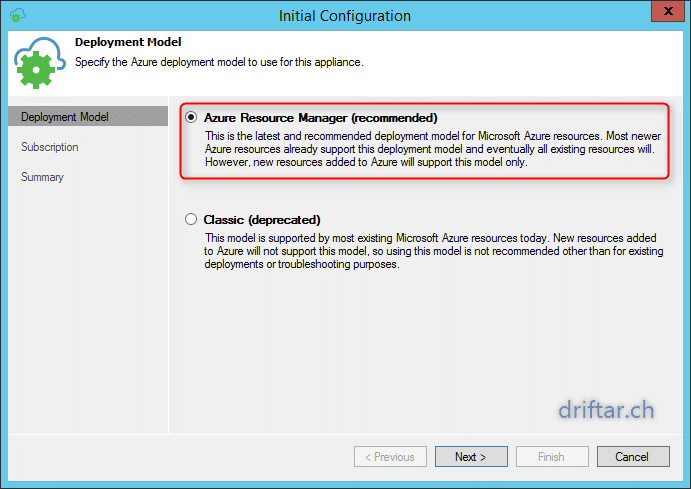
Choose the deployment model. Using “Azure Ressource Manager” is recommended.

-
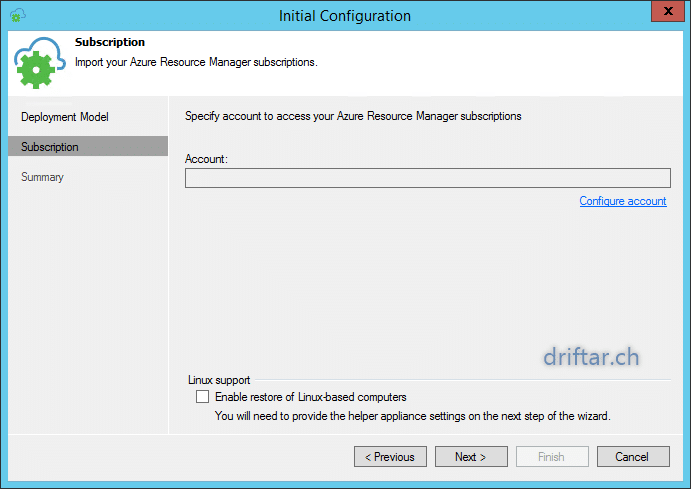
Now specify your Azure account to access the Azure Ressource Manager.
-
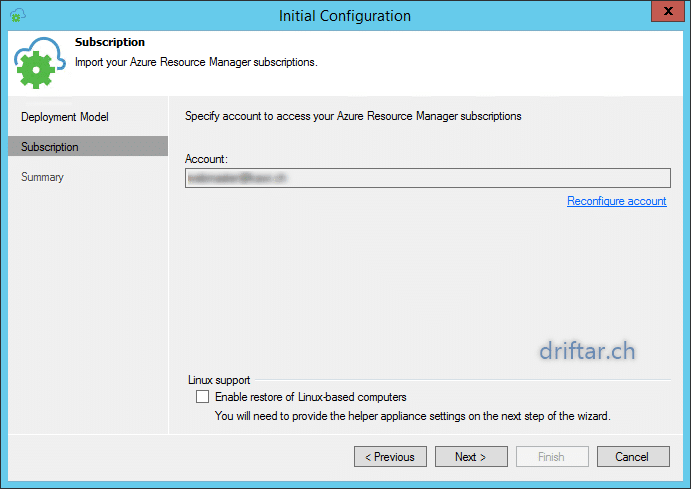
If you’re done, your account will show up in the “Account” box.
Hint: When you want to restore Linux-based computers, tick the checkbox at the bottom.
-
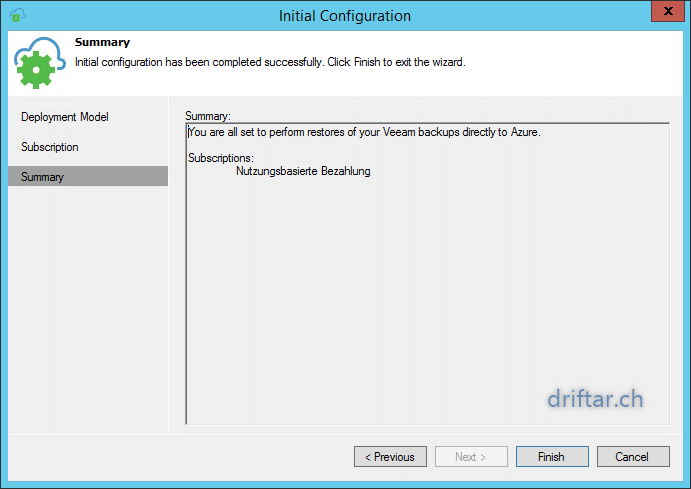
Check the summary and click “Finish”.
-
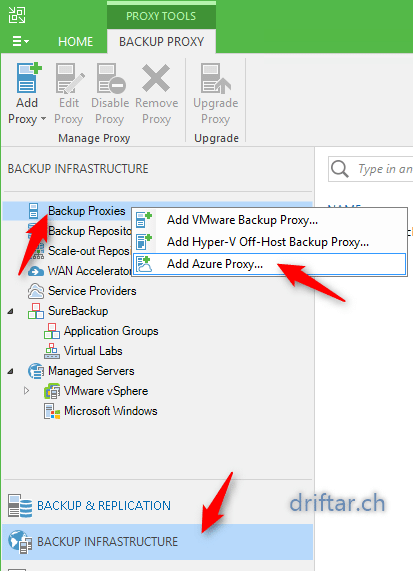
Add now an Azure Proxy to your backup infrastructure.

-
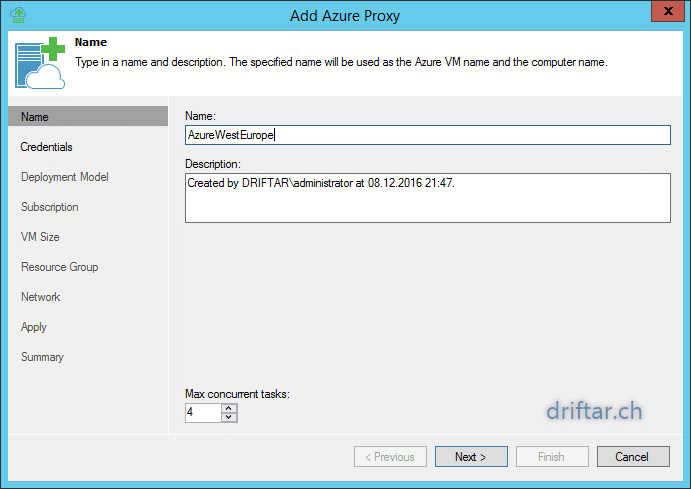
Give it a name.
Hint: No special characters allowed, and don’t exceed 15 characters.
-
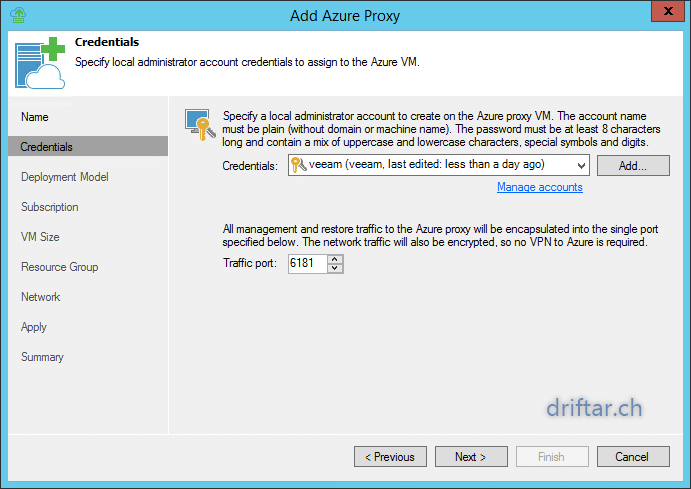
If not already exist, add the credentials for the Azure proxy.
Hint: You can create new and random credentials. These are used for the deployment of proxy on Azure.
-
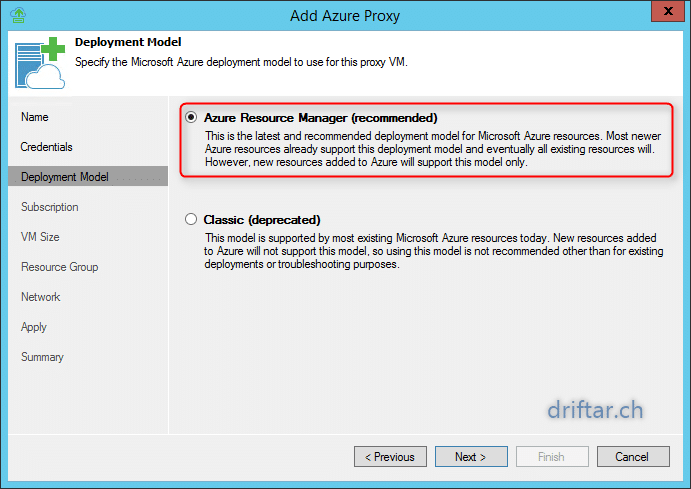
Again choose the deployment model. Using “Azure Ressource Manager” is recommended.
-
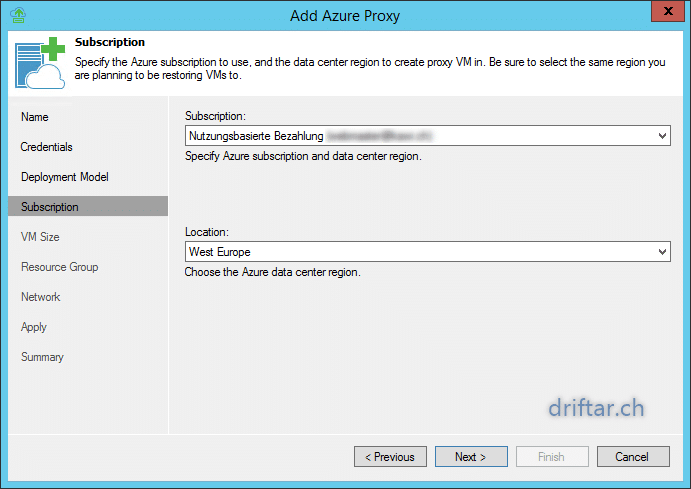
Specify the subscription model which you already use on Azure and choose the location.
Hint: It’s a good idea to choose a location closely to your company.
-
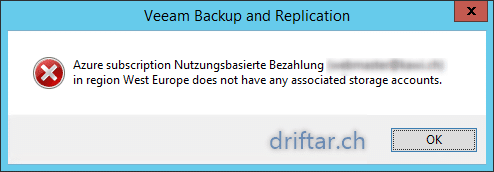
If you receive this error message, then it’s best to close the assistant and check the Azure requirements.

Hint: You’ll need storage and networking on Azure.
-
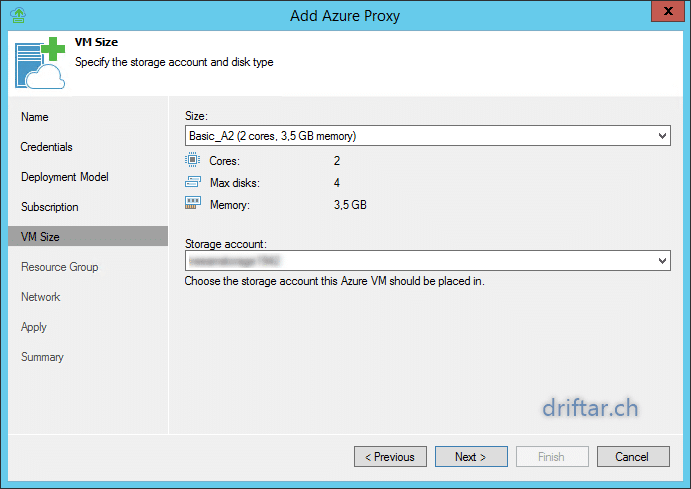
If everything is fine, we can move on. Choose your VM size on Azure.
Hint: Depending on your specific need you can choose smaller or larger deployments.
-
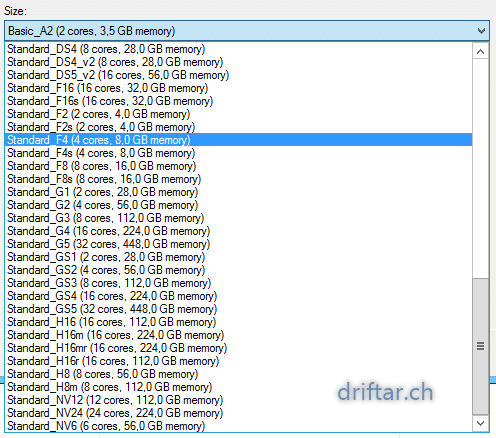
Have a look at this list!

-
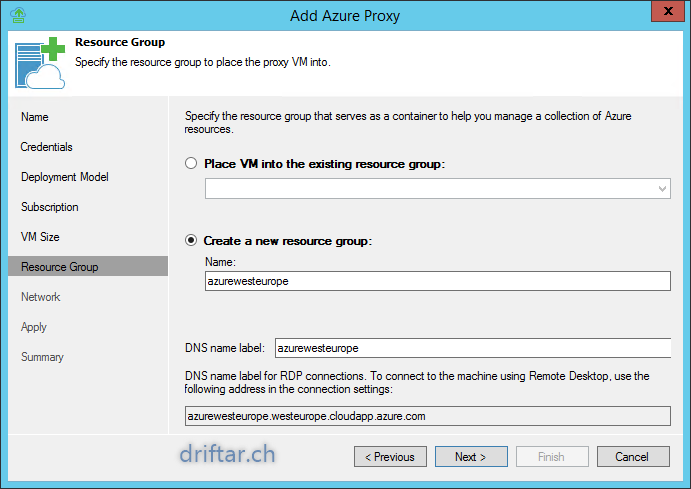
If you have already organized your Veeam related stuff on Azure in a ressource group, you can choose it here. Otherwise create a new one.
-
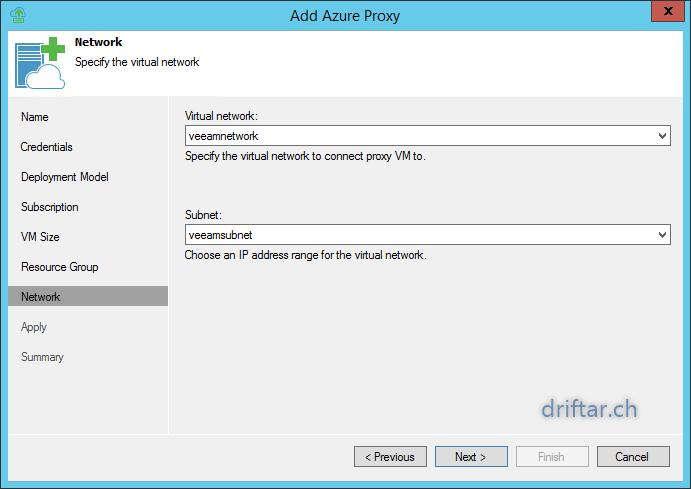
In this step choose your network and subnet in Azure.
-
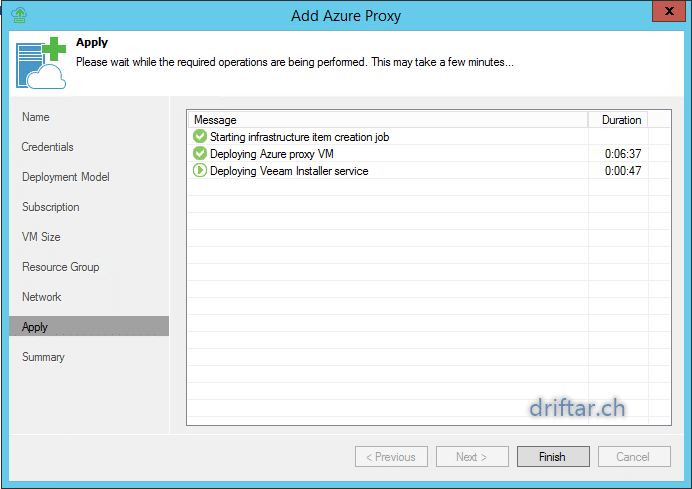
Now apply all the settings. It will take some minutes. Time for a coffee…

-
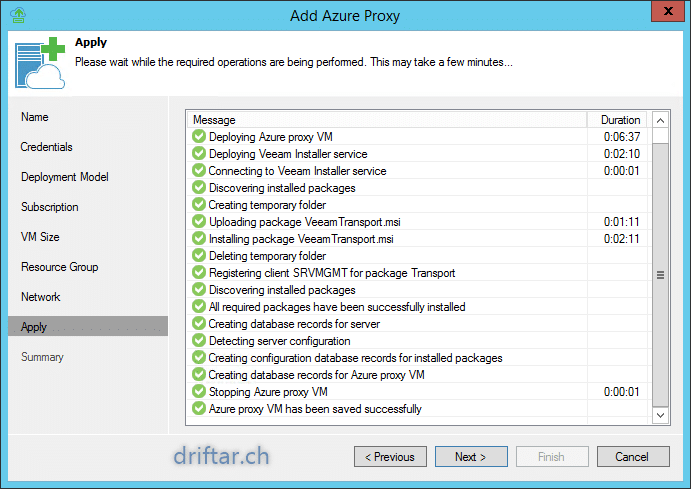
If everything is configured well then you should not have to worry about any error or warning.
-
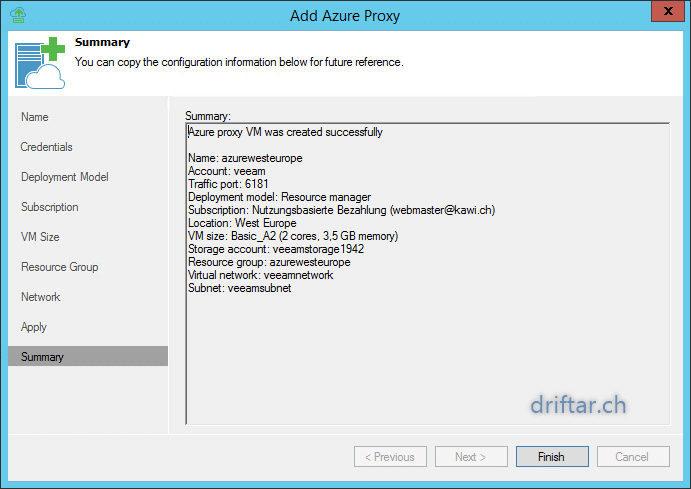
“Houston we have go for launch”. Your Azure proxy VM is no created and awaiting orders.
We have now the proxy VM on Azure ready and it’s waiting for your VMs to restore. Let’s do that to.
Restore a VM to Azure
-
Open your Veeam Backup & Replication console.
-
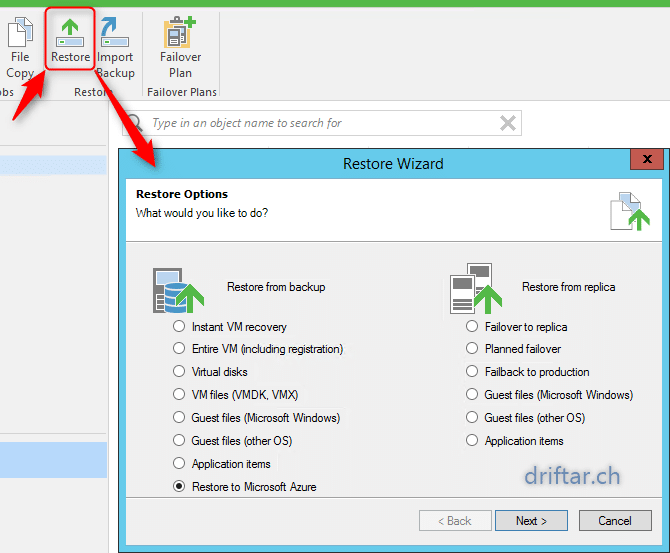
Click on the “Restore” button and choose “Restore to Microsoft Azure”.

-
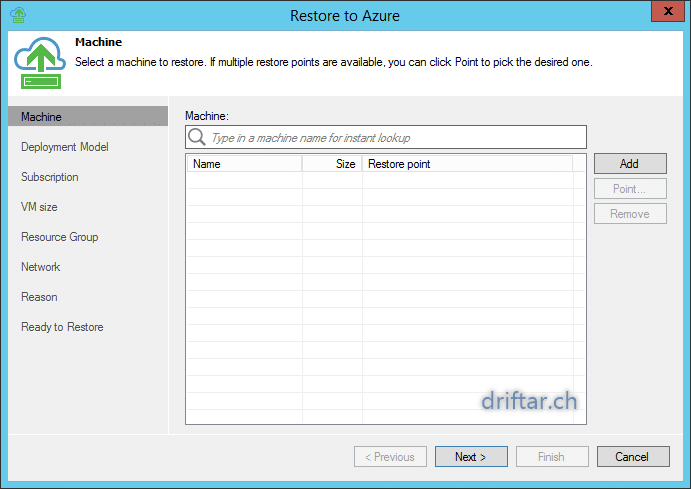
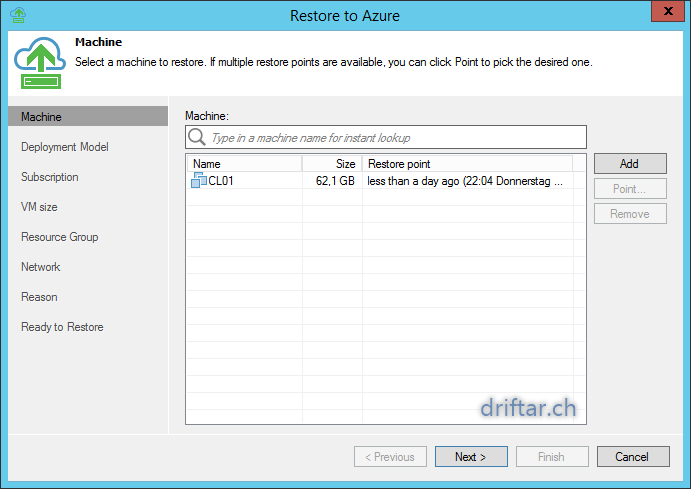
Add the VM you want to restore. Click “Add”.
-
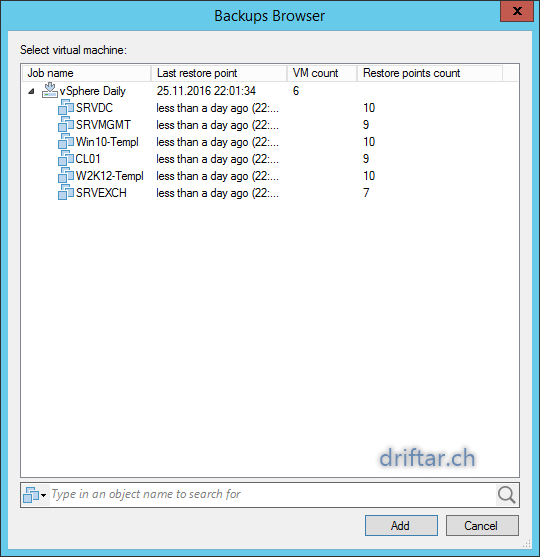
Search your backups for the VM, then click “Add”.

-
Your VM is now visible in the list.
-
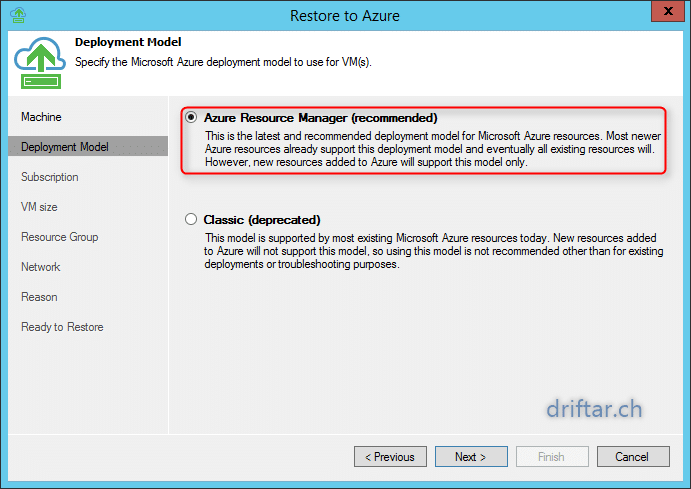
Choose the deployment model.
Hint: Choosing “Azure Ressource Manager” is recommended.
-
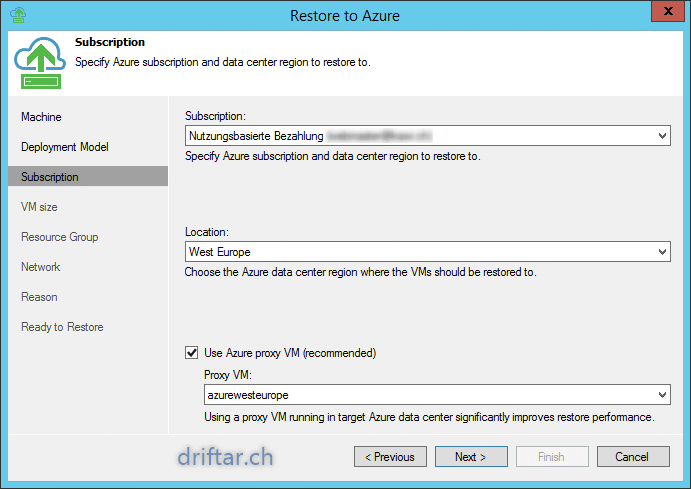
Choose your subscription and the location.
Hint: It’s a good idea to choose a location closely to your company.
-
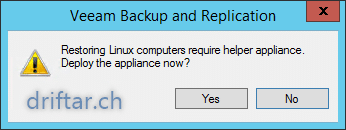
The restore assistant will ask you if you want to deploy a helper appliance, if you’re planning to restore Linux computers.

Hint: Click yes if you do so. I did not.
-
Click on your VM in the list and then click “Edit” if you want to change the sizing.
-
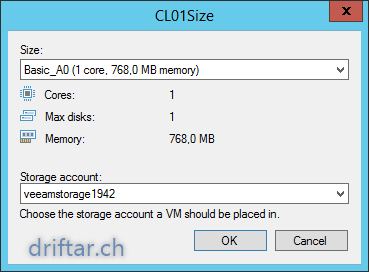
Choose VM size and storage account.

Hint: Depending on your need you’ll need probably some adjustment here.
-
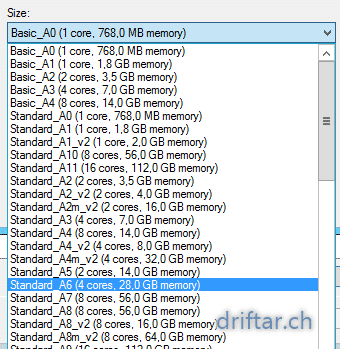
Again, look at this list of VM sizes!

-
Click on your VM and then click “Name”. You can change the VM name if you like / have to.
-
If you receive this error message, then it’s best to close the assistant and check the Azure requirements.
-
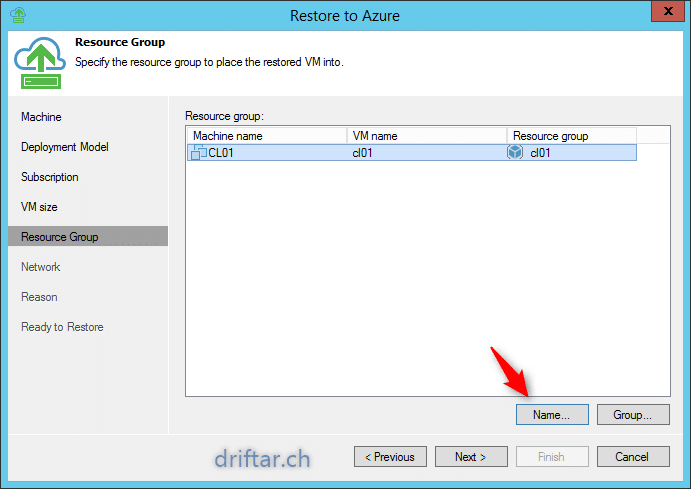
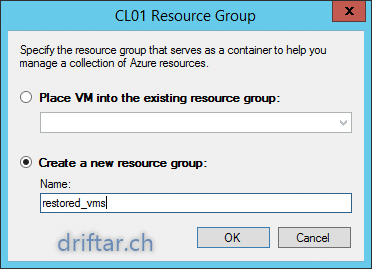
Click on “Group” to change the ressource group for your VM or create a new one.

Hint: Depending on your (already existing) Azure deployment it’s probably a good idea to have things organized.
-
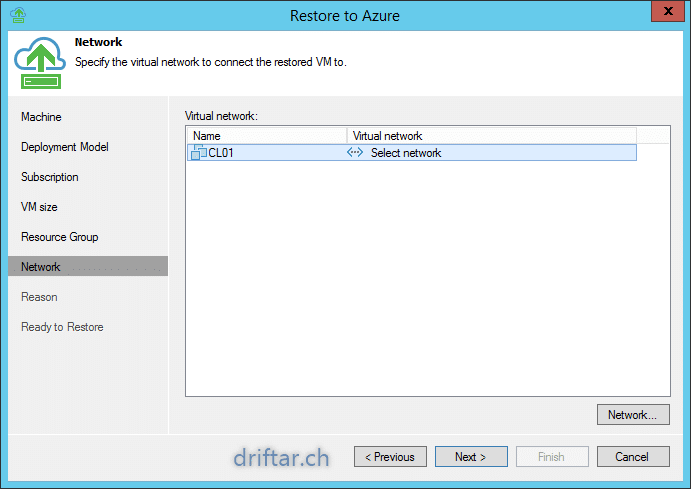
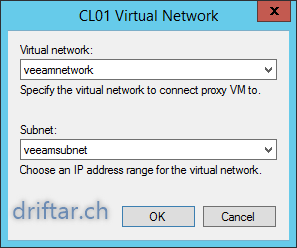
Specify the networking for your VM. Click on the VM and then click “Network”.
-
Choose your existing network and subnet on Azure.

-
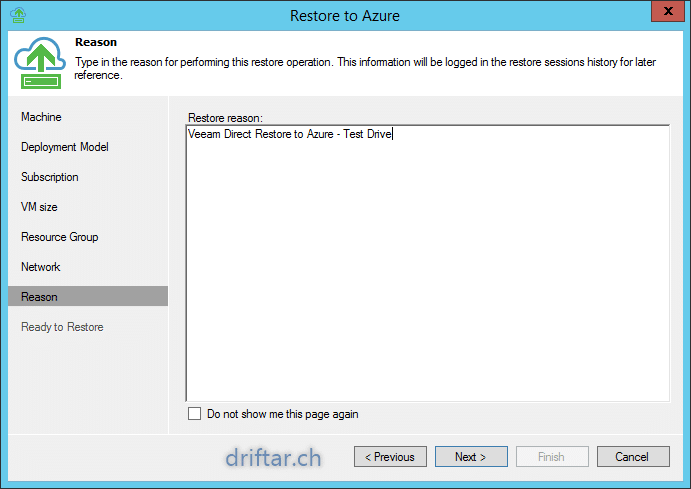
Optional. Enter a reason for restore. And there is probably always a reason…
-
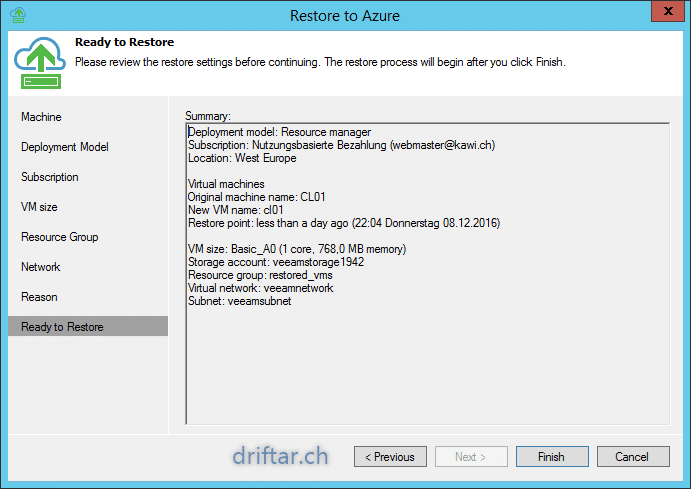
Review the summary. The last chance to go back and do some adjustments.
-
If things are all good, click “Finish”. The restore process will start immediately.


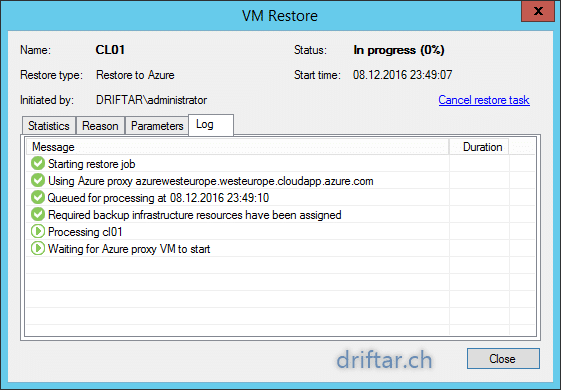
Aaaand you’re done.
I don’t have to say that a restore to any cloud service will take a while, depending on your network connections, VM size and so on. Now enjoy a cup of coffee and wait for the restore to be finished. Let’s have a look tomorrow if it all worked or not. I’ll keep you updated.
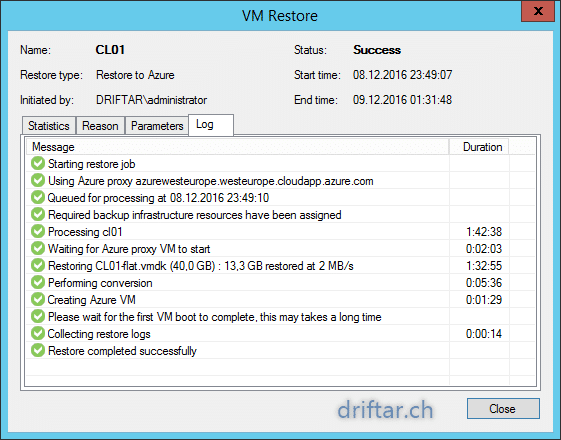
Update
It looks as the restore was successful. After roughly 1.75 hours all was done. Lets look how this restored VM works on Azure in the next blog post. Stay tuned!